20
o
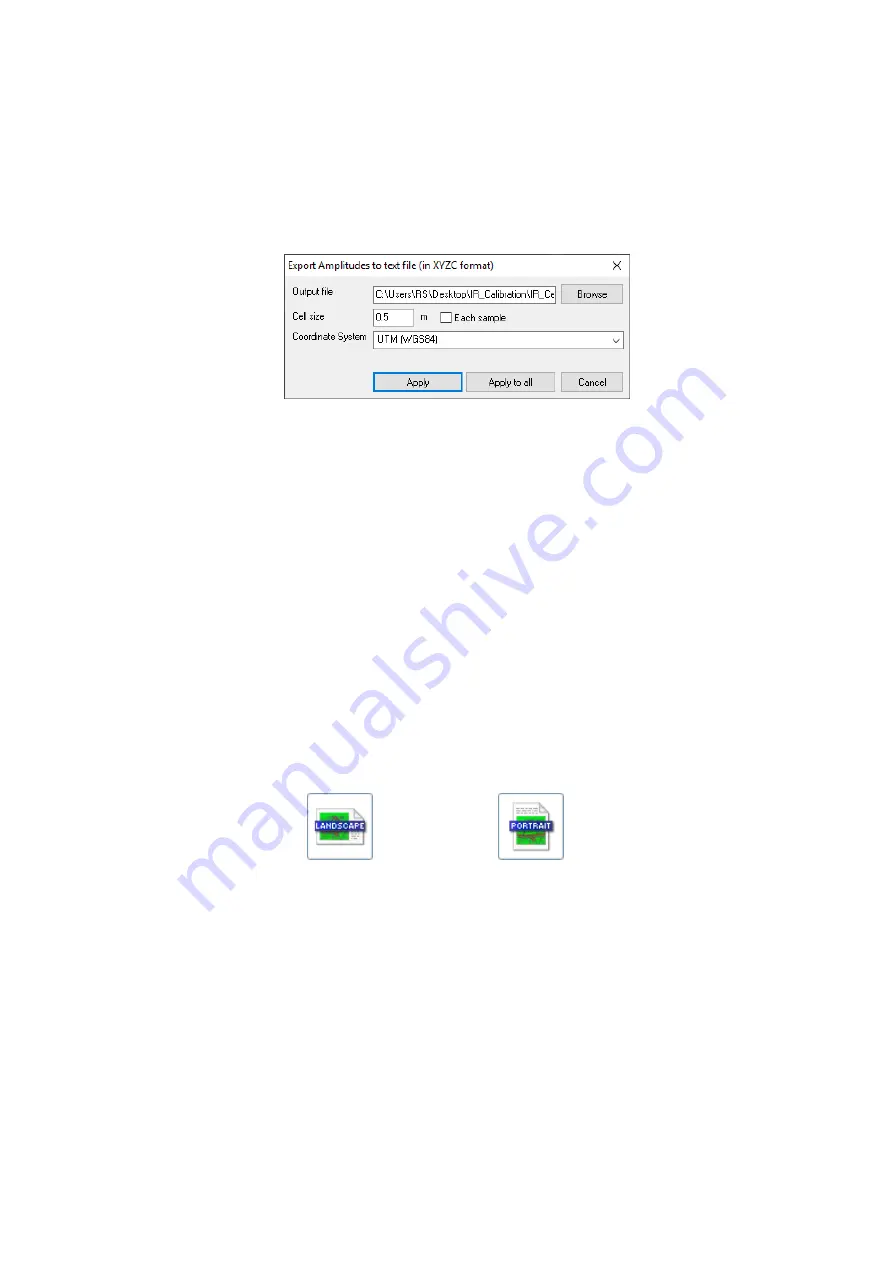
XYZC –
export of current profile (button
Apply
) or of all opened profiles
(button
Apply to all
) data amplitude values as a Tab separated table with X, Y,
Z and C columns (where X and Y corresponds to chosen
Coordinates System
,
Z is a depth and C is an average amplitude value in cell with defined
Cell size
or amplitude value of each sample if
Each sample
option is chosen) to text
ASCII file (*.txt), where output (export) file name could be chosen by pressing
on
Browse
button (see Appendix C. on p. 79).
Fig.7.5. XYZC export dialog box.
Import –
different import options from existing stored before files:
o
Gain Function
– gain function import from the stored profile.
o
Zero point
– direct wave zero line point import from the stored profile.
o
GPS coordinates in NMEA format
– GPS/GNSS coordinates import from the
text file containing GGA strings in NMEA format.
Profiles combining
– opens
Profiles Combining Wizard
what helps to combine
all selected profiles into single profile (see on p. 57).
Profiles splitting
– opens
Profiles Splitting Wizard
that helps to split selected
profile(-s) to the several profiles (see on p. 58).
Profiles 3D aligning –
aligning of parallel profiles acquired for 3D imaging in third
party software (see on p. 59).
– Profile printout in one of the views supported by the software. The
following items may be modified in the Print dialog box (Fig. 7.3):
o
Printer
– Choice of the Printer that user can use for the printing out.
o
Printing type
–
Scaled
or
Not
scaled
. In case of scaled print, the vertical and
horizontal scales shall be specified.
o
Orientation
(
Landscape
or
Portrait
) – When changing
orientation of a page, the outline of the page and the layout of drawing therein
are changed, respectively.
o
Poster –
possibility to split printing output between specified number of pages
per horizontal and vertical.
o
Preview
– User can place the profile output area on the page. The yellow
rectangle helps to change the output area size. The red rectangle shows the title
area on the page.
o
Size –
After clicking output’s size modification area (small yellow rectangle on
the right down of the output area) and holding left mouse button (the pointer will
be replaced by the double arrow), moving the mouse will change output’s size.
o
Properties –
Standard dialog box for the printer settings.


