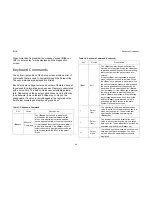
BIOS
K
EYBOARD
C
OMMANDS
3-3
<
Tab
>
Select
Field
The
<
Tab
>
key is used to move between
fields. For example,
<
Tab
>
can be used to
move from hours to minutes in the time item in
the main menu.
-
Change
Value
The minus key on the keypad is used to
change the value of the current item to the
previous value. This key scrolls through the
values in the associated pick list without
displaying the full list.
+
Change
Value
The plus key on the keypad is used to change
the value of the current menu item to the next
value. This key scrolls through the values in
the associated pick list without displaying the
full list. On 106-key Japanese keyboards, the
plus key has a different scan code than the
plus key on the other keyboard, but will have
the same effect.
<
F1
>
General
Help
Press <
F1
> to display general help.
Table 3-2: Keyboard Command (Continued)
K
EY
O
PTION
D
ESCRIPTION
<
F8
>
Previous
Values
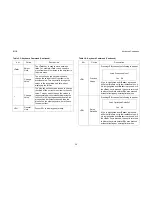
Pressing <
F8
> causes the following to appear:
If Yes is highlighted and <
Enter
> is pressed,
all Setup fields are set to their default values. If
No is highlighted and <
Enter
> is pressed, or if
the <
Esc
> key is pressed, the user is returned
to where they were before <
F8
> was pressed
without affecting any existing field values
<
F9
>
Setup
Defaults
Pressing
<
F9
>
causes the following to appear
If Yes is highlighted and
<
Enter
> is pressed,
all Setup fields are set to their default values. If
No is highlighted and
<
Enter
>
is pressed, or if
the <
Esc
> key is pressed, the user is returned
to where they were before <
F9
> was pressed
without affecting any existing field values.
Table 3-2: Keyboard Command (Continued)
K
EY
O
PTION
D
ESCRIPTION
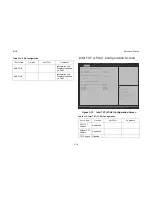
Load Previous Values?
Yes No
Load Optimized Defaults?
Yes No
Summary of Contents for STRATOS S210 Series S210-X12MS
Page 21: ...About the Server Chapter 1 About the Server Chapter 1 ...
Page 37: ...Installing Hardware Chapter 2 Installing Hardware Chapter 2 ...
Page 78: ...BIOS Chapter 3 BIOS ...
Page 135: ...BMC Chapter 4 BMC Chapter 4 ...
Page 194: ...Jumpers and Connectors Chapter 5 Jumpers and Connectors Chapter 5 ...
Page 197: ...Rail Kit Assembly Chapter 6 Rail Kit Assembly Chapter 6 ...
Page 201: ...Troubleshooting Chapter 7 Troubleshooting Chapter 7 ...
Page 210: ...Safety Information Chapter 9 Safety Information Chapter 9 ...


