NAS System
User’s Manual
211
5.7.2 Upgrade tab
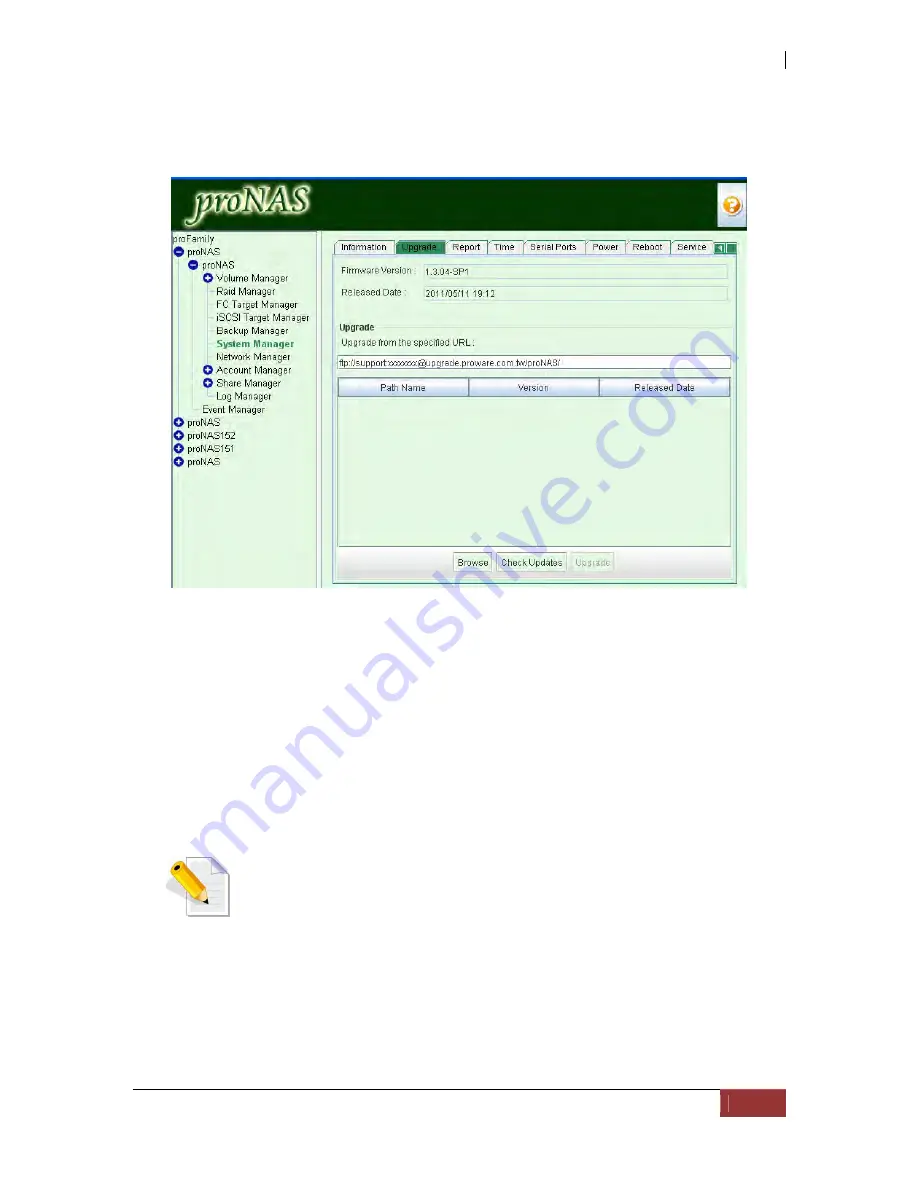
The Upgrade tab is used to upgrade the proNAS system firmware version.
Firmware Version - Displays the current firmware version.
Release Date - The Release Date of this version.
Upgrade from the specified URL - You can download the latest version from
URL:
ftp://support:[email protected]/proNAS/
If you would like to see if there is latest version, please press "Check Updates" button.
The system will search online (NAS should have internet connection) if there is any
latest firmware to update. Then select (highlight) the proNAS tar file from the list, then
click “Upgrade” button.
NOTE: During upgrade, the NAS system must not be in-use, which
means the share folders, FC or iSCSI target volumes must not be
accessed from client computers.
Aside from online firmware update from FTP site, you can also do a firmware update
from local file system, but you need to download first the firmware tar file (for example:
proNAS-1.3.03.tar) and save to the local directory of computer. Press the "Browse"
button and locate the firmware tar file. Select the tar file when it appears in the list,
then click “Upgrade” button. The NAS system will reboot to load the updates.
Summary of Contents for 2126JS6H-SQX
Page 1: ...NAS System User s Manual Revision 1 0...
Page 7: ...NAS System User s Manual 7 PART I Hardware Components and RAID Controller...
Page 38: ...NAS System 38 User s Manual 3 Choose the Make Global HSP option and click Go 4 Click Go...
Page 41: ...NAS System User s Manual 41 PART II proNAS System...
Page 54: ...NAS System 54 User s Manual 4 The selected disk drive will become a Hot Spare drive...
Page 56: ...NAS System 56 User s Manual 4 The selected disk drive will become a free or UN_USED disk drive...
Page 81: ...NAS System User s Manual 81 5 The new Logical Volume will be shown...
Page 83: ...NAS System User s Manual 83 4 Verify the new LV size...
Page 93: ...NAS System User s Manual 93 4 The deleted snapshot will no longer exist in the Snapshot List...
Page 174: ...NAS System 174 User s Manual 10 In Add Network Location click Next 11 Click Next...


