Chapter 3: Management with the Promise Utility
69
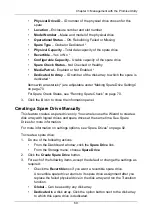
•
Physical Drive ID
– ID number of the physical drive chosen for this
spare
•
Location
– Enclosure number and slot number
•
Model Number
– Make and model of the physical drive
•
Operational Status
– OK, Rebuilding, Failed or Missing
•
Spare Type
– Global or Dedicated *
•
Physical Capacity
– Total data capacity of the spare drive
•
Revertible
– Yes or No *
•
Configurable Capacity
– Usable capacity of the spare drive
•
Spare Check Status
– Not Checked or Healthy
•
Media Patrol
– Enabled or Not Enabled *
•
Dedicated to Array
– ID number of the disk array to which the spare is
dedicated *
Items with an asterisk (*) are adjustable under “Making Spare Drive Settings”
on page 70.
For Spare Check Status, see “Running Spare Check” on page 70.
3.
Click the
X
icon to close the information panel.
Creating a Spare Drive Manually
This feature creates a spare drive only. You can also use the Wizard to create a
disk array with logical drives and spare drives at the same time. See Spare
Drives for more information.
For more information on settings options, see “Spare Drives” on page 92.
To create a spare drive:
1.
Do one of the following actions:
•
From the Dashboard window, click the
Spare Drive
link.
•
From the Storage menu, choose
Spare Drive
.
2.
Click the
Create Spare Drive
button.
3.
For each of the following items, accept the default or change the settings as
required:
•
Check the
Revertible
box if you want a revertible spare drive.
A revertible spare drive returns to its spare drive assignment after you
replace the failed physical drive in the disk array and run the Transition
function.
•
Global
– Can be used by any disk array
•
Dedicated
to a disk array. Click the option button next to the disk array
to which this spare drive is dedicated.


