


Chapter 5: WebPAM
87
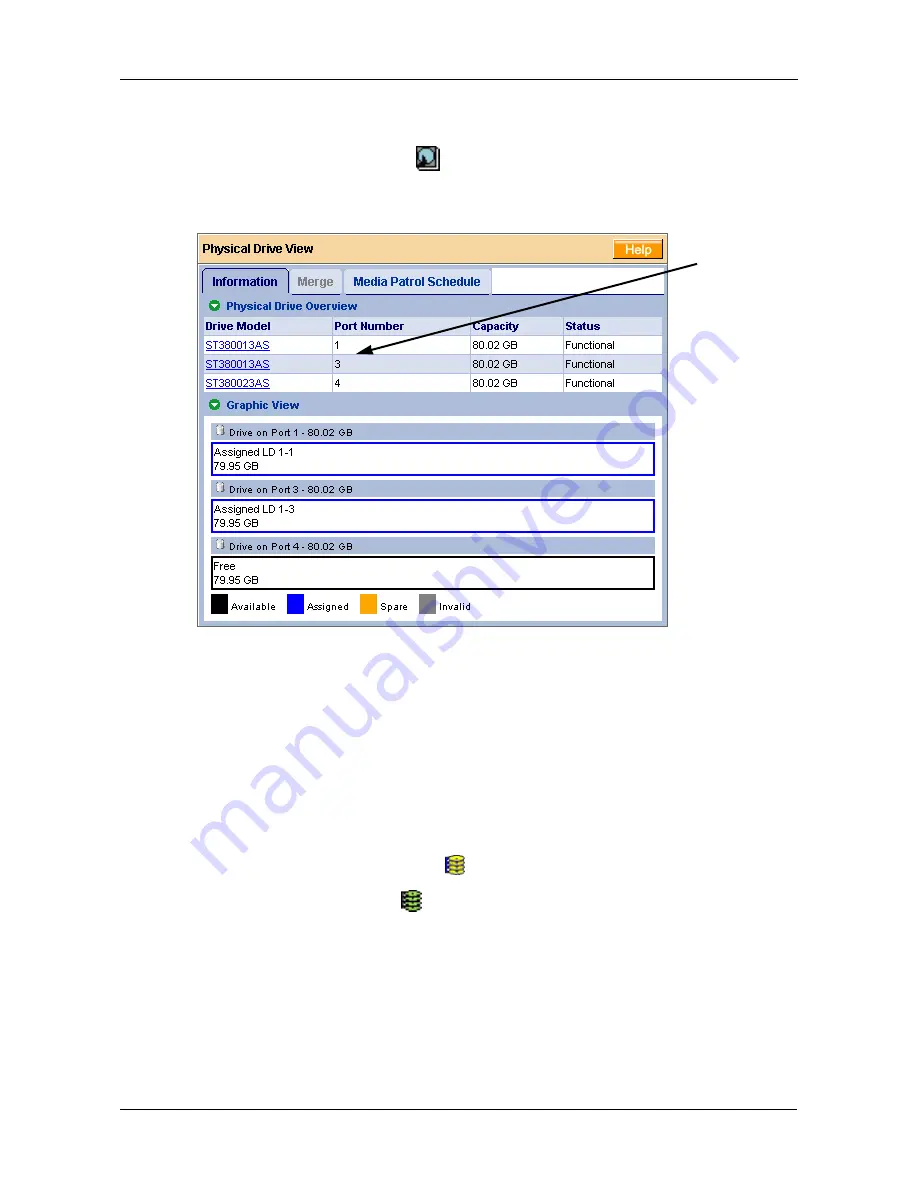
Identify the Failed Disk Drive
Click on the Physical Drive View
icon in the WebPAM user interface. Look for
a missing physical drive. A drive that used to be present but is suddenly absent is
the failed disk drive.
In this example, there were four disk drives connected to the FastTrak Controller.
Notice that there is no drive on Port 2. This is the failed drive.
Replace the Failed Disk Drive
Replace the failed disk drive with a new one of equal or greater capacity. Then
rebuild the logical drive. See “Install the Disk Drives” on page 9 and the
SuperSwap User Manual
for more information about replacing a disk drive.
Rebuild Your Logical Drive
1.
Click on the Logical Drive View
icon in Tree View.
2.
Click on the Logical Drive
icon of the logical drive you want to rebuild.
3.
Click on the Rebuild tab in Management View.
Port 1
Port 3
Port 4
No drive
on Port 2
Summary of Contents for FastTrak TX4310
Page 1: ...FASTTRAK TX4310 USER MANUAL Version 1 1 ...
Page 4: ...FastTrak TX4310 User Manual iv ...
Page 14: ...FastTrak TX4310 User Manual 6 ...
Page 30: ...FastTrak TX4310 User Manual 22 ...
Page 50: ...FastTrak TX4310 User Manual 42 ...
Page 102: ...FastTrak TX4310 User Manual 94 ...
Page 116: ...FastTrak TX4310 User Manual 108 ...


