Chapter 4: FastBuild™ Utility
37
3.
Press the up and down arrow keys to select an available logical drive
number and press Enter.
4.
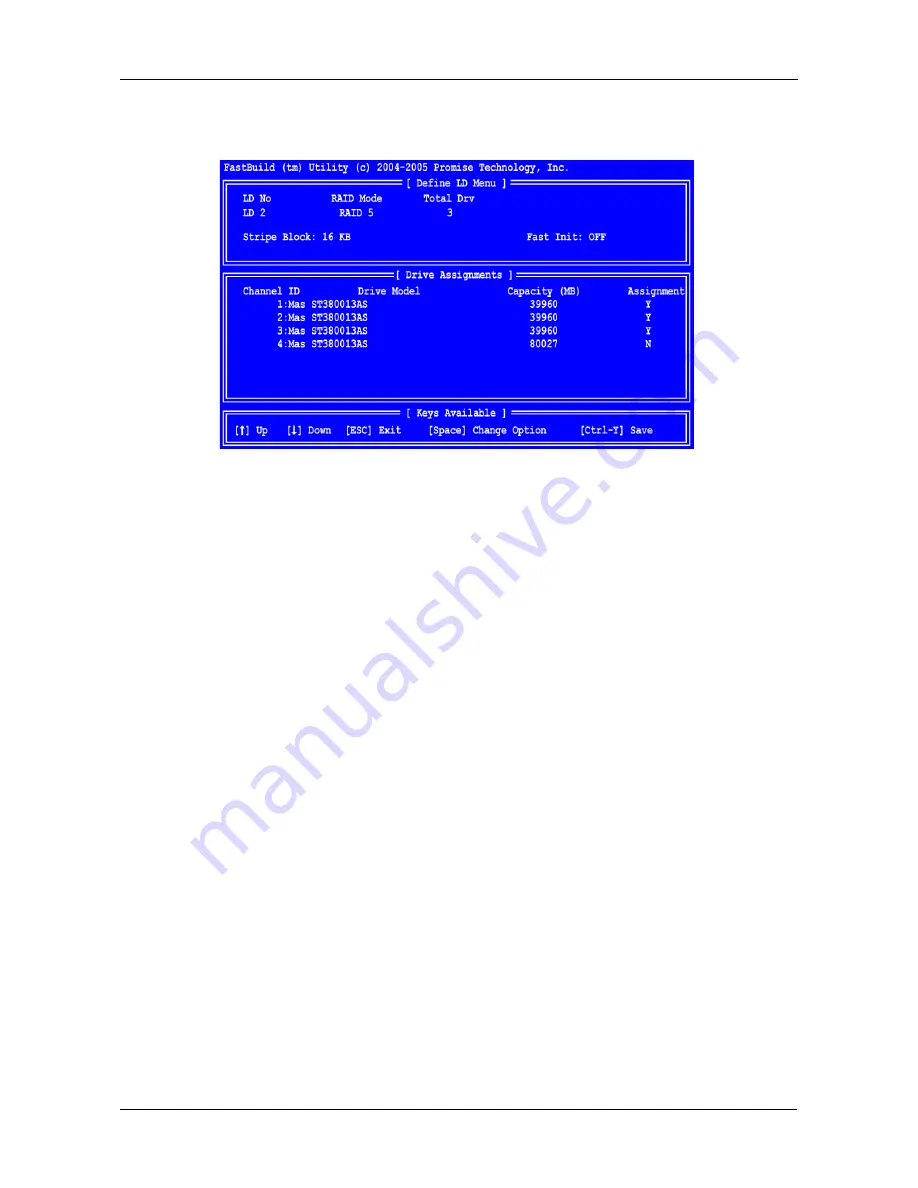
Choose the RAID level and options for the second logical drive.
Note that the disk drives in Channels 1, 2 and 3 reflect smaller capacities
because a portion of their original capacity belongs to a different logical
drive.
In this example the disk drive in Channel 4 is not assigned to a logical drive
in order to use it as a hot spare drive.
5.
Press Ctrl-Y to save your logical drive configuration.
6.
Press Esc to exit to the Main Menu. Press Esc again to exit the Utility.
7.
Press Y to restart the computer.
You have successfully created a new RAID logical drive.
You must partition and format your new logical drive before you can use it. Use
the same method of partitioning and formatting a logical drive as you would any
other fixed disk added to your computer system.
Summary of Contents for FastTrak TX4310
Page 1: ...FASTTRAK TX4310 USER MANUAL Version 1 1 ...
Page 4: ...FastTrak TX4310 User Manual iv ...
Page 14: ...FastTrak TX4310 User Manual 6 ...
Page 30: ...FastTrak TX4310 User Manual 22 ...
Page 50: ...FastTrak TX4310 User Manual 42 ...
Page 102: ...FastTrak TX4310 User Manual 94 ...
Page 116: ...FastTrak TX4310 User Manual 108 ...


