
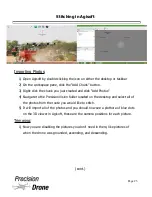
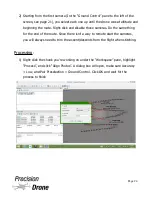
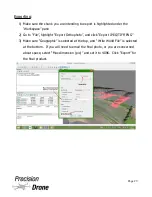
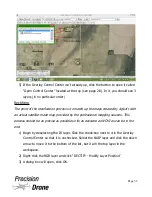
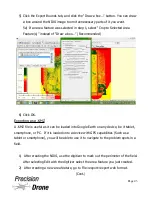

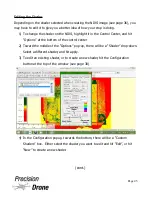
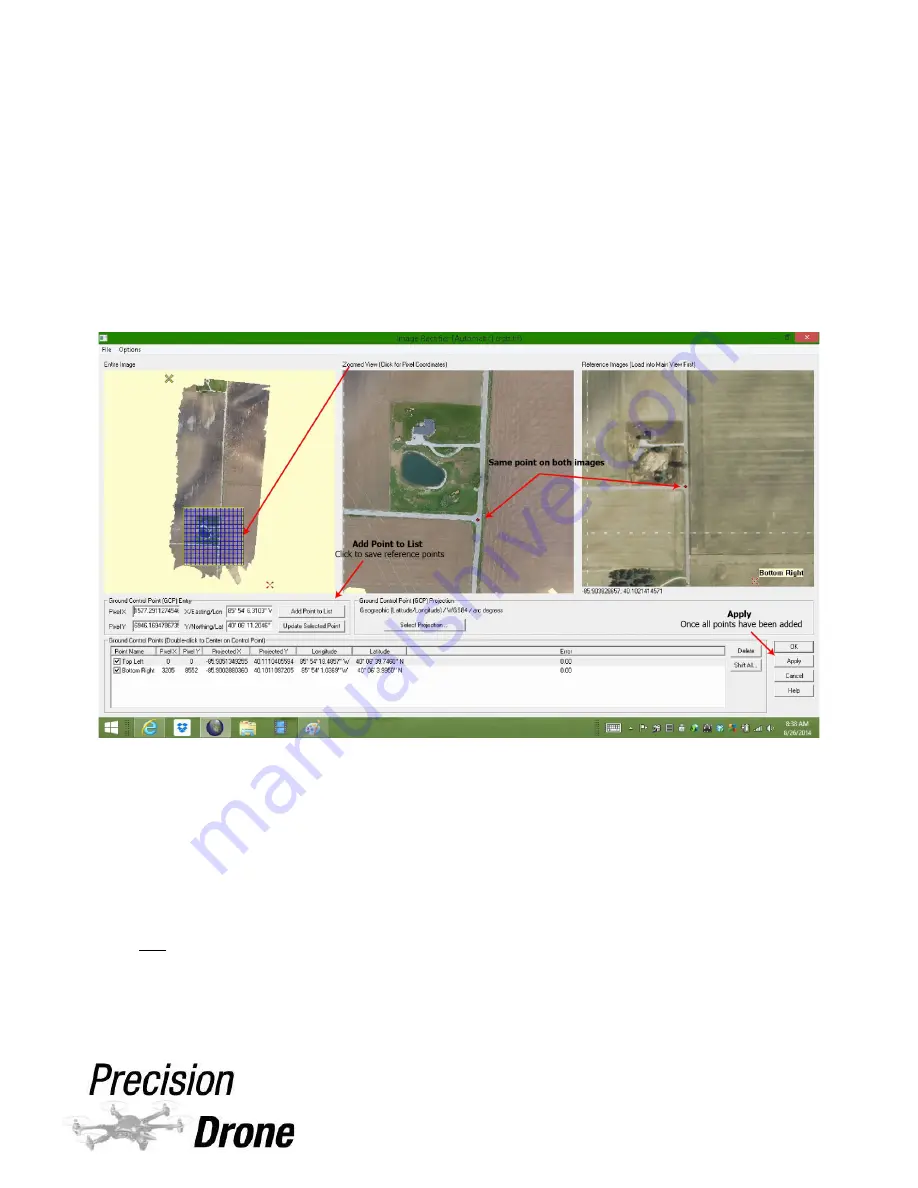
4) Now the Image Rectifier window will open, displaying the RGB map under
“Zoomed View” and the NAIP satellite map under “Reference Images”. An Entire
Image view is also displayed.
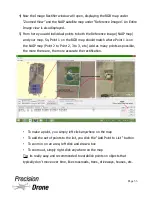
5) From here you add individual points to both the Reference image (NAIP map)
and your map. So, Point 1 on the RGB map should match where Point 1 is on
the NAIP map (Point 2 to Point 2, 3 to 3, etc.) Add as many points as possible,
the more there are, the more accurate the rectification.
•
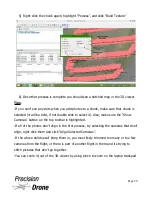
To make a point, you simply left click anywhere on the map
•
To add the set of points to the list, you click the “Add Point to List “ button
•
To zoom in on an area, left click and draw a box
•
To zoom out, simply right click anywhere on the map
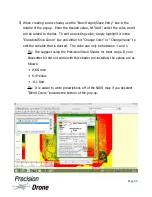
Tip: its really easy and recommended to establish points on objects that
typically don't move over time, like crossroads, trees, driveways, houses, etc.
1
34
Page 33
Summary of Contents for Pacesetter 2015
Page 1: ...User s Manual Pacesetter Model 2015 Serial Number Version 1 12...
Page 6: ...Components DX8 Controller 1 6 Page 5...
Page 7: ...Battery Charger 1 7 Page 6...
Page 8: ...Live Feed Monitor 1 8 Page 7...
Page 10: ...Precision Vision Camera 1 10 Page 9...
Page 15: ...1 15 Page 14...
Page 18: ...1 18 Page 17...
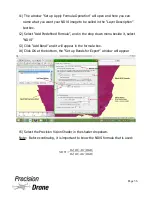
Page 36: ...10 A Select Layers box will open select the RGB IR layers and click OK 1 36 Page 35...
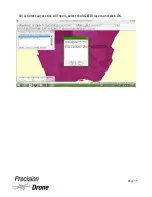
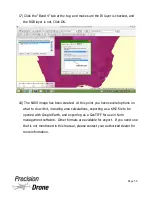
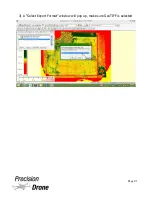
Page 42: ...3 A Select Export Format window will pop up make sure GeoTIFF is selected 1 42 Page 41...
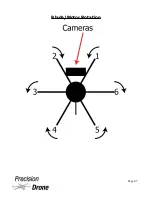
Page 48: ...Blade Motor Rotation 1 48 Page 47...
Page 49: ...1 49 Page 48...


