


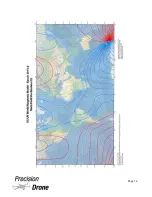


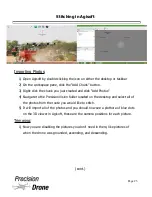
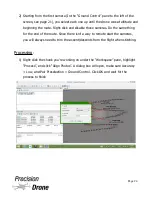


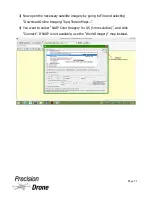

5) Click “Click to draw a region in which you want to scan”, a box will appear on the
map. The yellow pin is where the route will start and the red pin is where it will
end. You can rotate the box by right clicking the center red pin or by clicking on
the green arrows in the photogrammetry box. Refer to photos on the next page
for visual reference.
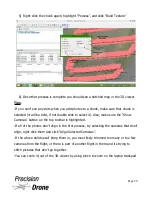
6) Make the box inside the borders of the field except for overflying the turns by 30
feet. Refer to photos on the next page for visual reference.
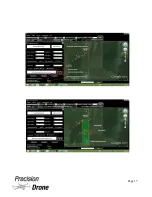
7) Click “Preview” under the Photogrammetry Tool, and the box will preview a
route for that current position. You can continue to adjust the box and hit
“preview” until you are satisfied with where all of the waypoints are located.
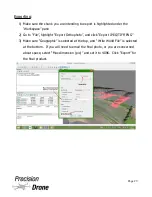
8) Clicking “Generate” will create the route, you can now edit individual waypoints
to fit the shape of the field. Maintain the uniform flight pattern.
IMPORTANT:
Point 0 is the very first waypoint the drone will move to and it is
critical to make sure it is in a safe location above the take off spot. The drone will
follow a straight line from its home point to point 0, and will hit any obstructions in its
path. It is highly recommended you move point 0 to directly above where you will be
taking off. Point 1 is the very first point in your actual route and should be a “Stop
and Turn”
9) Check each individual waypoint and its height/speed settings to make sure they
are consistent with the values above.
10) Save this route for future use, click the “Save” button under the Editor window.
Note: For more information, refer to the Youtube video.
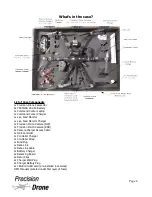
1
17
Page 16
Summary of Contents for Pacesetter 2015
Page 1: ...User s Manual Pacesetter Model 2015 Serial Number Version 1 12...
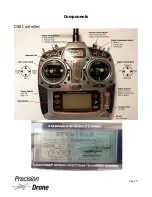
Page 6: ...Components DX8 Controller 1 6 Page 5...
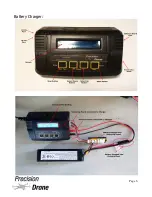
Page 7: ...Battery Charger 1 7 Page 6...
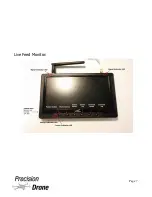
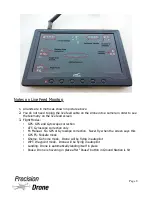
Page 8: ...Live Feed Monitor 1 8 Page 7...
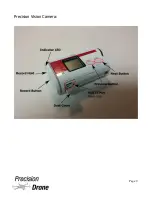
Page 10: ...Precision Vision Camera 1 10 Page 9...
Page 15: ...1 15 Page 14...
Page 18: ...1 18 Page 17...
Page 36: ...10 A Select Layers box will open select the RGB IR layers and click OK 1 36 Page 35...
Page 42: ...3 A Select Export Format window will pop up make sure GeoTIFF is selected 1 42 Page 41...
Page 48: ...Blade Motor Rotation 1 48 Page 47...
Page 49: ...1 49 Page 48...


