2.6 Installing and Removing Screens
34
2.6.2 Opening or Removing a Screen
Removing a screen from a
single
Margay standing
alone
is not a problem. Simply grasp the sides of the
screen and pull forward sharply. The spring latches
will pop loose.
Removing a screen from a Margay in a
wall
is more
exacting, because the screens are so close together.
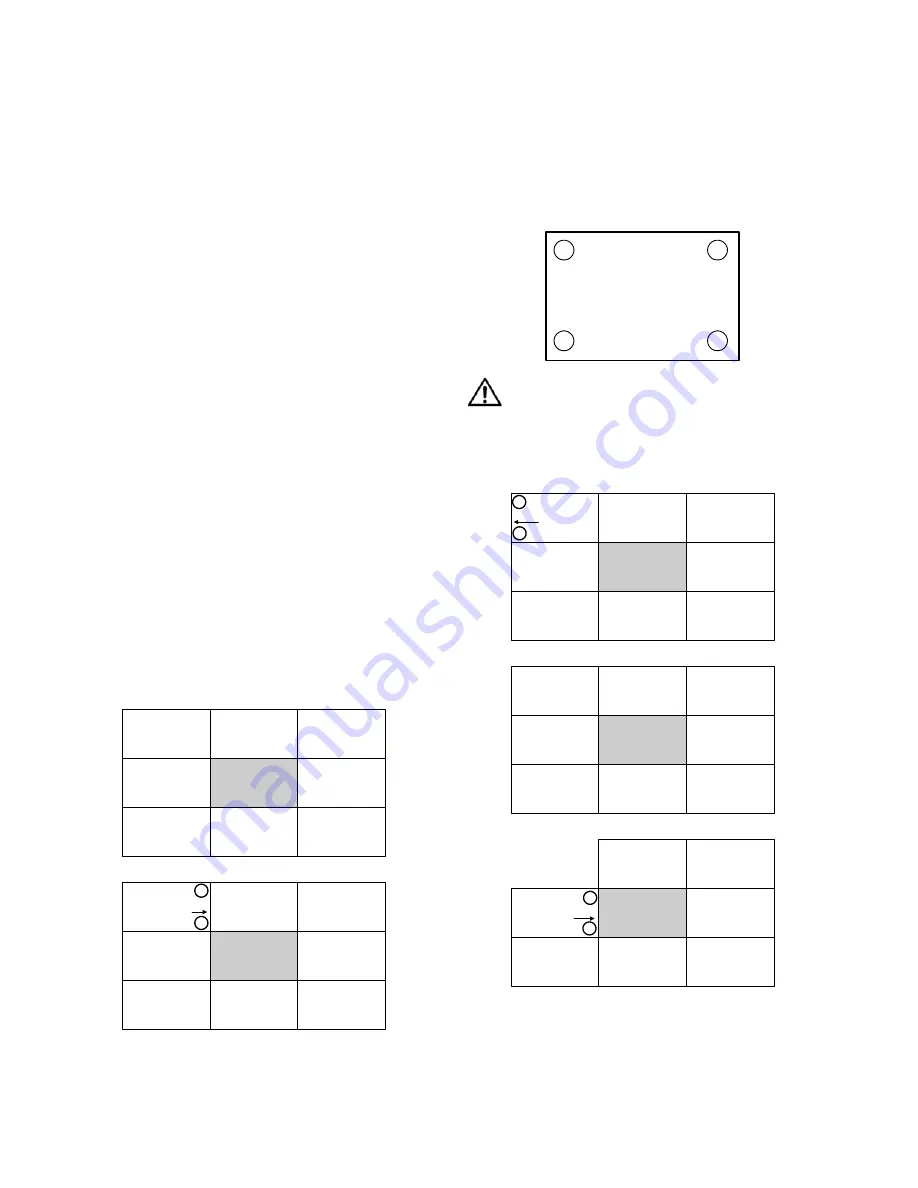
On the opposite page, look at the row of Margays.
To remove a screen on the outside column in a wall,
do not
start at the outside edge. This seems the logi-
cal place to start, but it will cause the outside screen
to crunch against the next screen to the center.
Notice also that if you want to remove a screen in
the middle of a wall, you should work from the out-
side of the wall inward.
Hints
When pulling with the suction cup, always pull at a
slightly up angle. This keeps the screen from scraping
the screen below.
Place the suction cup puller near the corner of the
screen.
Start at the outside and work in.
Never pull the “open” edge first.
Steps to remove a single screen from a Margay wall
1.
2.
3. Place the suction cup near the corner of the
screen and pull slightly up and outward sharply.
You will hear the screen latch click and release.
Pulling up a little keeps this screen from rubbing
the screen below. Release the latch at top and bot-
tom of one side.
CAUTION
When you pull the edges out, pull out only ½"
(2 cm). That is enough to release the spring
latches without harming the next screen.
4.
5.
6.
Suppose you want
to remove this
screen.
Start with this screen
and pull this edge.
1
2
Place suction
cup at these
points
Then pull this edge.
3
4
With both edges
free, remove this
screen completely
Next, pull this edge.
1
2
Summary of Contents for WN-5040-720
Page 1: ...WN 5040 720 User Guide...
Page 2: ......
Page 3: ...i WN 5040 720 Margay 50 Display Wall Unit User Guide 020 0548 00B 29 March 2007...
Page 6: ...iv...
Page 7: ......
Page 14: ...5...
Page 17: ...6...
Page 20: ...9...
Page 24: ...13...
Page 30: ...19...
Page 32: ...21 Electronics module as seen from the front The electronics module door is open...
Page 34: ...23 In Out...
Page 36: ...25...
Page 38: ...27 AC power in and out 1 4 5 3 2 6 No more than 4 115 VAC...
Page 40: ...29...
Page 51: ...40...
Page 54: ...43...
Page 56: ...45...
Page 58: ...47...
Page 66: ...55...
Page 70: ...59...
Page 72: ...61...
Page 74: ...63 ENTER ENTER...
Page 77: ...66...
Page 80: ...69...
Page 82: ...71...
Page 84: ...73...
Page 86: ...75...
Page 95: ...84...
Page 115: ...104 Diagnostics RS232 RS485 Status...
Page 116: ...105 Diagnostics Test Patterns...
Page 117: ...106 Diagnostics Setup Summary...
Page 128: ...117 Starts scanning the input con nectors for the next available source...
Page 131: ...120 7 3 Drawings All dimensions are in inches...
Page 132: ...121...
Page 133: ...122...
Page 134: ...123...
Page 140: ...129...
Page 144: ...133...


