background image

Additional information

13

129

en

DTS-HD Master Audio

DTS-HD Maste

r

 Audio is a technology that delive

r

s maste

r


audio sou

r

ces 

r

eco

r

ded in a 

pr

ofessional studio to listene

r

without any loss of data, 

pr

ese

r

ving audio quality. DTS-HD 

Maste

r

 Audio ado

p

ts va

r

iable data t

r

ansfe

r


r

ates, 

facilitating data t

r

ansfe

r

 to the maximum 

r

ate of 24.5 Mb

p

in the Blu-

r

ay disc fo

r

mat, 18.0 Mb

p

s in the HD-DVD 

fo

r

mat, which by fa

r

 exceeds that of a standa

r

d DVD. These 

high data t

r

ansfe

r


r

ates enable lossless t

r

ansmission of 96 

kHz/24-bit 7.1-channel audio sou

r

ces without dete

r

io

r

ating 

the quality of the o

r

iginal sound. DTS-HD Maste

r

 Audio is 

an i

rr

e

p

laceable technology that can 

r

e

pr

oduce sound 

faithfully as intended by the c

r

eato

r

 of music o

r

 movies.

Manufactured under license under U.S. Patent #’s: 
5,451,942; 5,956,674; 5,974,380; 5,978,762; 6,226,616; 
6,487,535; 7,212,872; 7,333,929; 7,392,195; 7,272,567 & 
other U.S. and worldwide patents issued & pending. DTS is 
a registered trademark and the DTS logos, Symbol, DTS-HD 
and DTS-HD Master Audio are trademarks of DTS, Inc. © 
1996-2008 DTS, Inc. All Rights Reserved.

Windows Media Audio 9 Professional

Windows Media Audio 9 P

r

ofessional (WMA9 P

r

o) is a 

disc

r

ete su

rr

ound fo

r

mat develo

p

ed by Mic

r

osoft 

Co

rp

o

r

ation. 

Windows Media and the Windows logo are trademarks or 
registered trademarks of Microsoft Corporation in the 
United States and/or other countries.

About iPod

“Made fo

r

 iPod” means that an elect

r

onic accesso

r

y has 

been designed to connect s

p

ecifically to iPod and has 

been ce

r

tified by the develo

p

e

r

 to meet A

pp

le 

p

e

r

fo

r

mance standa

r

ds.

“Wo

r

ks with iPhone” means that an elect

r

onic accesso

r

has been designed to connect s

p

ecifically to iPhone and 

has been ce

r

tified by the develo

p

e

r

 to meet A

pp

le 

p

e

r

fo

r

mance standa

r

ds.

A

pp

le is not 

r

es

p

onsible fo

r

 the o

p

e

r

ation of this device o

r


its com

p

liance with safety and 

r

egulato

r

y standa

r

ds.

iPod is a trademark of Apple Inc., registered in the U.S. and 
other countries. iPhone is a trademark of Apple Inc.

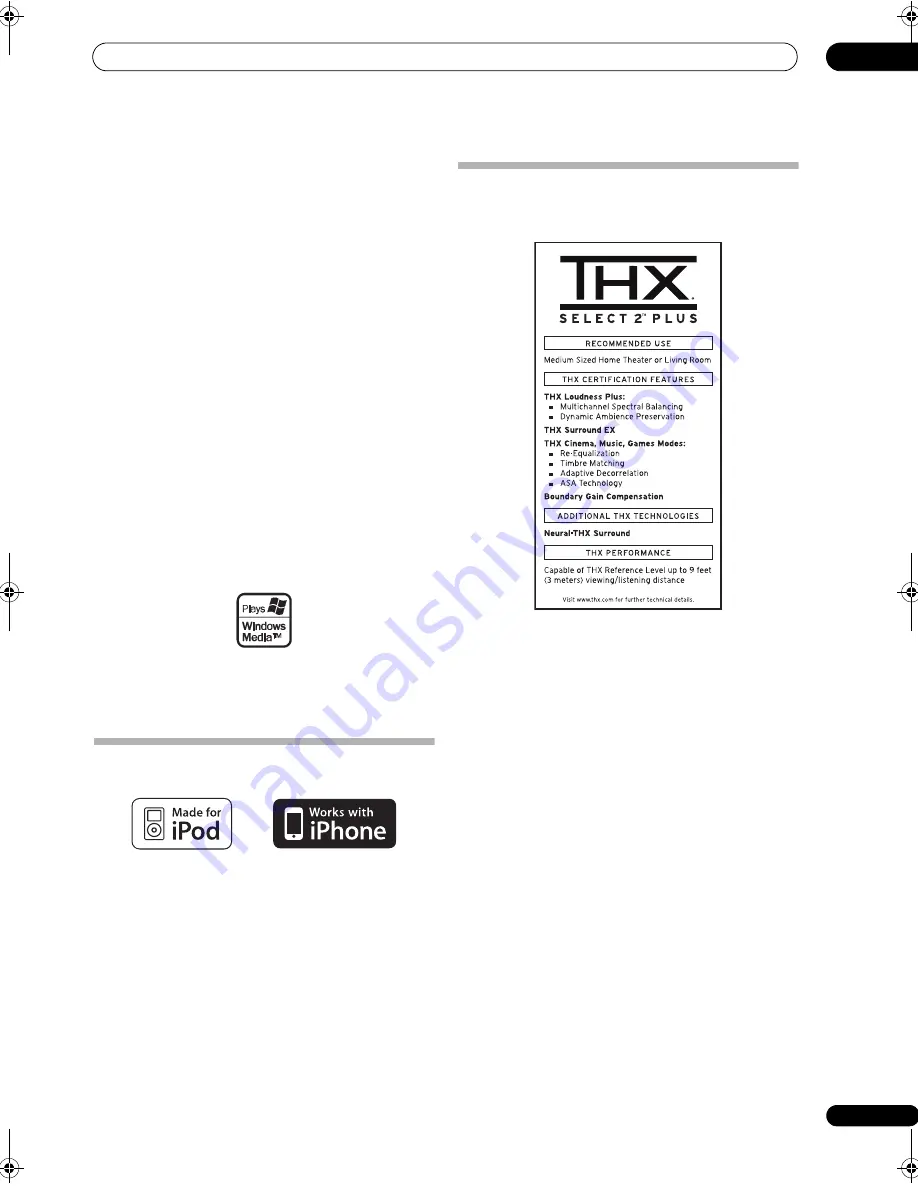
About THX

The THX technologies a

r

e ex

p

lained below. See 

www.thx.com fo

r

 mo

r

e detailed info

r

mation.

THX Cinema processing

THX is an exclusive set of standa

r

ds and technologies established by 

THX Ltd. THX g

r

ew f

r

om Geo

r

ge Lucas’ 

p

e

r

sonal desi

r

e to make you

r


ex

p

e

r

ience of the film soundt

r

ack, in both movie theat

r

es and in you

r


home theat

r

e, as faithful as 

p

ossible to what the di

r

ecto

r

 intended. 

Movie soundt

r

acks a

r

e mixed in s

p

ecial movie theat

r

es called 

dubbing stages and a

r

e designed to be 

p

layed back in movie theat

r

es 

with simila

r

 equi

p

ment and conditions. This same soundt

r

ack is then 

t

r

ansfe

rr

ed di

r

ectly onto Lase

r

disc, VHS ta

p

e, DVD, etc., and is not 

changed fo

r


p

layback in a small home theat

r

e envi

r

onment. THX 

enginee

r

s develo

p

ed 

p

atented technologies to accu

r

ately t

r

anslate 

the sound f

r

om the movie theat

r

e envi

r

onment into the home, 

co

rr

ecting the tonal and s

p

atial e

rr

o

r

s that occu

r

. On this 

pr

oduct, 

when the THX indicato

r

 is on, THX featu

r

es a

r

e automatically added 

in Cinema modes (e.g. THX Cinema, THX Su

rr

ound EX).

Re-Equalization

The tonal balance of a film soundt

r

ack will be excessively b

r

ight and 

ha

r

sh when 

p

layed back ove

r

 audio equi

p

ment in the home because 

film soundt

r

acks we

r

e designed to be 

p

layed back in la

r

ge movie 

theate

r

s using ve

r

y diffe

r

ent 

pr

ofessional equi

p

ment. Re-Equalization 

r

esto

r

es the co

rr

ect tonal balance fo

r

 watching a movie soundt

r

ack in 

a small home envi

r

onment.

Timbre Matching

The human ea

r

 changes ou

r


p

e

r

ce

p

tion of a sound de

p

ending on the 

di

r

ection f

r

om which the sound is coming. In a movie theat

r

e, the

r

e is 

an a

rr

ay of su

rr

ound s

p

eake

r

s so that the su

rr

ound info

r

mation is all 

a

r

ound you. In a home theat

r

e, you use only two s

p

eake

r

s located to the 

side of you

r

 head. The Timb

r

e Matching featu

r

e filte

r

s the info

r

mation 

going to the su

rr

ound s

p

eake

r

s so that they mo

r

e closely match the 

tonal cha

r

acte

r

istics of the sound coming f

r

om the f

r

ont s

p

eake

r

s. This 

ensu

r

es seamless 

p

anning between the f

r

ont and su

rr

ound s

p

eake

r

s.

SC-9540.book  129 ページ  2009年4月24日 金曜日 午後1時42分

Summary of Contents for SC-9540

Page 1: ...Operating Instructions audio video multi channel receiver ...

Page 2: ...ference will not occur in a particular installation If this equipment does cause harmful interference to radio or television reception which can be determined by turning the equipment off and on the user is encouraged to try to correct the interference by one or more of the following measures Reorient or relocate the receiving antenna Increase the separation between the equipment and receiver Conn...

Page 3: ...s product is for general household purposes Any failure due to use for other than household purposes such as long term use for business purposes in a restaurant or use in a car or ship and which requires repair will be charged for even during the warranty period K041_En WARNING The voltage of the available power supply differs according to country or region Be sure that the power supply voltage of...

Page 4: ...s unit does not match the AC outlet you want to use the plug must be removed and appropriate one fitted Replacement and mounting of an AC plug on the power supply cord of this unit should be performed only by qualified service personnel If connected to an AC outlet the cut off plug can cause severe electrical shock Make sure it is properly disposed of after removal The equipment should be disconne...

Page 5: ... Connecting an IR receiver 37 Operating other Pioneer components with this unit s sensor 37 Switching components on and off using the 12 volt trigger 38 Connecting a PC for Advanced MCACC output 38 Connecting an HDMI equipped component to the front panel input 39 Connecting an iPod 40 Connecting a USB device 40 Plugging in the receiver 41 04 Basic Setup Changing the OSD display language OSD Langua...

Page 6: ... favorite songs 72 About playable file formats 73 Advanced operations for Internet radio 74 Saving Internet radio stations 74 Retrieving saved Internet radio stations 74 Setting up the network 74 Checking the network settings 76 Checking about the Accounts 76 Software update 76 Glossary 77 08 KURO LINK Making the KURO LINK connections 79 Cautions on the KURO LINK function 79 About connections with...

Page 7: ... 111 The Other Setup menu 112 Multi Channel Input Setup 112 ZONE Audio Setup 113 Power ON Level Setup 113 Volume Limit Setup 113 Remote Control Mode Setup 114 Flicker Reduction Setup 114 13 Additional information Speaker Setting Guide 115 Positional relationship between speakers and monitor 116 Troubleshooting 116 Power 116 No sound 117 Other audio problems 118 Video 119 Settings 120 Professional ...

Page 8: ...r On 6 Changing the OSD display language OSD Language page 42 7 Surround back speaker setting page 109 8 MCACC speaker settings Automatically setting up for surround sound Auto MCACC Full Band Phase Control page 42 9 The Input Setup menu page 44 When using connections other than the recommended connections 10 Basic playback page 46 11 Switching the HDMI output page 87 12 Adjusting the sound and pi...

Page 9: ...oth the digital and analog domain making your home theater experience as faithful as possible to what the director intended Dolby Digital and DTS decoding including Dolby Digital EX Dolby Pro Logic IIx DTS 96 24 DTS ES Dolby Digital Plus Dolby TrueHD DTS EXPRESS and DTS HD Master Audio Dolby Digital and DTS decoding brings theater sound right into your home with up to six channels of surround soun...

Page 10: ...r s historical technologies HDMI and digital video conversion This receiver is compatible with the HDMI digital video format providing you with high definition digital video audio via a single cable High quality sound formats such as DTS HD and Dolby TrueHD are supported while this receiver is also compatible with the Deep Color and x v Color feature You can operate this receiver in synchronizatio...

Page 11: ...blic institution s rules that apply in your country or area WARNING Do not use or store batteries in direct sunlight or other excessively hot place such as inside a car or near a heater This can cause batteries to leak overheat explode or catch fire It can also reduce the life or performance of batteries Operating range of remote control unit The remote control may not work properly if There are o...

Page 12: ... or brightens the display page 87 CH LEVEL Press repeatedly to select a channel then use to adjust the level page 110 Press TUNER first to access D ACCESS After pressing you can access a radio station directly using the number buttons page 52 CLASS Switches between the seven banks classes of radio station presets page 52 4 TV CONTROL buttons These buttons are dedicated to control the TV assigned t...

Page 13: ...tches between Auto Surround page 57 Auto level control Optimum Surround mode and Stream Direct mode page 60 STEREO Switches between stereo playback and Front Stage Surround Advance modes page 60 STANDARD Press for Standard decoding and to switch between the various 2 Pro Logic IIx and Neo 6 options page 57 ADV SURR Use to switch between the various surround modes page 59 THX Press to select a Home...

Page 14: ...ed page 26 4 Remote sensor Receives the signals from the remote control see Operating range of remote control unit on page 11 5 Character display See Display on page 15 6 MASTER VOLUME dial 7 Front panel controls To access the front panel controls push gently on the lower third portion of the panel with your finger 8 AUDIO PARAMETER Use to access the Audio options page 82 9 VIDEO PARAMETER Use to ...

Page 15: ... iPod iPhone USB terminals Use to connect your Apple iPod as an audio and video source or connect a USB device for audio and photo playback page 40 20 MCACC SETUP MIC jack Use to connect the supplied microphone page 42 21 PHONES jack Use to connect headphones When the headphones are connected there is no sound output from the speakers Display 1 SIGNAL indicators Light to indicate the currently sel...

Page 16: ...ors TUNED Lights when a broadcast is being received STEREO Lights when a stereo FM broadcast is being received in auto stereo mode MONO Lights when the mono mode is set using MPX 13 SOUND Lights when any of the Midnight Loudness or tone controls feature is selected page 82 Lights when Dialog Enhancement is switched on 14 Lights when the sound is muted page 13 15 Master volume level Shows the overa...

Page 17: ...al satellite receivers CD players etc See also The Input Setup menu on page 44 to assign the inputs 6 12 V trigger jacks total 50 mA max x2 Use to switch components in your system on and off according to the input function of the receiver See Switching components on and off using the 12 volt trigger on page 38 7 SIRIUS Radio input See Connecting a SiriusConnect tuner on page 34 8 Remote inputs out...

Page 18: ...s such as CD players tape decks turntables etc See Connecting other audio components on page 32 15 Audio video source inputs x5 output x1 Use for connection to audio visual sources such as DVD players recorders VCRs etc Each set of inputs has jacks for composite video S Video and stereo analog audio See Connecting an HDD DVD recorder VCR and other video sources on page 30 16 AM and FM antenna term...

Page 19: ...ch surround ZONE 2 connection Multi Zone With these connections you can simultaneously enjoy 5 1 channel surround sound in the main zone with stereo playback on another component in ZONE 2 The selection of input devices is limited Surr Back System setting ZONE 2 4 5 1ch surround Speaker B connection With these connections you can simultaneously enjoy 5 1 channel surround sound in the main zone wit...

Page 20: ...ngle If not place them at a narrower angle Place the center speaker above or below the TV so that the sound of the center channel is localized at the TV screen Also make sure the center speaker does not cross the line formed by the leading edge of the front left and right speakers It is best to angle the speakers towards the listening position The angle depends on the size of the room Use less of ...

Page 21: ...Bare wire connections 1 Twist exposed wire strands together fig A 2 Loosen terminal and insert exposed wire fig B 3 Tighten terminal fig C Banana plug connections If you want to use speaker cables terminated with banana plugs screw the speaker terminal fully shut then plug the banana plug into the end of the speaker terminal Important Please refer to the manual that came with your speakers for det...

Page 22: ...2 OUTPUT 12V TOTAL 50 mA MAX 1 2 IN 1 IN IN 2 OUT OUT DVD PR PB Y PR PB Y PR PB Y DVR IN 3 VIDEO 1 MONITOR OUT ZONE 2 OUT VIDEO AUDIO ZONE 3 OUT PHONO IN CD IN OUT IN CD R TAPE TV SAT IN VIDEO1 IN VIDEO2 IN DVD IN OUT DVR IN SIGNAL GND S VIDEO VIDEO FRONT CENTER SUBWOOFER SURROUND SURROUNDBACK FRONT CENTER B A R SURROUND BACK Class 2Wiring SUBWOOFER SURROUND SURROUNDBACK Single L Single R SURROUND...

Page 23: ... CAUTION Don t connect different speakers from the same terminal in this way When bi wiring as well heed the cautions for bi amping shown at the left LAN 10 100 SPEAKERS CAUTION SPEAKERIMPEDANCE 6Ω 16Ω ATTENTION ENCEINTE D IMPEDANCE DE 6Ω 16Ω OPTICAL RS 232C HDMI COAXIAL COMPONENT VIDEO ANTENNA PRE OUT AC IN MULTI CH IN XM IR CONTROL SIRIUS BD IN IN IN 12V TRIGGER IN 1 IN 2 IN 3 OUT 1 OUT 2 OUT 1 ...

Page 24: ...r setting on page 109 to do this Bi Amping setup Bi amping connection of the front speakers for high sound quality with 5 1 channel surround sound 1 Connect Bi amp compatible speakers to the front and surround back speaker terminals See Bi amping your speakers on page 23 2 Select Front Bi Amp from the Surr Back System menu See Surround back speaker setting on page 109 to do this About the audio co...

Page 25: ... signal input resolutions that can be converted from the component video input for the HDMI output are 480i 576i 480p 576p 720p and 1080i 1080p signal cannot be converted Only signals with an input resolution of 480i 576i can be converted from the component video input for the composite and S Video MONITOR OUT HDMI IN VIDEO IN VIDEO MONITOR OUT COMPONENT VIDEO IN S VIDEO IN S VIDEO MONITOR OUT HDM...

Page 26: ...sound of the TV cannot be heard over the receiver if the TV is connected using an HDMI cable If you want to listen to the sound of the TV over the receiver connect the receiver and TV with audio cables LAN 10 100 SPEAKERS CAUTION SPEAKERIMPEDANCE 6Ω 16Ω ATTENTION ENCEINTE D IMPEDANCE DE 6Ω 16Ω OPTICAL RS 232C HDMI COAXIAL COMPONENT VIDEO ANTEN XM IR CONTROL SIRIUS BD IN IN IN 12V TRIGGER IN 1 IN 2...

Page 27: ...nputs on page 31 LAN 10 100 SPEAKERS CAUTION SPEAKERIMPEDANCE 6Ω 16Ω ATTENTION ENCEINTE D IMPEDANCE DE 6Ω 16Ω OPTICAL RS 232C HDMI COAXIAL COMPONENT VIDEO XM IR CONTROL SIRIUS BD IN IN IN 12V TRIGGER IN 1 IN 2 IN 3 OUT 1 OUT 2 OUT 1 OUT 2 ASSIGNABLE 3 1 3 1 ASSIGNABLE KURO LINK ASSIGNABLE ASSIGNABLE CD R IN 4 VIDEO1 IN 3 DVR IN 2 TV SAT IN 1 IN 2 CD IN 1 DVD IN 1 IN 2 OUTPUT 12V TOTAL 50 mA MAX 1 ...

Page 28: ...r TV and source component to check whether they are compatible with progressive scan video If your DVD player has multichannel analog outputs you can connect these instead See also see Connecting the multichannel analog inputs on page 31 LAN 10 100 SPEAKERS CAUTION SPEAKERIMPEDANCE 6Ω 16Ω ATTENTION ENCEINTE D IMPEDANCE DE 6Ω 16Ω OPTICAL RS 232C HDMI COAXIAL COMPONENT VIDEO XM IR CONTROL SIRIUS BD ...

Page 29: ...nents using the KURO LINK function see KURO LINK on page 79 HDMI the HDMI logo and High Definition Multimedia Interface are trademarks or registered trademarks of HDMI Licensing LLC x v Color and x v Color logo are trademarks of Sony Corporation Input function Input Terminals Digital HDMI Component DVD COAX 1 IN 1 BD BD TV SAT OPT 1 DVR OPT 2 IN 2 VIDEO 1 OPT 3 IN 3 VIDEO 2 HDMI 1 HDMI 1 HDMI 2 HD...

Page 30: ...UT 2 ASSIGNABLE 3 1 3 1 ASSIGNABLE KURO LINK ASSIGNABLE ASSIGNABLE CD R IN 4 VIDEO1 IN 3 DVR IN 2 TV SAT IN 1 IN 2 CD IN 1 DVD IN 1 IN 2 OUTPUT 12V TOTAL 50 mA MAX 1 2 IN 1 IN IN 2 OUT OUT DVD PR PB Y PR PB Y PR PB Y DVR IN 3 VIDEO 1 MONITOR OUT ZONE 2 OUT VIDEO AUDIO ZONE 3 OUT PHONO IN CD IN OUT IN CD R TAPE TV SAT IN VIDEO1 IN VIDEO2 IN DVD IN OUT DVR IN SIGNAL GND S VIDEO VIDEO FRON FRON B A R...

Page 31: ...232C COAXIAL COMPONENT VIDEO ANTENNA XM IR CONTROL SIRIUS IN IN 12V TRIGGER OUT 1 OUT 2 3 1 ASSIGNABLE ASSIGNABLE ASSIGNABLE CD R IN 4 VIDEO1 IN 3 DVR IN 2 TV SAT IN 1 IN 2 CD IN 1 DVD IN 1 IN 2 OUTPUT 12V TOTAL 50 mA MAX 1 2 IN 1 IN IN 2 OUT OUT DVD PR PB Y PR PB Y PR PB Y DVR IN 3 VIDEO 1 MONITOR OUT ZONE 2 OUT VIDEO AUDIO ZONE 3 OUT PHONO IN CD IN OUT IN CD R TAPE TV SAT IN VIDE IN DVD IN SIGNA...

Page 32: ... when connected to a WMA9 Pro compatible player However the connected DVD player set top box etc must be able to output WMA9 Pro format audio signals through a coaxial or optical digital output LAN 10 100 SPEAKERS CAUTION SPEAKERIMPEDANCE 6Ω 16Ω ATTENTION ENCEINTE D IMPEDANCE DE 6Ω 16Ω OPTICAL RS 232C HDMI COAXIAL COMPONENT VIDEO ANTENNA XM IR CONTROL SIRIUS BD IN IN IN 12V TRIGGER IN 1 IN 2 IN 3 ...

Page 33: ... protective shields of both AM antenna wires 2 Push open the tabs then insert one wire fully into each terminal then release the tabs to secure the AM antenna wires 3 Fix the AM loop antenna to the attached stand To fix the stand to the antenna bend in the direction indicated by the arrow fig a then clip the loop onto the stand fig b If you plan to mount the AM antenna to a wall or other surface s...

Page 34: ...NBAL 75 AM LOOP 75 Ω coaxial cable ANTENNA FM UNBAL 75 AM LOOP Outdoor antenna 5 m to 6 m 16 ft to 20 ft Indoor antenna vinyl coated wire LAN 10 100 SPEAKERS CAUTIO SPEAKERI ATTEN ENCEINTE OPTICAL RS 232C HDMI COAXIAL XM IR CONTROL SIRIUS BD IN IN IN 12V TRIGGER IN 1 IN 2 IN 3 OUT 1 OUT 2 OUT 1 OUT 2 ASSIGNABLE 3 1 KURO LINK ASSIGNABLE ASSIGNABLE CD R IN 4 VIDEO1 IN 3 DVR IN 2 TV SAT IN 1 IN 2 CD ...

Page 35: ...s system Choose whichever works best for you MULTI ZONE listening options The following table shows the signals that can be output to ZONE 2 and ZONE 3 PR PB Y LAN 10 100 SPEAKERS CAUTION SPEAKERIMPEDA ATTENTIO ENCEINTE D IMPE OPTICAL RS 232C HDMI COAXIAL XM IR CONTROL SIRIUS BD IN IN IN 12V TRIGGER IN 1 IN 2 IN 3 OUT 1 OUT 2 OUT 1 OUT 2 ASSIGNABLE 3 1 KURO LINK ASSIGNABLE ASSIGNABLE CD R IN 4 VID...

Page 36: ... OUT 2 ASSIGNABLE 3 1 KURO LINK ASSIGNABLE ASSIGNABLE CD R IN 4 VIDEO1 IN 3 DVR IN 2 TV SAT IN 1 IN 2 CD IN 1 DVD IN 1 OUTPUT 12V TOTAL 50 mA MAX 1 2 IN 1 IN IN 2 OUT OUT DVD ZONE 2 OUT VIDEO Z L R SEE INSTRUCTION MANUAL SELECTABLE VO D S ZONE 2 OUT VIDEO AUDIO L R R L AUDIO IN VIDEO IN PR PB Main zone Sub zone ZONE 2 SPEAKERS CAUTION SPEAKERIMPEDANCE 6Ω 16Ω ATTENTION ENCEINTE D IMPEDANCE DE 6Ω 16...

Page 37: ... 2 Connect the CONTROL OUT jack of that component to the CONTROL IN jack of another Pioneer component Use a cable with a mono mini plug on each end for the connection Continue the chain in the same way for as many components as you have Note 1 Remote operation may not be possible if direct light from a strong fluorescent lamp is shining on the IR receiver remote sensor window Note that other manuf...

Page 38: ...cross type female female The software to output the results is available from the support area of the Pioneer website http www pioneerelectronics com PUSA Home Entertainment Custom Install Instructions for using the software are also available here If you have any questions regarding please contact the Customer Support Division of Pioneer Please make sure your system meets the following requiremen...

Page 39: ...cess the front panel input Select this input using HDMI INPUT SELECT remote or the INPUT SELECTOR dial front panel to select HDMI 4 Note 1 The various parameters the reverb characteristics data and group delay characteristics data used for display on the computer are not cleared when the power is turned off see Output PC on page 106 LAN 10 100 SPEAKERS CAUTION SPEAKERIMPE ATTENTI ENCEINTE D IM OPT...

Page 40: ... playing the iPod see Playing an iPod on page 47 Connecting a USB device It is possible to playback files using the USB interface on the front of this receiver Switch the receiver into standby then connect your USB device to the USB terminal on the front panel of this receiver Push down on the lower portion of the front panel door to access the USB terminal For instructions on playing the USB devi...

Page 41: ...a fire or give you an electric shock Check the power cord once in a while If you find it damaged ask your nearest Pioneer authorized independent service company for a replacement Do not use any power cord other than the one supplied with this unit Do not use the supplied power cord for any purpose other than that described below The receiver should be disconnected by removing the mains plug from t...

Page 42: ... you have set up the microphone provided with your system the receiver uses the information from a series of test tones to optimize the speaker settings and equalization for your particular room and also to calibrate the frequency phase characteristics of the speakers connected Make sure you do this before moving on to Playing a source on page 46 Important Make sure the microphone and speakers are...

Page 43: ... to measure correctly if the microphone is placed on a table sofa etc 2 You can t use the HOME MENU when the iPod USB HOME MEDIA GALLERY XM or SIRIUS Radio input function is selected in either the main or sub zone When you set ZONE 2 ZONE 3 or ZONE 2 3 to ON page 85 you can t use the HOME MENU If you leave the GUI screen for over five minutes the screen saver will appear DVD BD DVR HDMI TV CD CD R...

Page 44: ...uipment is hooked up to which terminal so the buttons on the remote control correspond to the components you ve connected 1 Switch on the receiver and your TV Use RECEIVER to switch on 2 Press on the remote control then press HOME MENU A Graphical User Interface GUI screen appears on your TV Use and ENTER to navigate through the screens and select menu items Press RETURN to confirm and exit the cu...

Page 45: ... using the 12 volt trigger on page 38 select MAIN ZONE 2 ZONE 3 or OFF for the corresponding trigger setting to switch it on automatically along with the main or sub zone specified 8 When you re finished press RETURN You will return to the System Setup menu Input function default and possible settings The terminals on the receiver generally correspond to the name of one of the input functions If y...

Page 46: ...you ve connected to for example HDMI 1 You can also perform the same operation by using the INPUT SELECTOR dial on the front panel or by pressing HDMI on the remote control repeatedly Set the HDMI parameter in Setting the Audio options on page 82 to THROUGH if you want to hear HDMI audio output from your TV or flat panel TV no sound will be heard from this receiver If the video signal does not app...

Page 47: ...NTER to browse that category To return to the previous level any time press RETURN 2 Use to browse the selected category e g albums Use to move to previous next levels Note 1 When playback from the multichannel inputs is selected only the volume and channel levels can be set You can t listen to your speaker B system during playback from the multichannel inputs With MULTI CH IN inputs it is possibl...

Page 48: ...m Title iPod iPod CTRL Top Menu List Shuffle Songs PLAY 3 02 2 02 Playing time File information Track number Track Title Shuffle Songs 3 02 2 02 Artist Name Album Title Play xxxx xxxx Chapxxx xxx Play mode Track title Album title Artist name Playing time File information Track number Button What it does Press to start playback If you start playback when something other than a song is selected all ...

Page 49: ... format FAT12 16 32 It is not possible to connect this unit to a personal computer for USB playback Pioneer cannot guarantee compatibility operation and or bus power with all USB mass storage devices and assumes no responsibility for any loss of data that may occur when connected to this receiver 2 Make sure the receiver is in standby when disconnecting the USB device 3 When a USB memory device wi...

Page 50: ...at it does Press to start playback Pauses unpauses playback Press and hold during playback to start scanning Press to skip to previous next track Press repeatedly to switch between Repeat One Repeat Folder Repeat All and Repeat Off Press repeatedly to switch between Random On and Random Off DISP Press repeatedly to change the song playback information displayed in the front panel display ENTER Whe...

Page 51: ...ed Supported WAV wav LPCM Sampling frequency 32 kHz 44 1 kHz 48 kHz Quantization bitrate 8 bit 16 bit Channel 2 ch Monaural WMA wma WMA8 9b b Files encoded using Windows Media Codec 9 may be playable but some parts of the specification are not supported specifically Pro Lossless Voice Sampling frequency 8 kHz to 48 kHz Quantization bitrate 16 bit Channel 2 ch Bitrate 8 kbps to 320 kbps VBR CBR Sup...

Page 52: ...ns on the remote control 1 Press TUNER to select the tuner 2 Use BAND to change the band FM or AM if necessary Each press switches the band between FM and AM 3 Press D ACCESS Direct Access 4 Use the number buttons to enter the frequency of the radio station For example to tune to 106 00 FM press 1 0 6 0 0 If you make a mistake halfway through press D ACCESS twice to cancel the frequency and start ...

Page 53: ...follow installation and setup instructions are provided with the satellite tuners Whichever service you choose there are a variety of programming packages available including the option of adding The Best of SIRIUS programming to your XM tuner or The Best of XM programming to your SIRIUS tuner enabling you to enjoy the most popular programming among both services The Best of packages are not avail...

Page 54: ... The default for all presets is XM1 4 Press ENTER After pressing ENTER the preset class and number stop blinking and the receiver stores the XM channel Tip You can also press MEMORY during reception display to save the information of up to five songs See Using the XM Menu below to recall this information Listening to channel presets 1 Press CLASS to select the class in which the channel is stored ...

Page 55: ...Note 1 In order to activate your radio subscription you will need the SIRIUS ID SID which uniquely identifies your tuner The SID may be found on a sticker located on the packaging or on the bottom of the tuner itself The label will have a printed 12 digit SID number When you have located the SID write it down in the space provided near the end of this manual Contact SIRIUS on the internet at https...

Page 56: ...l preset you want You can also use the number buttons on the remote control to recall the channel preset Using the SIRIUS Menu The SIRIUS Menu provides additional SIRIUS Radio features 2 1 Press TOP MENU 2 Use to select a menu item then press ENTER Choose from the following menu items Channel Skip Add Use and ENTER to select channels you would like to remove restore from to the channel guide Paren...

Page 57: ...ions available will depend on your speaker setup and the type of source you re listening to If you connected surround back speakers see also Using surround back channel processing on page 61 Standard surround sound The following modes provide basic surround sound for stereo and multichannel sources 4 While listening to a source Press then press STANDARD STANDARD SURROUND 5 If necessary press repea...

Page 58: ...IC THX MUSIC Neo 6 MUSIC THX MUSIC 2 Pro Logic IIx GAME THX GAMES THX Select2 GAMES7 With multichannel sources press THX HOME THX repeatedly to select from 8 THX Surround EX Allows you to hear 6 1 or 7 1 channel playback with 5 1 channel sources9 Note 1 If surround back channel processing page 61 is switched OFF or the surround back speakers are set to NO this happens automatically if the Surround...

Page 59: ...stening mode is selected the effect level can be adjusted using the EFFECT parameter in Setting the Audio options on page 82 Listening in stereo When you select STEREO you will hear the source through just the front left and right speakers and possibly your subwoofer depending on your speaker settings Dolby Digital DTS and WMA9 Pro multichannel sources are downmixed to stereo While listening to a ...

Page 60: ...sources according to the number of channels in the signal PURE DIRECT Analog sources are heard without any digital processing 4 No sound is output from the Speaker B in this mode OPTIMUM SURR Listening in Optimum Surround mode page 57 Note 1 The Front Stage Surround Advance mode cannot be selected in the following cases When headphones are plugged in When MULTI CH IN input is selected When the HDM...

Page 61: ...ck mode Default setting OFF When you re not using surround back speakers selecting this mode allows you to hear a virtual surround back channel through your surround speakers You can choose to listen to sources with no surround back channel information or if the material sounds better in the format for example 5 1 for which it was originally encoded you can have the receiver only apply this effect...

Page 62: ...e close to the TV While listening to a source Press then press MCACC Press repeatedly to select one of the six MCACC presets3 See Data Management on page 106 to check and manage your current settings Note 1 Set to ON regardless of this setting when playing DTS HD signals May automatically be set to OFF even when set to ON depending on the input signal and listening mode C SW FL FR SL SR SBL SBR SB...

Page 63: ...e subwoofer or the other most appropriate speaker At least in theory however this type of processing involves a group delay that varies with frequency resulting in phase distortion where the low frequency sound is delayed or muffled by the conflict with other channels With the Phase Control mode switched on this receiver can reproduce powerful bass sound without deteriorating the quality of the or...

Page 64: ... a wave meets a trough as shown in the upper section of the diagram above then the sound will be out of phase and an unreliable sound image will be produced The PHASE CONTROL feature is available even when the headphones are plugged in If your subwoofer has a phase control switch set it to the plus sign or 0 However the effect you can actually feel when PHASE CONTROL is set to ON on this receiver ...

Page 65: ...Press then press PHASE CTRL PHASE CONTROL to select FULLBAND PHASE 1 Both the Phase Control and Full Band Phase Control functions are switched on The FULL BAND and indicator on the front panel lights Tweeter Midrange Woofer Group Delay Characteristics ms Hz Tweeter Midrange Woofer Group Delay Characteristics ms Hz Note 1 The Full Band Phase Ctrl mode cannot be set to ON in the following cases When...

Page 66: ...on from the list of Internet radio stations created edited and managed by the vTuner database service exclusively for use with the Pioneer products See Playback with Home Media Gallery on page 69 and Listening to Internet radio stations on page 70 Listening to Rhapsody Sirius Neural THX internet radio or Neural Music Direct See Listening to Rhapsody on page 72 See Listening to Sirius Internet Radi...

Page 67: ... stored on the following PCs running Microsoft Windows XP with Windows Media Connect installed PCs running Microsoft Windows Vista or XP with Windows Media Player 11 installed DLNA compatible digital media servers on PCs or other components To play back audio files stored on components on the network or listen to Internet radio stations you must turn on the DHCP server function of your router In c...

Page 68: ...r service marks of Digital Living Network Alliance Content playable over a network Even when encoded in a compatible format some files may not play correctly Movie or Photo files cannot be played back There are cases where you cannot listen to an Internet radio station even if the station can be selected from a list of radio stations Some functions may not be supported depending on the server type...

Page 69: ... Internet radio stations are displayed 3 Use to select the folder music files or Internet radio station to play back and then press ENTER Press to scroll up and down the list and select the desired item When you press ENTER playback starts with the playback screen being displayed for the selected item To return to the list screen press RETURN 1 In case of a server In case of Internet radio DVD BD ...

Page 70: ...where in the world as long as there is a connection to the Internet as services are not transmitted through the air but are delivered over the World Wide Web On this receiver you can select Internet radio stations by genre as well as by region About the playback screen The following screen appears when audio streams from an Internet radio station are received Main Zone Button Function Press to sta...

Page 71: ...et Your WebID PW Resets all the information registered on the special Pioneer Internet radio site When reset all the registered broadcast stations are also cleared If you want to listen to the same stations re register after resetting 4 Access the special Pioneer Internet radio site from your computer and perform the registration process http www radio pioneer com Access the above site and use the...

Page 72: ...rnet radio station managed and operated by Neural THX Neural radio stations deliver multichannel surround sound The Neural THX Surround mode is automatically selected and lets you enjoy a rich multichannel surround sound experience For details about Neural THX see the operation manual supplied separately Neural Surround is a trademark owned by Neural Audio Corporation THX is a trademark of THX Ltd...

Page 73: ... wav LPCM Sampling frequency 8 kHz to 44 1 kHz Quantization bitrate 16 bit 20 bit 24 bit Channel 2 ch WMA wma WMA2 7 8 Sampling frequency 8 kHz to 48 kHz Quantization bitrate 16 bit Channel 2 ch Bitrate 5 kbps to 320 kbps VBR CBR Supported Supported WMA9 Sampling frequency 8 kHz to 48 kHz Quantization bitrate 16 bit Channel 2 ch Bitrate 5 kbps to 320 kbps VBR CBR Supported Supported AAC m4a aac 3g...

Page 74: ...o set up the network manually You must set up the network as described below only when you have connected this receiver to a server without the DHCP server function Before you set up the network consult with your ISP or the network manager for the required settings It is advisory that you also refer to the operation manual supplied with your network component 1 IP Address The IP address to be ente...

Page 75: ...t a number and to move the cursor After you select the last number press or ENTER You can also use the numeric buttons to enter a number The Enable Proxy Server screen appears 8 Select No or Yes for the proxy server setting to deactivate or activate the proxy server In case you select No proceed with Step 13 In case you select Yes on the other hand proceed with Step 9 The Proxy Hostname screen app...

Page 76: ...tion is not the latest 2 Check the network settings Press to switch the display Each time you press the display switches as follows Firmware Version MAC Address IP address Subnet Mask Gateway IP Proxy Server 3 Press RETURN The Setup screen appears To return to the Top Menu screen press RETURN again Checking about the Accounts Screen concerning Rhapsody or Sirius Internet Radio account registration...

Page 77: ...221 192 106 Ethernet A frame based computer networking technology for local area networks LANs This player supports 100BASE TX and 10BASE T FLAC FLAC Free Lossless Audio Codec is an audio format allows lossless codec Audio is compressed in FLAC without any loss in quality For more details about FLAC visit the following website http flac sourceforge net IP Internet Protocol address A unique number ...

Page 78: ...Management service for the Windows Media platform It is designed to provide secure delivery of audio and or video content over an IP network to a PC or other playback device in such a way that the distributor can control how that content is used The WMDRM protected content can only be played back on a component supporting the WMDRM service Windows Media Player 11 Windows Media Connect Windows Medi...

Page 79: ...nent not to a flat panel TV but rather directly to the HDMI terminal on this receiver To use the KURO LINK function connect this receiver and flat panel TV using the HDMI OUT 1 terminal Connecting the KURO LINK compatible component using the HDMI OUT 2 terminal may result in malfunction If this happens turn off the KURO LINK compatible component s KURO LINK setting While the receiver is equipped w...

Page 80: ...re information see the operating instructions for each component 1 Press then press HOME MENU 2 Select System Setup then press ENTER 3 Select Other Setup then press ENTER 4 Select the KURO LINK setting you want Choose whether to set this unit s KURO LINK function ON or OFF You will need to set it to ON to use the KURO LINK function When using a component that does not support the KURO LINK functio...

Page 81: ...tion below for operations in the synchronized amp mode These functions are set from the TV s menu screen For more information refer to the operating instructions of the KURO LINK compatible TV Synchronized amp mode operations When using the synchronized amp mode the KURO LINK compatible component connected to the receiver operates in sync as described below The receiver s volume can be set and the...

Page 82: ...HT LOUDNESS OFF MIDNIGHT ON LOUDNESS Used to get good bass and treble from music sources at low volumes LOUDNESS ON RECEIVER TONEb Tone Control Applies the treble and bass tone controls to a source or bypasses them completely BYPASS ON BASSc Adjusts the amount of bass 6 to 6 dB Default 0 dB TREBLEc Adjusts the amount of treble 6 to 6 dB Default 0 dB S RTRV Sound Retriever With the Sound Retriever ...

Page 83: ... the sound more distant minus settings or more forward positive settings 3 to 3 Default 0 PANORAMAi Extends the front stereo image to include the surround speakers for a wraparound effect OFF ON C IMAGEj Center Image Applicable only when using a center speaker Adjusts the center image to create a wider stereo effect with vocals Adjust the effect from 0 all center channel sent to front right and le...

Page 84: ...omponent 0 to 8 Default 0 DETAILc Adjusts how sharp edges appear 4 to 4 Default 0 SHARPc e Sharpness Adjusts the sharpness of the high frequency detailed elements in the picture 4 to 4 Default 0 BRIGHTc Brightness Adjusts the overall brightness 6 to 6 Default 0 CONTRASTc Adjusts the contrast between light and dark 6 to 6 Default 0 HUEc f Adjusts the red green balance 6 to 6 Default 0 CHROMAc Chrom...

Page 85: ...adio It is possible to play when using the main zone and ZONE 2 or the main zone and ZONE 3 4 Use the MASTER VOLUME dial to adjust the volume for the zone you have selected This is only possible if you selected the Variable volume control in ZONE Audio Setup on page 113 3 5 When you re finished press MULTI ZONE CONTROL again to return to the main zone controls You can also press MULTI ZONE ON OFF ...

Page 86: ... You can use this if you find that the OVER indicator lights often or you can hear distortion in the sound 2 Press then press A ATT to switch the input attenuator on or off Using the sleep timer The sleep timer switches the receiver into standby after a specified amount of time so you can fall asleep without worrying about the receiver being left on all night Use the remote control to set the slee...

Page 87: ...ed press STATUS again to switch off the display Note 1 Synchronized amp mode on page 81 is canceled when the HDMI output is switched If you wish to use the synchronized amp mode switch to HDMI OUT 1 then select the synchronized amp mode on the flat panel TV using the flat panel TV s remote control When the power is turned off then back on after switching the HDMI output the input is set to a setti...

Page 88: ... Brightest Inputs See Input function default and possible settings on page 45 MULTI ZONE ZONE 2 3 Volume Level Variable ZONE 2 3 Volume 60 dB HDMI HDMI Audio Amp HDMI output HDMI OUT ALL KURO LINK ON DSP Surround back channel Processing ON Phase Control ON Full Band Phase Control OFF Sound Retriever iPod USB or HOME MEDIA GALLERY function ON Other functions OFF Sound Delay 0 0 frame Dual Mono CH1 ...

Page 89: ...rer in the remote control will not work for the model that you are using If you can t find a preset code that matches the component you want to control you can still teach the remote individual commands from another remote control see Programming signals from other remote controls on page 90 Note You can cancel or exit any of the steps by pressing To go back a step press RETURN After ten seconds o...

Page 90: ...rased then press the button to be erased twice To erase all the settings stored at the input function buttons press the input function button twice here The LED flashes twice to confirm the button has been erased 4 Repeat step 3 to erase other buttons Note 1 The remote can store about 200 preset codes this has been tested with codes of Pioneer format only 2 You can t assign TUNER HOME MEDIA GALLER...

Page 91: ...rt multi operations with the receiver switched on or in standby 1 Press MULTI OPE 2 Press an input function button that has been set up with a multi operation The receiver switches on if it was in standby and the programmed multi operation is performed automatically Note 1 Before Multi Operation and System Off will work correctly you must setup the remote to work with your TV and other components ...

Page 92: ...power off codes are sent 2 When Selecting preset codes directly on page 89 are set all the signals learned in the input function buttons are cleared This function is convenient when you want to reset some but not all of input function buttons Input function button Preset code DVD 3 1 5 7 1 BD 3 2 4 4 2 DVR 2 2 3 0 6 HDMI 3 2 4 4 2 TV 1 4 0 0 1 CD 7 0 4 6 8 CD R 7 1 0 8 7 TV CTRL 1 4 0 0 1 6 1 9 3 ...

Page 93: ...INFO EXIT TOP MENU TOP MENU DISC NAVI LIST TOOLS GUIDE USER MENU TOOLSa GUIDE GUIDE ENTER ENTER ENTER ENTER ENTER ENTER HOME MENU HOME MENU HOME MENU HOME MENU HOME RETURN RETURN RETURN RETURN RETURN HDD Red Red Red HDD A Red DVD Green Green Green DVD B Green Yellow Yellow Yellow VCR C Yellow Blue Blue Blue MENU MENU MENU Blue E AUTO SETUP FREEZE D ANT AV SELECTION SCREEN SIZE AUDIO AUDIO AUDIO AU...

Page 94: ... ENTER DISC ENTER OPEN CLOSEb ENTER TOP MENU MS LEGATO LINKa MS ENTER ENTER SACD SETUPa RETURN HDD Red PROGRAM Yellow REPEAT Blue SHUFFLE AUDIO AUDIO PURE AUDIOa DISP DISPLAY INFO TIMEa Button s TV Projector SOURCE POWER ON 1 MOVIE 2 STANDARD 3 DYNAMIC 4 USER1 5 USER2 6 USER3 7 COLOR 8 SHARP 9 GAMMA 0 COLOR dot SHARP ENTER CLASS COLOR TEMP EXIT INFO ENTER ENTER TEST HIDE MENU HDMI1 HDMI2 COMP VIDE...

Page 95: ...ty 3 Select Advanced MCACC from the HOME MENU then press ENTER 4 Select the setting you want to adjust Full Auto MCACC See Automatically setting up for surround sound Auto MCACC Full Band Phase Control on page 42 for a quick and effective automatic surround setup Auto MCACC See Automatic MCACC Expert on page 96 for a more detailed MCACC setup In addition the Full Band Phase Control function calibr...

Page 96: ...are using THX speakers set all speakers to SMALL otherwise leave it set to NO STAND WAVE Multi Point only available when the Auto MCACC Menu above is EQ Pro S Wave In addition to measurements at the listening position you can use two more reference points for which test tones will be analyzed for standing waves This is useful if you want to get a balanced flat calibration for several seating posit...

Page 97: ...seconds while the speaker configuration check screen is being displayed the Auto MCACC Setup will resume automatically In this case you don t need to select OK and press ENTER in step 8 If you see an ERR message or the speaker configuration displayed isn t correct there may be a problem with the speaker connection If selecting RETRY doesn t work turn off the power and check the speaker connections...

Page 98: ...Auto MCACC Setup Manual MCACC setup You can use the settings in the Manual MCACC setup menu to make detailed adjustments when you re more familiar with the system Before making these settings you should have already completed Automatically setting up for surround sound Auto MCACC Full Band Phase Control on page 42 You only need to make these settings once unless you change the placement of your cu...

Page 99: ...justments that you may not achieve using the Manual speaker setup on page 108 1 Select Fine Channel Level from the Manual MCACC setup menu The volume increases to the 0 0 dB reference level 2 Adjust the level of the left channel This will be the reference speaker level so you may want to keep the level around 0 0dB so that you ll have plenty of room to adjust the other speaker levels After pressin...

Page 100: ...fect of overly resonant sounds in your listening area During playback of a source you can customize the filters used for Standing Wave Control for each of your MCACC presets 3 1 Select Standing Wave from the Manual MCACC setup menu 2 Adjust the parameters for the Standing Wave Control Filter Channel Select the channel to which you will apply the filter s MAIN all except center channel and subwoofe...

Page 101: ... allowing you to calibrate your system based on the direct sound coming from the speakers It can also provide you with a graphical output of the frequency response of your room 3 How to use Acoustic Calibration EQ Professional If you find that lower frequencies seem overly reverberant in your listening room i e it sounds boomy or that different channels seem to exhibit different reverb characteris...

Page 102: ...room for example moving furniture or paintings will affect the calibration results In such cases you should recalibrate your system Using Acoustic Calibration EQ Professional 1 Select EQ Professional then press ENTER 2 Select an option and press ENTER Reverb Measurement Use this to measure the reverb characteristics of your room for graphical output using a PC see Connecting a PC for Advanced MCAC...

Page 103: ...u can choose the time period that will be used for the final frequency adjustment and calibration Even though you can make this setting without reverb measurement it is best to use the measurement results as a reference for your time setting For an optimal system calibration based on the direct sound coming from the speakers we recommend using the 30 50ms setting Use to select the setting Use to s...

Page 104: ...Group Delay Used to check the speakers group delay both before and after calibration See Group Delay on page 105 for more on this Output PC See Output PC on page 106 for more on this 4 Press RETURN to go back to MCACC Data Check menu repeating steps 2 and 3 to check other settings 5 When you re finished press RETURN You will return to the HOME MENU Speaker Setting Use this to display the speaker s...

Page 105: ...ACC then use to select the MCACC preset you want to check Group Delay Use this to display the calibrated speaker group delay results See Using Full Band Phase Control on page 64 for more on this 1 Select Group Delay from the MCACC Data Check menu 2 When Channel is highlighted use to select the channel you want to check The result of group delay calibration for the selected channel is displayed Whe...

Page 106: ... example watching movies from a sofa or playing a video game close to the TV From this menu you can copy from one preset to another name presets for easier identification and clear any ones you don t need 1 Set the remote control to the receiver operation mode then press HOME MENU A Graphical User Interface GUI screen appears on your TV Use and ENTER to navigate through the screens and select menu...

Page 107: ...is selected the memory is not copied Completed shows in the GUI screen to confirm the MCACC preset has been copied then you automatically return to the Data Management setup menu Clearing MCACC presets If you are no longer using one of the MCACC presets stored in memory you can choose to clear the calibration settings of that preset 1 Select MCACC Memory Clear from the Data Management setup menu 2...

Page 108: ...eaker system or add new speakers These settings are designed to customize your system but if you re satisfied with the settings made in Automatically setting up for surround sound Auto MCACC Full Band Phase Control on page 42 it isn t necessary to make all of these settings CAUTION The test tones used in the Manual SP Setup are output at high volume 1 Select Manual SP Setup then press ENTER See Ma...

Page 109: ...peaker configuration size number of speakers and crossover frequency 1 It is a good idea to make sure that the settings made in Automatically setting up for surround sound Auto MCACC Full Band Phase Control on page 42 are correct Note that this setting applies to all MCACC presets and cannot be set independently 1 Select Speaker Setting from the Manual SP Setup menu 2 Choose the set of speakers th...

Page 110: ...in Surround back speaker setting on page 109 you can t adjust the surround back settings If the surround speakers are set to NO the surround back speakers will automatically be set to NO If you select one surround back speaker only make sure that speaker is hooked up to the left surround back terminal 2 If you have a subwoofer and like lots of bass it may seem logical to select LARGE for your fron...

Page 111: ...he user to adjust various THX features including Loudness Plus SB Speaker Position THX Select2 Subwoofer on off and Boundary Gain Control Please see page 129 for a details regarding these THX features 1 Select THX Audio Setting from the Manual SP Setup menu 2 Select either ON or OFF for THX Loudness Plus setting 3 Specify the distance of your surround back speakers from each other 0 1 ft Surround ...

Page 112: ... for a multi channel input see below ZONE Audio Setup Specifies the volume setting for a MULTI ZONE setup page 113 Power ON Level Setup Specifies the volume level set when the power is turned on page 113 Volume Limit Setup Limits the maximum volume page 113 Remote Control Mode Setup Sets this receiver s remote control mode page 114 Flicker Reduction Adjusts the way the GUI screen looks page 114 5 ...

Page 113: ...eiver s power is turned on 1 Select Power ON Level Setup from the Other Setup menu 2 Select the Power ON Level setting you want LAST When the power is turned on the volume is set to the same level as when the power was last turned off When the power is turned on the volume is set to minimum level 80 0dB to 12 0dB Specify the volume to be set when the power is turned in steps of 0 5 dB It is not po...

Page 114: ...is setting Note that the resolution in this setting only affects the GUI screen it has no influence on the video output 1 Select Flicker Reduction Setup from the Other Setup menu 2 Select the Flicker Reduction setting you want 3 When you re finished press RETURN You will return to the Other Setup menu Note 1 If you change this receiver s setting also change the setting on the remote control 4d Oth...

Page 115: ... Set surround speaker 1 so that it is not under the height of the ears Step 3 Adjusting the speaker orientation If the left and right speakers are not pointing in the same direction the tone will not be the same on the right and left and as a result the sound field will not be reproduced properly However if all the speakers are pointed towards the listening position the sound field will seem cramp...

Page 116: ...ice company to carry out repair work Note If the unit does not operate normally due to external effects such as static electricity disconnect the power plug from the outlet and insert again to return to normal operating conditions Power Monitor L R 45 to 60 Installation on floor Diagram as seen from the side Monitor Symptom Remedy The power does not turn on Make sure that the power cord is plugged...

Page 117: ...nd is output when an input function is selected No sound output from the front speakers Check the volume mute setting press MUTE and speaker setting press SPEAKERS Make sure the correct input function is selected Check that the MCACC setup microphone is disconnected Make sure the correct input signal is selected press SIGNAL SEL Note that when PCM is selected you won t be able to hear any other si...

Page 118: ...tal DTS software is played back Check that your DVD player is compatible with Dolby Digital DTS discs Check the digital output settings of your DVD player Make sure that the DTS signal output is set to On If the source component has a digital volume control make sure this is not turned down No sound when using the HOME MENU If the HDMI input function is selected sound is muted until exiting the HO...

Page 119: ...HDMI or when digital video conversion is set to OFF and a TV and another component are connected with different cords in Setting the Video options on page 83 you must connect your TV to this receiver using the same type of video cable as you used to connect your video component Make sure the input assignment is correct for components connected using component video HDMI or S Video cables see The I...

Page 120: ... adjust the Fine Speaker Distance setting page 100 properly Check that the speakers are all in phase make sure the positive and negative terminals are matched up properly The display shows KEY LOCK ON when you try to make settings With the receiver in standby press STANDBY ON while holding down SPEAKERS to disable the key lock Most recent settings have been erased The power cord was disconnected f...

Page 121: ...n this is not a malfunction Check the disc packaging for details about the audio tracks available During playback of a Surround EX or DTS ES source on the SBch AUTO setting EX or ES does not appear or the signal is not properly processed The source may be Dolby Surround EX DTS ES software but it has no flag to indicate it is 6 1 compatible Set to SBch ON see Using surround back channel processing ...

Page 122: ...ure No picture Try changing the Resolution setting in Setting the Video options on page 83 Set the HDMI output setting to the connected HDMI OUT terminal in Switching the HDMI output on page 87 No sound or sound suddenly ceases Check that the HDMI AV setting is set to AMP THROUGH If the component is a DVI device use a separate connection for the audio If analog video is being output over HDMI plea...

Page 123: ...limited to the number of channels available from the connected display unit for example audio output is reduced to 2 channels for a monitor with stereo audio limitations If you want to switch the input function you ll have to switch functions on both the receiver and your display unit Since the sound is muted on the display when using the HDMI connection you must adjust the volume on the display e...

Page 124: ...ly authorized you need to enter the corresponding information again Check whether the connection status is set to Do not authorize There are no playable audio files on the component connected to the network Check the audio files stored on the component connected to the network Audio playback is undesirably stopped or disturbed The audio file currently being played back was not recorded in a format...

Page 125: ...rs files in the FAT region The number of levels in a folder is more than 8 Limit the maximum number of levels in a folder to 8 page 49 There are more than 30 000 folders files stored in a USB memory device Limit the maximum number of folders files stored in a USB memory device to 30 000 page 49 The audio files are copyrighted Copyrighted audio files stored on a USB memory device cannot be played b...

Page 126: ...ed an XM channel that is blocked or cannot be received with your XM subscription package Consult the latest channel guide at www xmradio com for the current list of channels For information on receiving this channel visit www xmradio com or contact XM Satellite Radio at 1 800 967 2346 CH Unavailable The selected channel is not available The channel may have been reassigned to a different channel n...

Page 127: ...l is matrixed into the surround left right channels for 6 1 channel playback This allows for compatibility with Dolby Digital 5 1 channel decoding as well as for decoding using Dolby Digital EX Dolby Pro Logic IIx and Dolby Surround Dolby Pro Logic IIx is an improved version of the Dolby Pro Logic II and Dolby Pro Logic decoding system Using the innovative steering logic circuit this system extrac...

Page 128: ... DVD and Blu ray Disc standards currently limit their maximum number of audio channels to eight whereas Dolby Digital Plus and Dolby TrueHD support more than eight audio channels Manufactured under license from Dolby Laboratories Dolby Pro Logic Surround EX and the double D symbol are trademarks of Dolby Laboratories DTS The DTS technologies are explained below See www dtstech com for more detaile...

Page 129: ...trademark of Apple Inc registered in the U S and other countries iPhone is a trademark of Apple Inc About THX The THX technologies are explained below See www thx com for more detailed information THX Cinema processing THX is an exclusive set of standards and technologies established by THX Ltd THX grew from George Lucas personal desire to make your experience of the film soundtrack in both movie ...

Page 130: ...nd THX Select2 GAMES Boundary Gain Compensation Depending on the listener s and the subwoofer s position the listener may experience an excessive bass effect This feature compensates for excessive bass resulting from a boundary gain effect This feature is designed to operate when used with a subwoofer certified to THX Select2 specifications THX Music For the replay of multi channel music the THX M...

Page 131: ...rable limited right of use to this product under USA and foreign patent patent pending and other technology or trademarks owned by Neural Audio Corporation and THX Ltd Neural Surround Neural Audio Neural and NRL are trademarks and logos owned by Neural Audio Corporation THX is a trademark of THX Ltd which may be registered in some jurisdictions All rights reserved About SIRIUS and XM SIRIUS XM and...

Page 132: ... contributors may be used to endorse or promote products derived from this software without specific prior written permission THIS SOFTWARE IS PROVIDED BY THE COPYRIGHT HOLDERS AND CONTRIBUTORS AS IS AND ANY EXPRESS OR IMPLIED WARRANTIES INCLUDING BUT NOT LIMITED TO THE IMPLIED WARRANTIES OF MERCHANTABILITY AND FITNESS FOR A PARTICULAR PURPOSE ARE DISCLAIMED IN NO EVENT SHALL THE FOUNDATION OR CON...

Page 133: ...IE DTS Surround Neo 6 CINEMA Neo 6 CINEMA Other stereo sources Stereo playback Stereo playback Analog sources As above ANALOG DIRECT stereo PCM sources As above Stereo playback DVD A sources As above As above SACD sources As above As above Input signal format Auto Surround ALC PURE DIRECT DIRECT Surround Back speaker s Connected Dolby Digital EX 6 1 channel flagged Dolby Digital EX 2 Pro Logic llx...

Page 134: ...00 mA USB terminal USB2 0 Full Speed Type A iPod terminal USB and Video Composite SIRIUS antenna cable 8 pin mini DIN cable Network Section LAN terminal 10 BASE T 100 BASE TX Integrated control section Control SR terminal Ø 3 5 Mini jack MONO Control IR terminal Ø 3 5 Mini jack MONO IR signal High Active High Level 2 0 V 12 V Trigger terminal Ø 3 5 Mini jack MONO 12 V Trigger output type 12 V Tota...

Page 135: ...lt system settings 88 Demo 95 Detail 84 Dialog Enhancement 82 Digital Noise Reduction 82 Digital Video Conversion 84 Dimension 83 Display 15 87 121 Dolby 57 127 DTS 57 128 Dual Mono 82 Dynamic Range Control 82 E Effect 83 F Fine Channel Level 99 Fine Speaker Distance 100 Flicker Reduction 114 Front Stage Surround Advance 60 Full Band Phase Control 42 63 H HDCP 29 HDMI 26 29 39 46 79 81 87 122 HDMI...

Page 136: ...2 Sound Retriever 82 Speaker 19 24 115 Speaker B 19 22 24 84 109 Speaker Distance 105 111 Speaker Setting 104 109 Standard surround 57 Standing Wave 82 100 Status 87 Stereo 59 Stream direct 60 133 Surround back channel processing 61 Surround back speaker 109 Synchronized amp mode 81 System Setup 108 T THX 20 96 111 129 Home THX 58 Tone Control 82 Treble 82 Troubleshooting 116 Tuner 33 52 53 U Up M...

Page 137: ...able sound level Set the dial and leave it there Taking a minute to do this now will help to prevent hearing damage or loss in the future After all we want you listening for a lifetime We Want You Listening For A Lifetime Used wisely your new sound equipment will provide a lifetime of fun and enjoyment Since hearing damage from loud noise is often undetectable until it is too late this manufacture...

Page 138: ...4 0 4 Please do not ship your product to Pioneer without first calling the Customer Support at the above listed number for assistance Pioneer Electronics Service Inc P O BOX 1760 Long Beach CA 90801 1760 U S A For warranty information please see the Limited Warranty sheet included with your product Should this product require service in Canada please contact a Pioneer Canadian Authorized Dealer to...

Reviews: