


P
P
E
E
S
S
1
1
9
9
0
0
0
0
G
G
i
i
G
G
S
S
M
M
R
R
e
e
p
p
e
e
a
a
t
t
e
e
r
r
— Chapter 9. Configuring the Repeater
PES1900NR Operations Manual
164
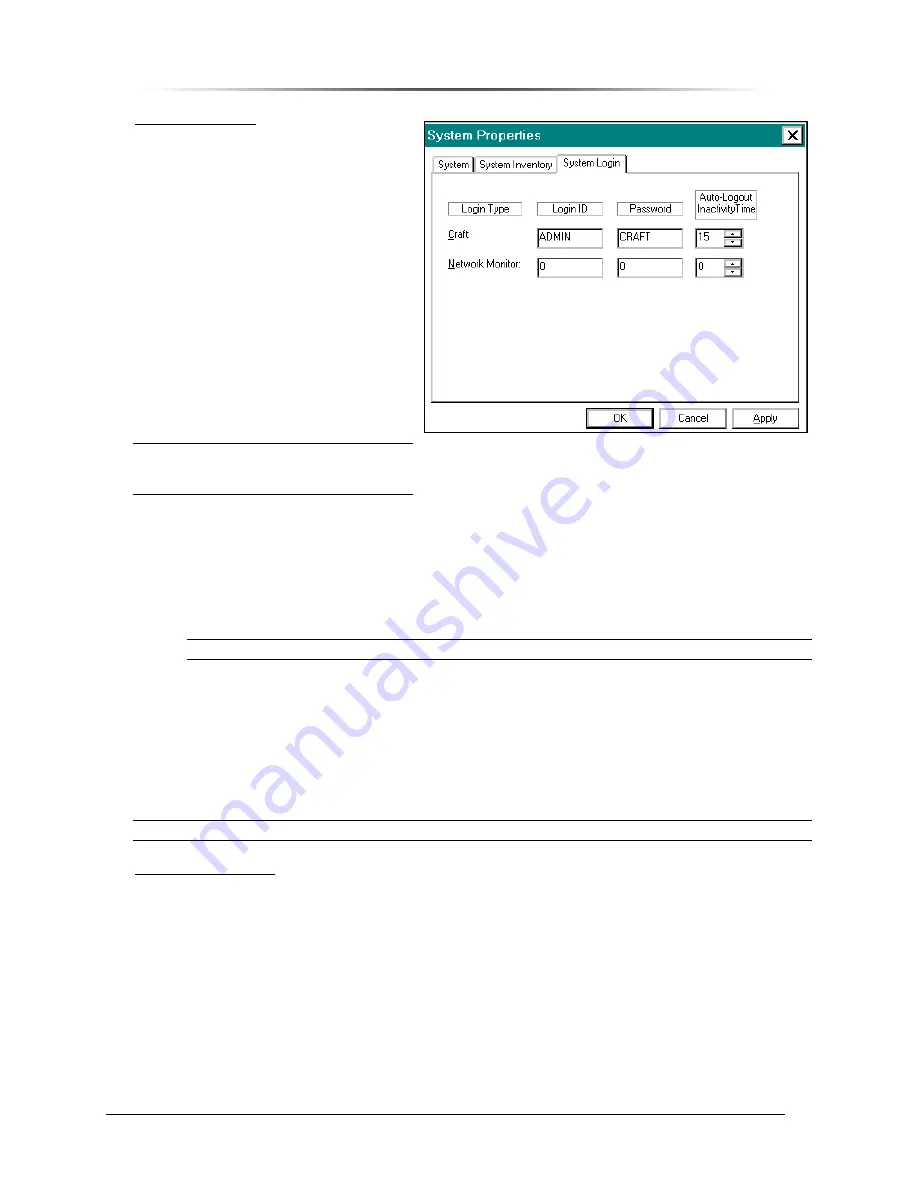
System Login Tab
The
System Login
tab (see Figure 162)
includes fields to do the following:
•
Type in login ID’s
•
Type in passwords
•
Configure the Auto-Logout
function
In the
Auto-Logout Inactivity Time
field,
define how long RepeaterNet should
wait, during a period of inactivity, before
it terminates a session.
You can define a separate time interval
in minutes, between 1 and 60, for each
access level. If you enter a zero (0) in a
time field, this feature becomes disabled.
NOTE:
When the repeater is part of a
network, the time field must be
zero (0).
To change a login ID or password:
1. Login to the repeater (as an administrator).
2. Select Properties… from the System menu.
3. Click the Login tab.
4. Type the new login ID or password into the appropriate fields.
NOTE:
The login ID and the password must each consist of six (6) or fewer characters.
5. Write down the login IDs and passwords, and secure them in a safe place.
6. Click
the
Apply
or
OK
button to set the new information.
•
The
Apply
button sets the login information, and keeps the
System Properties
screen
open.
•
The
OK
button sets the login information, and closes the
System Properties
screen.
7. Notify affected operators about the ID and password changes.
NOTE:
When the repeater is networked, this information also must reside in the NMS Database.
Alarm and Event Log
Open the Alarm and Event Log from the System menu, to view the alarm and event history. This log
dynamically updates during viewing.
Line entries in the Alarm and Event Log are organized as follows:
1. Subsystem affected by an alarm or event.
2. Alarm
severity.
3. Date and time stamp.
Notepad can be used to print or save Alarm and Event Log entries.
Figure 162 System Properties Screen,
System Login Tab