


Chapter 1. Installation
2 9
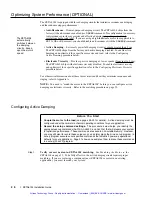
Configuring Electronic Viscosity (EV)
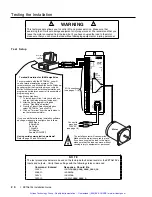
Before You Start
¥ If you configured active damping (see procedure above), leave the
DACTDP
setting set at the
value you chose. You do not need to disable active damping while you configure EV.
¥
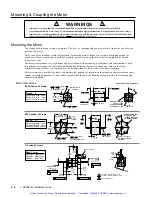
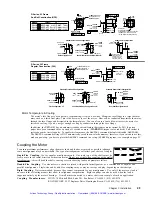
Couple the motor to the load
(see pages 24-25 for details). EV must be configured
under the normal mechanical operating conditions for your application.
¥
Record the
DELVIS
command setting.
The procedure below helps you identify the
appropriate set-up command (
DELVIS
) that will prepare your system for optimized
performance.
DELVIS
is not saved in non-volatile memory. Therefore, you should write down
this command as you qualify it in this procedure, then place it in a program. Page 31 shows
an example of how to place
DELVIS
in a set-up (
STARTP
) program (a set-up program executes
user-specified commands that establish power-up operational defaults for your application).
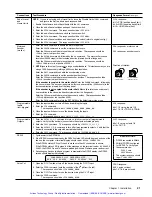
Step 1
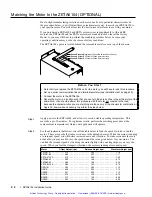
Verify correct motor-to-ZETA6104 matching.
See
Matching the Motor to the
ZETA6104
on page 22. To be fully effective, the active damping circuit requires proper
matching. If you are replacing a component (new ZETA6104 or motor) in an existing
application, you must rematch your system.
Step 2
Make a
baseline
move with EV disabled.
This is your baseline move. Notice the
sound, amount of motor vibration, perceptible ringing, etc. This move shows how your
system operates with EV disabled. Each time you adjust the
DELVIS
setting (in steps 3 & 4),
you will compare results against this baseline move.
1. Issue the
DELVIS¯
command to disable active damping.
2. Make a move that is representative of your application, with similar velocity and
acceleration. The velocity must 3Êrps or less, in order for the ZETA6104 to activate EV.
WARNING
Make sure that causing motion will not damage equipment or injure personnel.
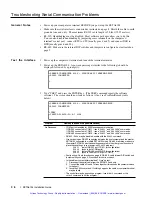
The following six commands illustrate a simple incremental point-to-point move:
MC0 ; select the preset positioning mode
MA0 ; select the incremental preset positioning mode
A10 ; set the acceleration to 10 revs/sec/sec
V2 ; set the velocity to 2 revs/sec/sec
D250000 ; set the distance to 250,000 steps, equal to 10 revs
GO ; initiate the move
; **************************************************************
; * NOTE: To stop a move in progress, issue the !S command. *
; * To repeat the move, issue the GO command. To reverse *
; * direction, issue the D~ command and the GO command. *
; **************************************************************
Step 3
Make a move with EV enabled.
Compare the results with the baseline move.
1. Issue the
DELVIS1
command to enable EV.
2. Make a move that is representative of your application. Use the same motion
parameters that you set up in step 1. If you have not changed these settings, simply
issue the
GO
command.
Step 4
Find the ideal EV setting.
Continue to increase the
DELVIS
setting by single
increments (the maximum setting is
DELVIS7
), and executing a move. Repeat this step
until you find the setting that gives the best performance. You can try all seven settings.
Incorrect settings will not cause damage.
During a repetitive move, you can change the setting Òon the flyÓ (while the move is in
progress) if you precede the
DELVIS
command with a Ò
!
Ó (e.g.,
!DELVIS2
). This allows
you to immediately compare two different settings.
Artisan Technology Group - Quality Instrumentation ... Guaranteed | (888) 88-SOURCE | www.artisantg.com
Summary of Contents for Compumotor ZETA6104
Page 45: ...Artisan Technology Group Quality Instrumentation Guaranteed 888 88 SOURCE www artisantg com...
Page 49: ...Artisan Technology Group Quality Instrumentation Guaranteed 888 88 SOURCE www artisantg com...
Page 53: ...Artisan Technology Group Quality Instrumentation Guaranteed 888 88 SOURCE www artisantg com...
Page 63: ...Artisan Technology Group Quality Instrumentation Guaranteed 888 88 SOURCE www artisantg com...


