142
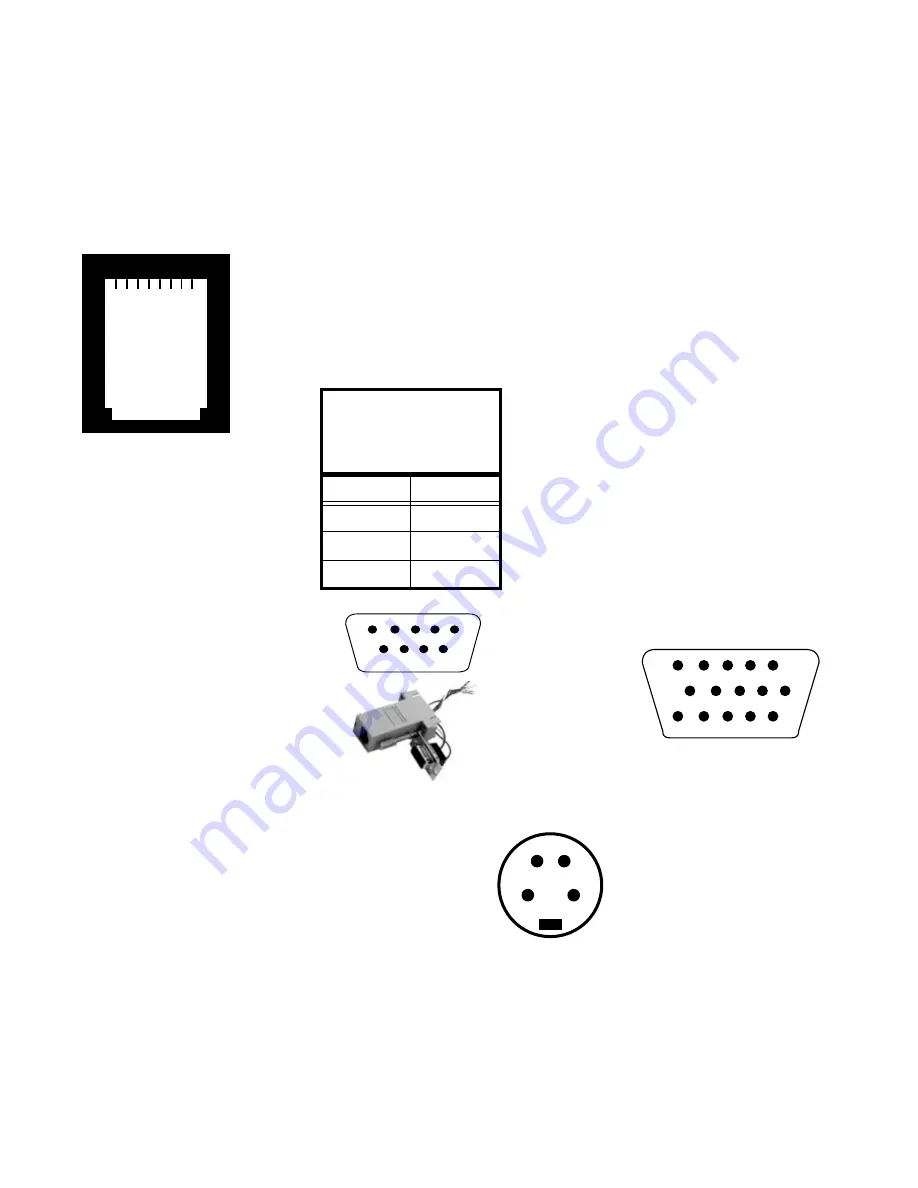
8.3 Connector Diagrams
These are connector diagrams with pin designations. All connectors on these pages are shown looking
at them from the outside, not from the solder side.These diagrams look at the outside of the connector,
as the cable sees it, not the wiring side.
1
5 6 7
3
2
4
8
1
2
3
4
6
7
10
15
9
14
13
12
11
8
5
Analog In and
Out, 1 and 2
(female connector)
1. Red Video
2. Green Video
3. Blue Video
4. No connection
5. No connection
6. Ground
7. Ground
8. Ground
9. No connection
10. Ground
11. No connection
12. No connection
13. Horizontal sync/Com-
posite sync
14. Vertical sync
15. No Connection
1. No connection
2. No connection
3. Transmit Data (TXD)
4. Ground (earth)
5. Ground (earth)
6. Receive Data (RXD)
7. No Connection
8. No connection
RS232 In (Out is same)
RJ45 connector viewed
from the outside, looking
into it as the cable does.
1
2
4
3
S-Video In and Out
(female connector)
1. Ground
2. Ground
3. Y (Luma)
4. C (Chroma)
Wiring the adapter
To change the RJ45 connectors to
9-pin D-sub connectors, use a standard
RJ45-to-9-pin adapter and connect it
internally as shown. The wiring shown
for this adapter is correct for straight-
thru cables.
Yellow wire
pin 3
Black wire
pin 2
Green wire
pin 5
RJ45
9-pin
6
3
5
5
3
2
1
2
3
4
6
7
9
8
5
!
You can tell if a cable is wired straight-
thru by looking at its two ends side-by-
side. Hold the cable ends next to each
other, both ends pointing away from
you. Have the clips on both connectors
pointing down so you can’t see them. If
the color coding on the two connectors
is the same, left to right, the cable is
straight-thru. The order of the colors
doesn’t matter, as long as they are both
the same.
Summary of Contents for PN-6730-UXP
Page 1: ...Panther PN 6730 UXP PN 6740 UXP Guide User ...
Page 2: ......
Page 3: ...i PN 6730 UXP PN 6740 UXP Panther 67 Display Unit User s Guide 070 0097 01 5 February 2003 ...
Page 6: ...iv ...
Page 9: ...vii ...
Page 10: ...viii ...
Page 15: ...5 ...
Page 16: ...6 ...
Page 23: ...13 ...
Page 25: ...15 AC Master switch AC power in ...
Page 37: ...27 ...
Page 42: ...32 ...
Page 61: ...51 ...
Page 63: ...53 ...
Page 67: ...57 ...
Page 79: ...69 ...
Page 81: ...71 ...
Page 82: ...72 ...
Page 85: ...75 ...
Page 87: ...77 Volume buttons are beneath the panel Volume up Volume down ...
Page 91: ...81 ...
Page 93: ...83 ...
Page 95: ...85 ...
Page 97: ...87 Turns on or off the User curtain immediately without showing a menu ...
Page 99: ...89 ...
Page 100: ...90 ...
Page 103: ...93 ...
Page 113: ...103 ...
Page 121: ...111 ...
Page 128: ...118 ...
Page 135: ...125 ...
Page 138: ...128 ...
Page 143: ...133 Aspect Ratiofor details see page 56 Color Temperaturefor details see page 52 ...
Page 145: ...135 Savefor details see page 66 Recallfor details see page 68 Delete for details see page 70 ...
Page 146: ...136 Misc Controlfor details see page 84 ...
Page 147: ...137 Status Monitorfor details see page 80 ...
Page 149: ...139 ...
Page 153: ...143 ...
Page 157: ...147 ...
Page 159: ...149 ...
Page 163: ...153 ...
Page 164: ...154 ...
Page 174: ...164 ...
Page 175: ...165 ...


