Chapter 2
Getting Started — Attaching/removing the projection lens (optional)
44 - ENGLISH
4)
Align the mark on the projection lens (red) with the protruding mark of the projector, and insert the
projection lens all the way in. (Fig. 4)
5)
While holding the projection lens, turn the lock lever fully to the Lock side. (Fig. 5)
f
Make sure to fully turn the lens lock lever.
f
The light source does not light up when the projection lens is not locked.
6) Secure the projection lens with the supplied lens fixing screw. (Fig. 6)
f
Secure the projection lens to the screw hole on the right of the projection lens using a ball point hex driver.
7) Attach the top slide cover. (Fig. 2)
f
Align the top slide cover with the top slide cover attachment line, and attach it by sliding.
Attention
f
Store the removed dustproof sponge in a safe place.
f
If the projection lens was replaced, execute the [PROJECTOR SETUP] menu
→
[LENS]
→
[LENS CALIBRATION]. (
x
page 69)
f
When installing the projector to a ceiling or in a high location, install the projector after attaching the projection lens to the projector.
Removing the projection lens
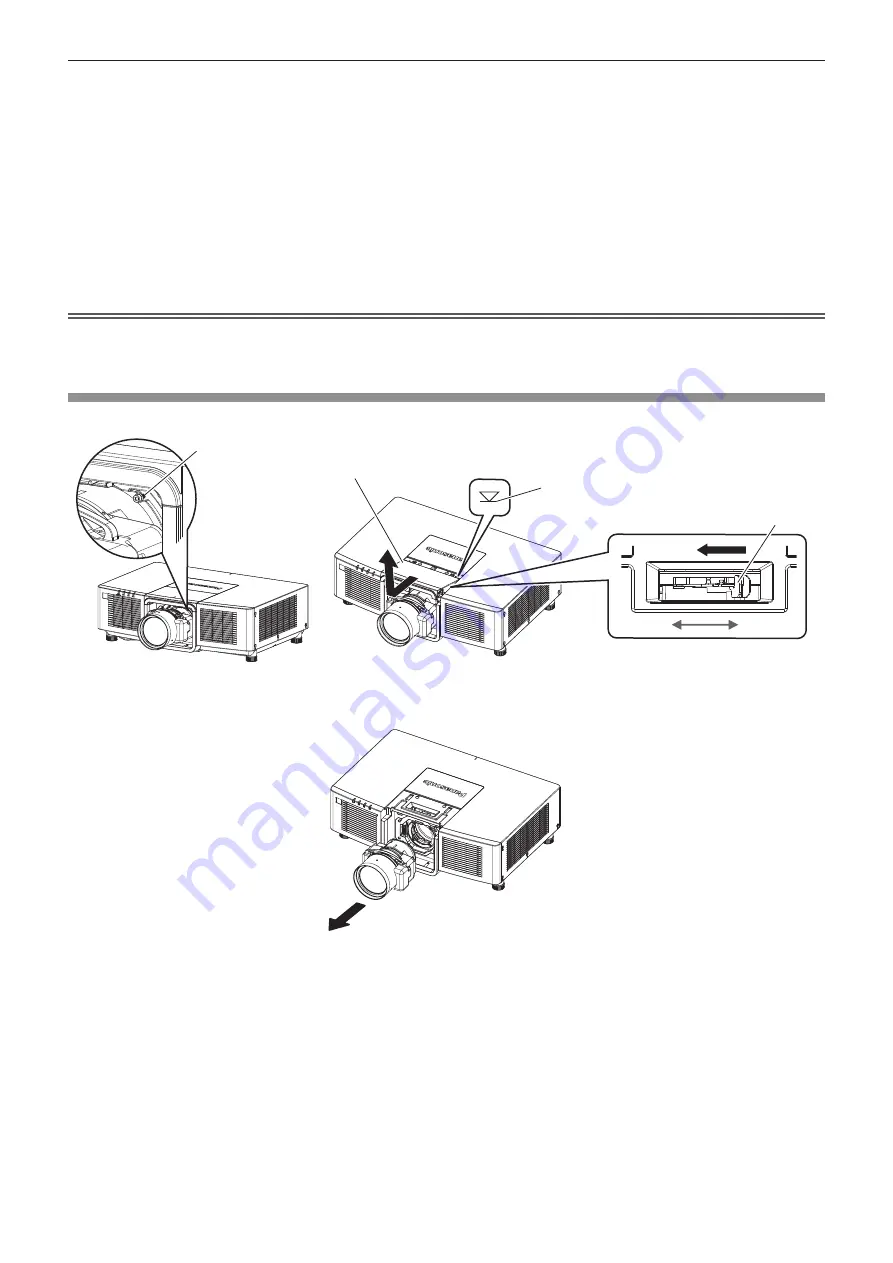
Remove the projection lens using the following procedure.
Lock
Unlock
Top slide cover attachment line
Lens fixing screw
Fig. 4
Fig. 3
Fig. 2
Fig. 1
Lens lock lever
Top slide cover
1) Remove the lens fixing screw. (Fig. 1)
f
Remove the screw on the right of the projection lens using a ball point hex driver.
2) Remove the top slide cover. (Fig. 2)
f
Slide the top slide cover until the top slide cover attachment line is visible.
Once the top slide cover attachment line is visible, remove it by lifting.
3)
While holding the projection lens, pinch the lens lock lever and turn to the Unlock side. (Fig. 3)
4) Remove the projection lens. (Fig. 4)
5) Attach the top slide cover. (Fig. 2)
f
Align the top slide cover with the top slide cover attachment line, and attach it by sliding.


