


14
optics11.com
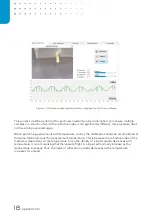
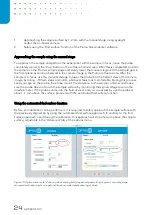
after changing the probe, you can still change those in the Dataviewer software while analyzing the
obtained data.
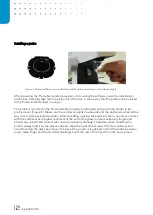
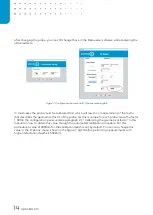
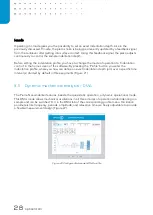
Figure 7: Configure probe menu (left), Options menus (right).
In most cases the probe must be calibrated first, which will result in a measurement of the factor
that describes the geometrical factor of the probe. As this is unique for each probe, leave the factor
1.000 in the configuration panel and see paragraph 2.4
“
Calibrating the geometrical factor
” in this
manual on how to obtain this value through the automated calibration procedure. For this
procedure a value of 4000nm for the calibration depth is set by default. You can can change this
value in the ‘Options’ menu, shown in the figure 7, right before peforming measurements with
higher indentation depths (<5000nm).
Summary of Contents for CHIARO NANOINDENTER
Page 1: ...PIUMA NANOINDENTER USER MANUAL ...
Page 63: ...63 Flowchart Calibration ...
Page 65: ......