


10
optics11.com
2.
PREPARING THE SETUP FOR
MEASUREMENT
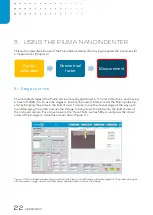
This section describes the steps required to start and prepare the system for a measurement series.
2.1
Starting the system
Powering up the system
Before starting up the setup for the first time, make sure that all cables are connected in the correct
way and the power switches on the back of the boxes are turned on. Switch on the devices in the
following order:
1.
Computer
2.
OP1550 interferometer
3.
Controller box
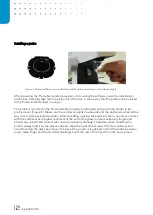
The controller box automatically powers the Piuma Nanoindenter head and the LED illumination in
the indenter head will turn on. After initialization, the interferometer will show a live measurement
signal on the LCD screen.
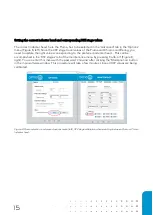
Starting the software
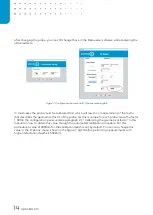
Start the Piuma Nanoindenter program by double-clicking the Piuma software icon on the desktop.
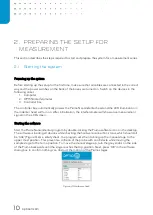
The software is loading all devices while checking the hardware connection status, which should all
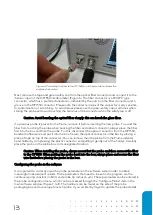
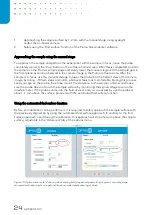
be ‘Idle’ (Figure 4). As a safety c
heck, the program asks then to bring up the manual stage to the
upper most position. This prevents a collision of the probe with an obstacle while moving the
sample stage to the home position. To move the manual stage up, turn the grey knobs on the side
of
the Piuma backwards until the stage reaches the top position. Next, press ‘OK’ in the software
dialog box to confirm nothing can obstruct the motion of the Piuma stages.
Figure 4: Hardware check.
Summary of Contents for CHIARO NANOINDENTER
Page 1: ...PIUMA NANOINDENTER USER MANUAL ...
Page 63: ...63 Flowchart Calibration ...
Page 65: ......