


CHAPTER 1 – Graphics Editor
OMRON
Page 4
Revision 2.0
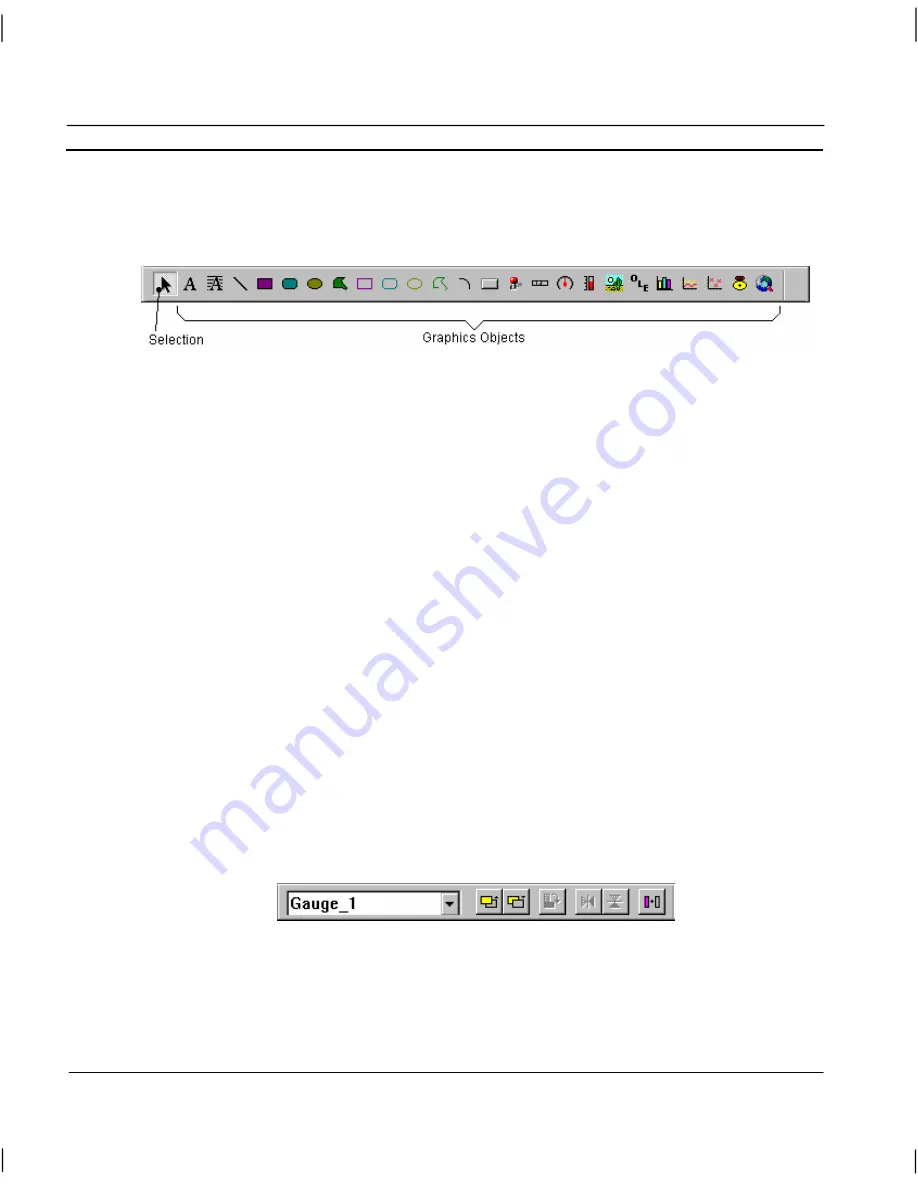
Graphic Object bar
The Graphic Object bar contains the tools to create the graphic objects which can be placed on pages
within CX-Supervisor.
In general terms, the operation of the Graphic Object bar is simple. With a page active the Graphic
Object bar is active, and operation involves merely clicking on the desired tool to select it, and then
clicking and dragging to the appropriate point in the page. This is not the case with the text, polygon
or polyline tools, however the operation of these tools is fully discussed in chapter 4, Objects.
Moving the mouse pointer over any of the tools causes CX-Supervisor to display a tooltip to describe
the tool.
By default, the cursor returns to Selection mode (an arrow) after drawing an object. If you would
prefer it to remain in its current state, clear the
Return to select mode
checkbox in the Editing
Preferences dialog, which is found on the CX-Supervisor file menu.
For further details concerning the tools contained within the Graphic Object bar refer to chapter 4,
Objects.
Control Bar
CX-Supervisor provides a Control Bar containing formatting and object manipulation tools. The
Control Bar can be activated or de-activated from the
View
menu. To activate the Control Bar, select
Control Bar
from the
View
menu; CX-Supervisor places a check mark next to it signifying its active
status. To de-activate it, repeat the procedure (the check mark is removed), and the Control Bar is no
longer displayed. The various tools on the control bar allow the properties of objects to be modified.
A control may be activated with more than one object selected to change a particular attribute of all
of the selected objects, e.g. when all graphical objects on a page are selected and the
Rotate
button is
pushed in and the desired angle specified, all selected objects are rotated.
An illustration of the Control Bar is as follows:
The Control Bar may vary slightly from this according to the display resolution currently in use - the
number of buttons displayed depends on the available space - at higher resolutions more buttons are
displayed.
The Control Bar can be removed from the display at any time by selecting
Control Bar
from the
View
menu.
Summary of Contents for CX-SUPERVISOR - V2.0
Page 2: ...CX Supervisor User Manual Software Release 2 0...
Page 3: ......
Page 5: ...CX Supervisor User Manual OMRON Page ii Revision 2 0...
Page 7: ...CX Supervisor User Manual OMRON Page iv Revision 2 0...
Page 11: ...CX Supervisor User Manual OMRON Page viii Revision 2 0...
Page 13: ...CX Supervisor User Manual OMRON Page x Revision 2 0...
Page 15: ...CX Supervisor User Manual OMRON Page xii Revision 2 0...
Page 17: ...CX Supervisor User Manual OMRON Page xiv Revision 2 0...
Page 19: ...CX Supervisor User Manual OMRON Page xvi Revision 2 0...
Page 21: ...CX Supervisor User Manual OMRON Page xviii Revision 2 0...
Page 23: ......
Page 67: ......
Page 97: ......
Page 137: ...CHAPTER 7 Graphics Library OMRON Page 114 Release 2 0...
Page 183: ...CHAPTER 9 Animation OMRON Page 160 Release 2 0...
Page 215: ......
Page 263: ......
Page 269: ......
Page 274: ...OMRON CHAPTER 16 Connecting to Omron Industrial Components Release 2 0 Page 251...
Page 275: ......
Page 285: ......
Page 319: ......
Page 331: ......
Page 351: ......
Page 359: ...GLOSSARY OF TERMS CX Supervisor User Manual OMRON Page 336 Release 2 0...


