16
Fax operation (Basic)
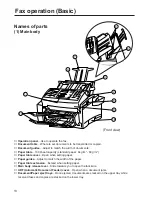
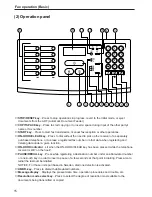
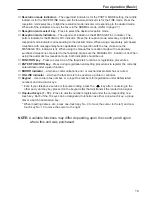
Resolution mode indicators…The uppermost indicator is for the PHOTO MODE setting, the middle
indicator is for the SUPER FINE mode, and the lowermost indicator is for the FINE mode. Press the
resolution mode select key to light the resolution mode indicator corresponding to the desired mode.
When all of the indicators are out, the fax is in the NORMAL mode. (Refer to page 27.)
Reception mode select key…Press to select the desired reception mode.
Reception mode indicators…The uppermost indicator is the MESSAGE TEL. indicator. The
bottom indicator is the MANUAL RX. indicator. Press the reception mode select key to light the
reception mode indicator corresponding to the desired mode. When using a separately purchased
telephone with message telephone capabilities in conjunction with the fax, make sure the
MESSAGE TEL. indicator is lit. When using the manual fax reception mode with a separately
purchased telephone connected to the facsimile, make sure the MANUAL RX. indicator is lit. When
using the automatic fax reception mode, both indicators should be out.
FUNCTION key…Press to select one of the facsimile’s functions or registration procedures.
ENTER FUNCTION key…Press during registration and setting procedures to register the currently
entered data under a given function.
ERROR indicator…Lit when a communications error or mechanical problem has occurred.
ON LINE indicator…Lit when the facsimile is to be used as a printer or scanner.
Keypad…Use to dial a fax number, or to input fax numbers for registration under abbreviated
numbers and one-touch keys.
* Even if your telephone service is for pulse dialling, press the key after connecting to the
other party and any key pressed on the keypad after that will transmit the related tone signal.
One-touch keys (1 - 10)…Press to dial fax numbers registered under the corresponding one-
touch key. Each of the 10 keys can be designated to function as either a one-touch key, a group
dial or a batch transmission key.
* When inputting names, etc., press one-touch key No. 9 to move the cursor to the left, and one-
touch key No. 10 to move the cursor to the right.
NOTE: Available functions may differ depending upon the country and region
where this unit was purchased.
Summary of Contents for OFX 5500
Page 187: ......

