


English
86
7.
Once the cartridge is in place, push the grey lever forward and
down, securing the cartridge and releasing the toner.
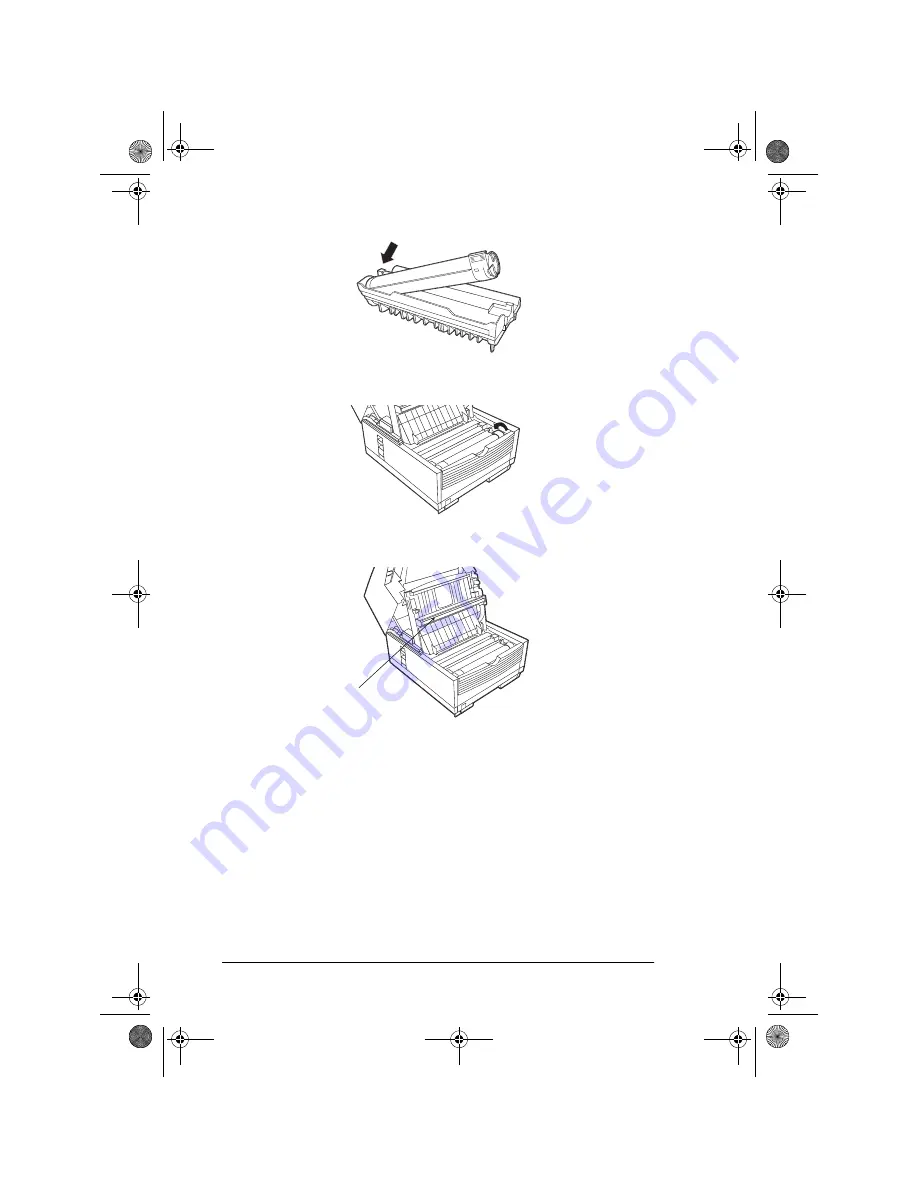
8.
Using the cleaning wipe provided in the package with the new toner
cartridge, gently wipe the full length of the LED array (1).
9.
Close the cover to the image drum compartment pushing down on it
until both latches catch.
10. Return the document tray to its working position.
11. Turn power switch back on.
Image drum unit replacement
If the faxes received become unusually light or have vertical streaks in
them while there is sufficient toner remaining, or if the machine display
shows “CHANGE DRUM SOON”, the machine most likely requires a
new image drum unit.
1
5750GB.book Page 86 Tuesday, June 6, 2000 8:08 PM
Summary of Contents for OKIFAX 5750
Page 1: ...User s Guide English 5750GB book Page i Tuesday June 6 2000 8 08 PM...
Page 14: ...English xiv 5750GB book Page xiv Tuesday June 6 2000 8 08 PM...
Page 32: ...English 18 5750GB book Page 18 Tuesday June 6 2000 8 08 PM...
Page 88: ...English 74 5750GB book Page 74 Tuesday June 6 2000 8 08 PM...
Page 94: ...English 80 5750GB book Page 80 Tuesday June 6 2000 8 08 PM...
Page 114: ...English 100 5750GB book Page 100 Tuesday June 6 2000 8 08 PM...
Page 128: ...English 114 5750GB book Page 114 Tuesday June 6 2000 8 08 PM...
Page 132: ...English 118 5750GB book Page 118 Tuesday June 6 2000 8 08 PM...