


5 Registering from TopAccess
94 Managing Mailboxes
6
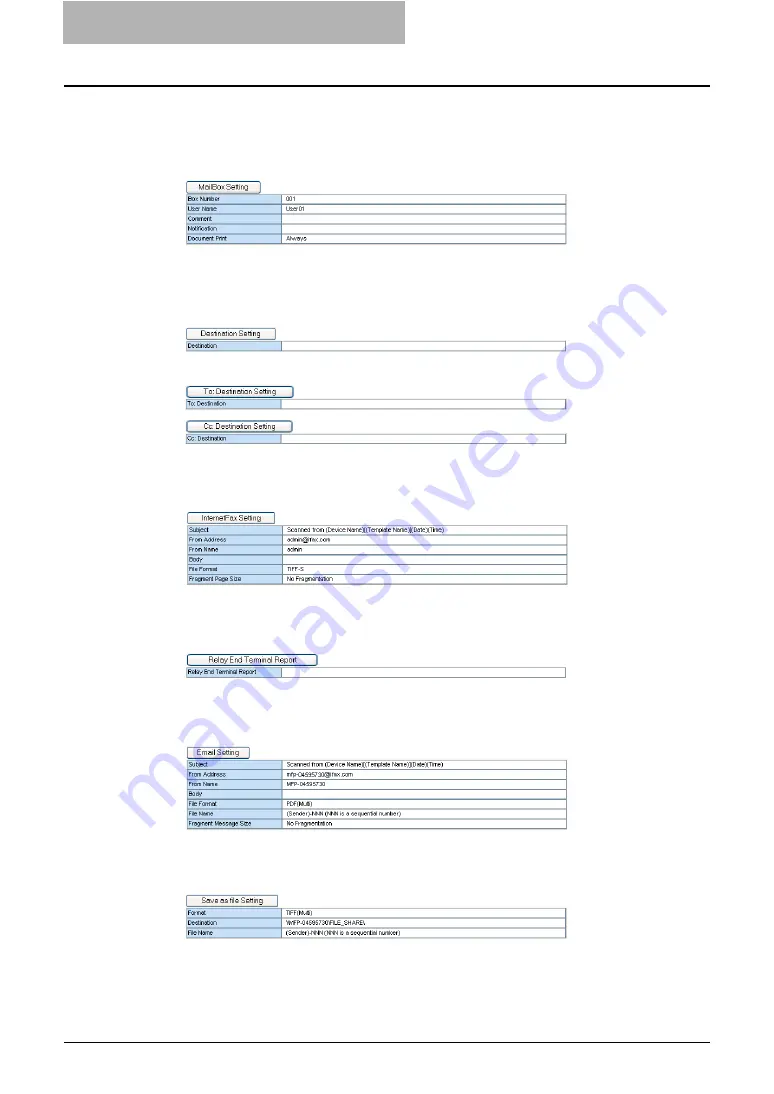
Click each button displayed in the page to set the template proper-
ties.
[MailBox Setting]
— Click this to specify the mailbox settings.
[Destination Setting]
— Click this to specify the destinations to be sent. This can be set
only when creating the Internet/Fax(Relay) agent or Email agent.
P.97 “Destination Setting (Mailbox)”
When Creating the Internet/Fax(Relay) agent:
When Creating the Email agent:
[Internet Fax Setting]
— Click this to specify how the document will be sent. This can
be set only when creating the Internet/Fax(Relay) agent.
P.97 “Internet Fax Setting (Mailbox)”
[Relay End Terminal Report]
— Click this to specify where the transmission result list
will be sent. This can be set only when creating the Internet/Fax(Relay) agent.
P.97 “Relay End Terminal Report”
[Email Setting]
— Click this to specify how the document will be sent. This can be set
only when creating the Email agent.
P.98 “Email Setting (Mailbox)”
[Save as file Setting]
— Click this to specify how the document will be stored in local
hard disk or network folder. This can be set only when creating the Save as file agent.
Summary of Contents for CX 1145 MFP
Page 1: ......
Page 7: ...6 TABLE OF CONTENTS...
Page 23: ......
Page 105: ...6 Managing Counters 104 Viewing Counters 4 The Department Information page opens...
Page 315: ......


