43163501TH Rev.1
78 /
Oki Data CONFIDENTIAL
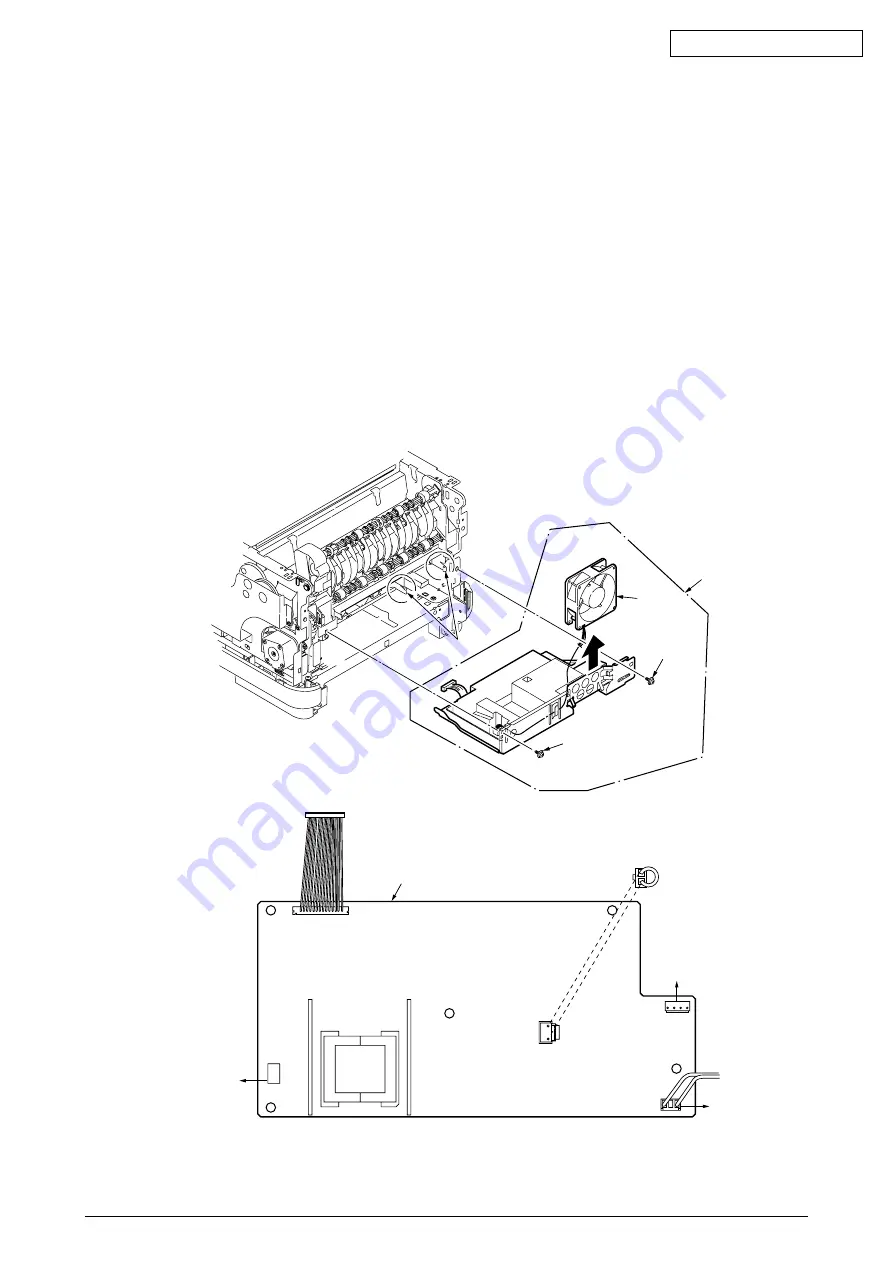
4.2.22 Low voltage power supply/ Low voltage fan
(1)
Remove the left side cover (See Subsection 4.2.1)
(2)
Remove the right side cover (See Subsection 4.2.2)
(3)
Remove the plate shield front (See Subsection 4.2.16)
(4)
Remove a cable connecting the BLA board (main board) with the Low voltage power
supply.
(5)
Detach the rear cover. (See Subsection 4.2.3)
(6)
Remove the two (silver-colored) screws
1
, release claw engagement at the two places, and
pull out the low-voltage power supply
2
to the position at which the AC switch connector and
the fuser interface connector can be removed.
(7)
Remove the AC switch connector and the fuser interface connector and detach the low-
voltage power supply
2
.
(8)
Pull out a connector of the FAN in the direction of the arrow to extract the FAN
3
.
Figure 4-2-22 Low voltage power supply/ Low voltage fan
1
2
1
3
3
CN5
2
CN5
1
CN101
CN102
CN2
PRN PCB
POWER connector
Short-circuit plug for CN5
Claws
Notes!
CN5 : Switching connector for AC input voltage setting
Short-circuit plug to be equipped for 100-V system/Short-circuit plug
not to be equipped for 230-V system
AC switch
Fuser unit I/F connector
Low-voltage power supply
Low-voltage fan


