BEFORE OPERATION
1-13
9
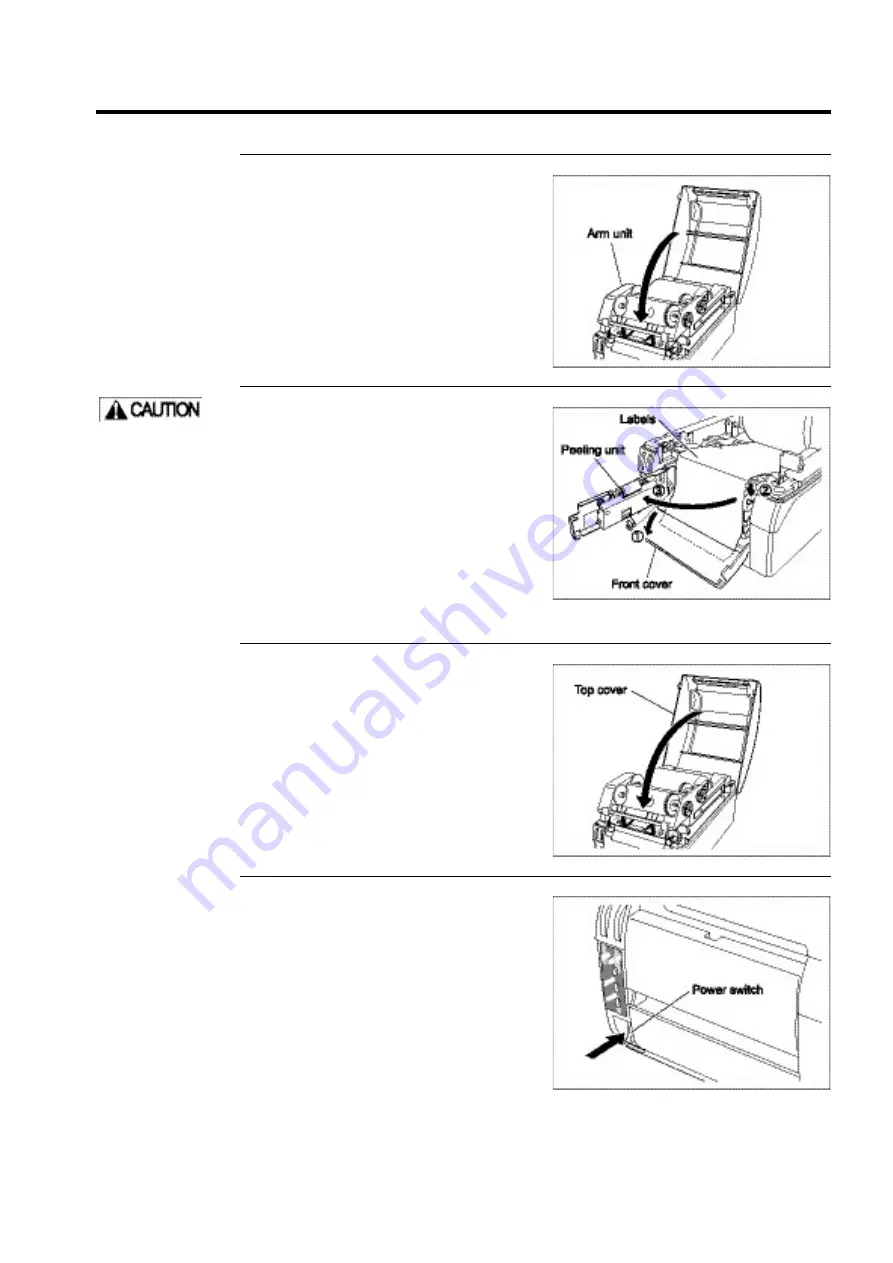
Lock the arm unit.
Lower the arm unit. Then press where it
says "PUSH” on either side to lock the arm
unit.
If the arm unit does not lock the first time,
press “PUSH" again to lock it.
10
If the optional peeling unit has
been installed:
(This step is required only if the peeling unit
has been installed.) If yours is the standard
configuration unit or is equipped with the
simplified cutter unit, skip this step.
Open the front cover and unfold the peeling
arm. Pass the backing paper under the front
cover and reposition the peeling arm as it
was. Gently pull the backing paper so that it
is taut.
11
Close the top cover.
12
Press the power switch to turn
on the printer.
The POWER and ONLINE lights come on;
the printer is now online.
If the discharge port
of the label backing
paper under the front
cover becomes
blocked, the paper
may become wound
around the platen
roller.
Summary of Contents for DURA PRINTER SL
Page 1: ...DURAPRINTER SRs T H E R M A L P R I N T E R I N S T R U C T I O N M A N U A L ...
Page 13: ...PREFACE XII ...
Page 16: ...BEFORE OPERATION 1 3 Rear view Operating panel ...
Page 67: ...MAINTENANCE 4 24 ...
Page 83: ...INSTALLING AND REMOVING THE OPTIONAL UNIT 5 16 ...
Page 89: ...DURA PRINTER SL SETTING TOOL 6 6 ...
Page 97: ...APPENDIX 7 8 ...
Page 98: ...P N A2136E ...


