GB
5
The operating principle of the A924 control unit is based on a posi-
tion control system featuring a magnetic sensor (encoder) incorpo-
rated in the motor. This system detects the degree of rotation of the
shaft and offers positioning and speed adjustment functions that tra-
ditional control systems cannot achieve. Thanks to the motor speed
and torque control, the control unit is able to detect the presence of
an obstacle (“current sensitivity function”). The control unit features a
manoeuvre counter which allows maintenance operations to be
scheduled, is compatible with the radio receivers produced by Nice
and is fitted with an internal battery charger.
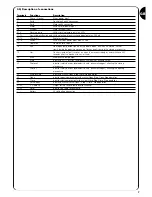
Fig. 1
offers an overall view of the board and indicates the main
components.
2.1) Preliminary checks
Automatic gate and door systems may only be installed
by qualified fitters in the full respect of the law.
Before starting installation:
• Comply with the warnings shown in the “Warnings for fitters” file.
• Make sure that the mechanical stops can stop the door from
moving and that they absorb all the kinetic energy accumulated
during movement without difficulty.
!
A
Secondary transformer 1 connector
B
Motor fuse (F2)
C
Opening manoeuvre current adjustment
D
Closing manoeuvre current adjustment
E
Flashing light, electric block, photocell, service fuse (F3)
F
Secondary transformer 2 connector
G
Microprocessor
H
Radio receiver slot
I
“Open” button
J
“Memory” button
K
“Close” button
L
Aerial terminal and second radio channel
M
Dip Switch programming
N
Dip Switch functions
O
Connector for door controls
P
Input led
Q
Motor/input/output terminals
R
“OK” led
S
Release led
T
Encoder led
U
Battery fuse (F4)
V
Power input terminals
W
Line fuse (F1)
X
Primary transformer connector
Y
Battery led
Z
Battery terminal
A
B
C
D
E
F
G
H
I
J
K
L
M
N
O
P
Q
S
R
T
Q
U
V
W
X
Y
Z
A
B
C
D
2)
Installation
2.2) Mounting the A924 control unit
The unit is supplied in a container which, if appropriately installed,
will guarantee a protection level of IP55 which means it is also suit-
able for surface mounted installation.
How to mount the control unit:
• Install the unit on a permanent surface that is perfectly flat and
adequately protected against knocks, making sure the bottom
remains at least 40 cm from the ground.
• Install cable or pipe leads only at the bottom of the unit; for no
reason whatsoever must the side and top walls be perforated. The
cables must only enter the unit from the bottom!
• Fit the two screws into the relative upper holes by sliding them
along the guide (
fig. 2A
) and partially tighten them. Rotate the con-
trol unit 180° and do the same with the other two screws (
fig. 2B
).
Fix the control unit to the wall.
• Fit the cover as required (opening to the left or right) and press
hard where shown by the arrows (
fig. 2C
).
• To remove the cover, press on the hinge with a screwdriver and
push up (
fig. 2D
).
1) Description of the product
Summary of Contents for Mindy A924
Page 2: ...mindy...
Page 3: ...A924...
Page 19: ...19 Nice reserves the right to modify the products whenever it sees fit...


