ProSafe 7000 Managed Switch Software Administration Manual, Release 8.0.3
Captive Portal
31-9
v1.0, June 2010
CLI: Configuring RADIUS as the Verification Mode
(Netgear Switch ) (Config-CP 1)#radius-auth-server Default-RADIUS-Server
(Netgear Switch ) (Config-CP 1)#verification radius
Web Interface: Configuring RADIUS as the Verification Mode
1.
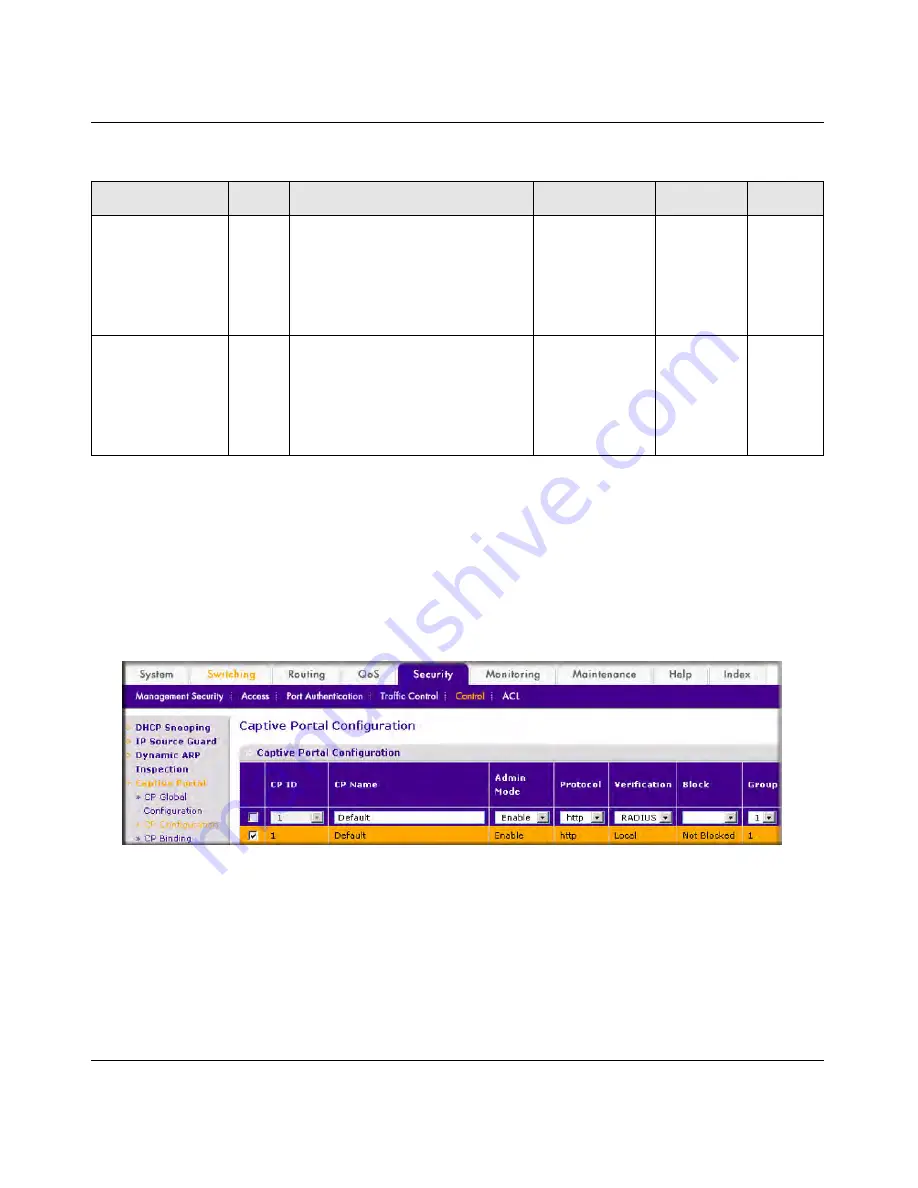
From the main menu, select Security > Control >Captive Portal> CP Configuration. A screen similar to
the following displays.
Figure
31-7
2.
Under Captive Portal Configuration, scroll down to CP ID 1 and select the
CP 1
checkbox. Now CP 1
appears in the CP ID field at the top.
3.
Enter the following information in the Captive Portal Configuration.
•
Select
RADIUS
from the Verification field.
•
In the Radius Auth Server field, enter the radius server name
Default-RADIUS-Server
.
4.
Click
Apply
.
WISPr-Max-
Bandwidth-Up
14122,
7
Maximum client transmit rate (b/s).
Limits the bandwidth at which the
client can send data into the
network. If the attribute is 0 or not
present then use the value
configured for the captive portal.
Integer
Optional
0
WISPr-Max-
Bandwidth-Down
14122,
8
Maximum client receive rate (b/s).
Limits the bandwidth at which the
client can receive data from the
network. If the attribute is 0 or not
present then use the value
configured for the captive portal.
Integer
Optional
0
Table
31-1. RADIUS Attributes for Configuring Captive Portal Users (continued)
RADIUS Attribute No.
Description
Range
Usage
Default


