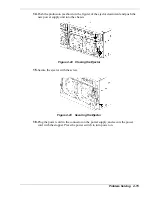
3.
Select the location label corresponding to the location of the defected disk drive
from the location labels provided with the replacement disk drive, and then put the
label on the replacement disk drive.
Location label
Figure 4-25 Location Label
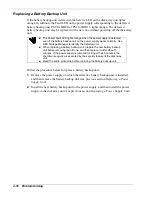
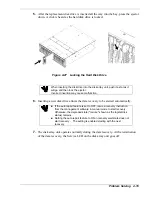
4.
With the ejector of the replacement disk drive opened, engage the upper and lower
guides of the drive with the grooves on the slot and slowly insert the disk drive
completely.
Figure 4-26 Inserting the Hard Disk Drive in the Bay
4-18 Problem
Solving
Summary of Contents for VERSA S1300 Series
Page 1: ... U s e r s G u i d e NEC Storage S1300 ...
Page 2: ......
Page 4: ......
Page 8: ...vi Contents ...
Page 18: ...xvi Using This Guide ...
Page 19: ...1 System Overview Overview System Chassis System Features ...
Page 54: ...A B Figure 2 3 Installing the Rack Mounting Kit 2 6 Setting Up the System ...
Page 73: ...3 Upgrading the System Overview Adding Hard Disk Drives Adding Disk Enclosures ...
Page 86: ...3 14 Upgrading the System ...
Page 114: ...A 8 Appendix ...
Page 117: ...xx ...
Page 118: ... ...

