


UX5000 IP Terminal Features
7 - 20
IP Terminal Features
10.1 Setup
1. Make sure the IP terminal has firmware 92.2.2.0 or higher installed.
2. Download the sample Screen Saver zip file from the NEC Technical
3. Unzip the sample Screen Saver zip file.
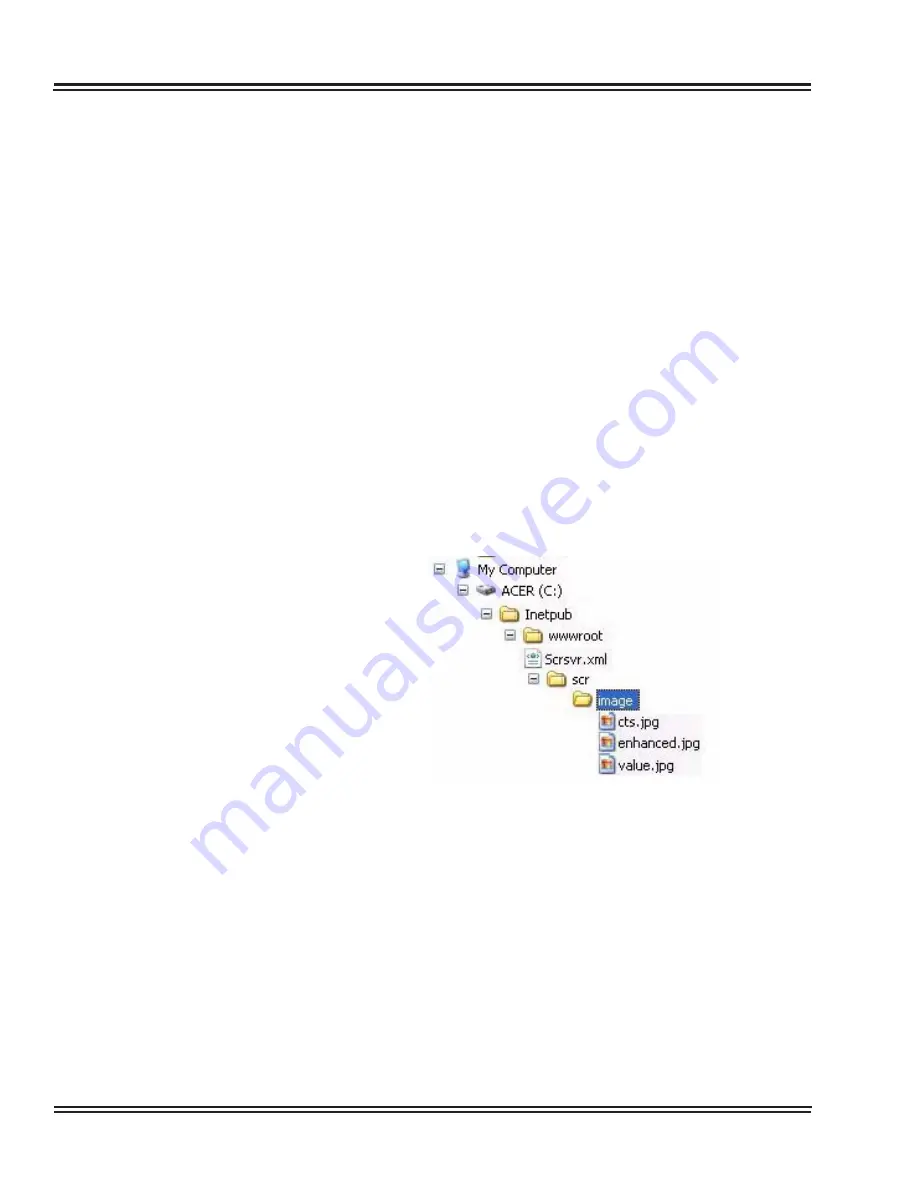
4. Move the SCR folder into the
C:\INETPUB\wwwroot
folder on the server
PC which is used for the XML applications.
◆
The INETPUB folder is created when the IIS service is installed as part
of the XML setup. Refer to the XML Software Application Manual, P/N
0193220, for further details on the initial XML setup.
5. Move the desired graphic for the Screen Saver into the
image
directory
(
C:\INETPUB\wwwroot\scr\image)
.
6. Move the
Scrsvr.xml
file from the SCR folder within the
C:\INETPUB\wwwroot folder and place it in the root of the
wwwroot
folder.
◆
The final directory path should look like this:
Summary of Contents for UX5000
Page 20: ...UX5000 IP Phone Manager 1 8 IP Phone Manager Figure 1 5 Search Results...
Page 30: ...UX5000 IP Phone Manager 1 18 IP Phone Manager Figure 1 15 SwitchPortCtrl Screen...
Page 48: ...UX5000 IP Phone Manager 1 36 IP Phone Manager Figure 1 32 Restore Process Completed...
Page 52: ...UX5000 IP Phone Manager 1 40 IP Phone Manager Figure 1 35 Error Log Process Screen...
Page 58: ...UX5000 IP Phone Manager 1 46 IP Phone Manager...
Page 94: ...UX5000 IP Terminal AutoConfig Setup 2 36 IP Terminal AutoConfig Setup...
Page 190: ...UX5000 IP Data Maintenance 6 46 Data Maintenance Tool THIS PAGE INTENTIONALLY LEFT BLANK...
Page 218: ...UX5000 IP Terminal Features 7 24 IP Terminal Features THIS PAGE INTENTIONALLY LEFT BLANK...


