


29
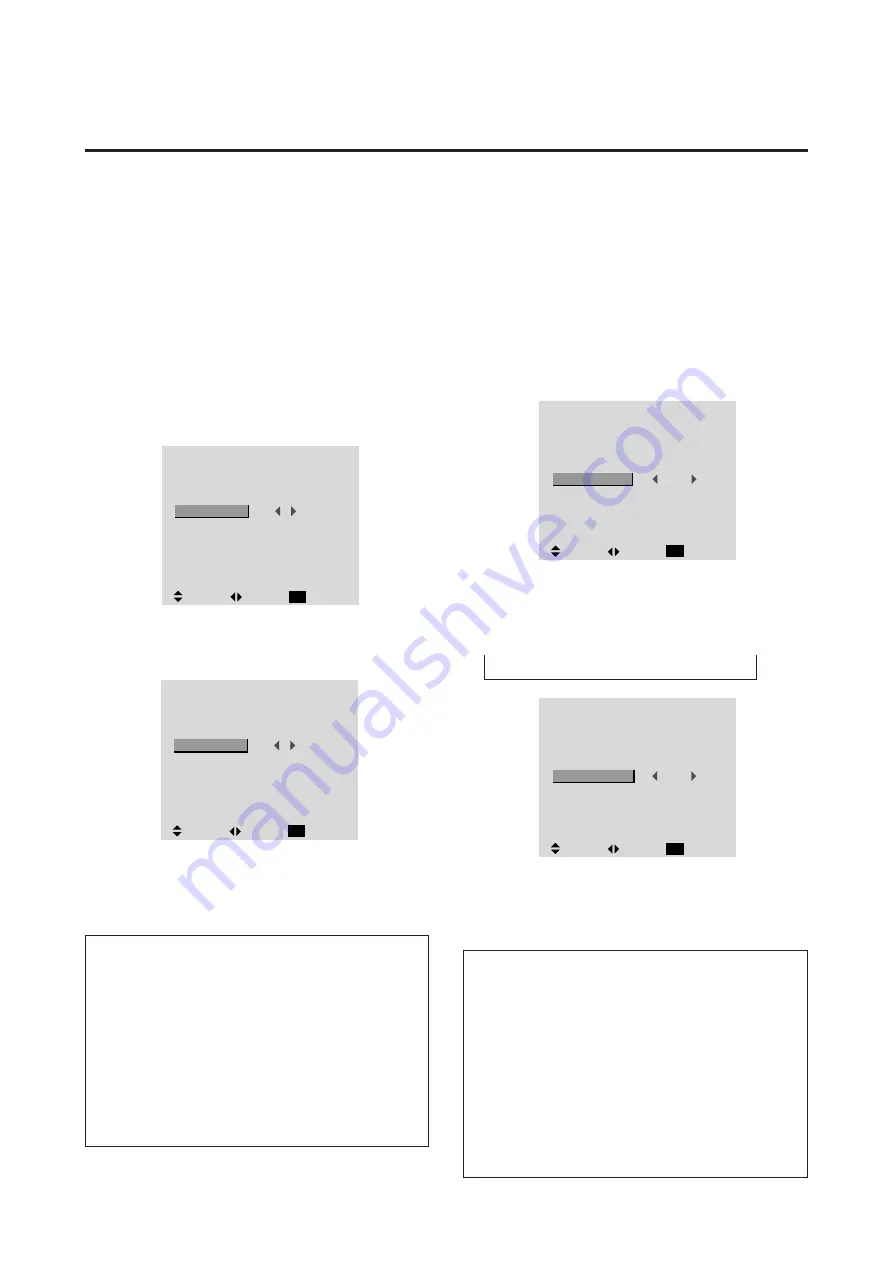
Setting the gray level for the sides of the screen
Use this procedure to set the gray level for the parts on the
screen on which nothing is displayed when the screen is
set to the 4:3 size.
Example: Adjusting the "GRAY LEVEL"
Press the PROCEED button on the remote controller to
display the MAIN MENU on the screen, then...
1. Use the
▲
and
▼
buttons to select “FUNCTION”, then
press the “PROCEED” button.
The “FUNCTION” screen appears.
2. Use the
▲
and
▼
buttons to select “GRAY LEVEL”.
3. To adjust the "GRAY LEVEL"...
Use the
§
and
©
buttons to adjust the GRAY LEVEL.
5. Once the setting is completed ...
Press the “EXIT” button to return to the main menu.
The delete the main menu, press the “EXIT” button
once more.
Information
m
GRAY LEVEL
This adjusts the brightness of the black (the gray level)
for the sides of the screen.
The standard is 0 (black). The level can be adjusted from
0 to 15. The factory setting is 3 (dark gray).
m
Restoring the factory default settings
Select “RESET” under the function menu. Note that this
also restores other settings to the factory defaults.
F U N C T I O N
OSM
OSM ADJ.
POWER MGT
GRAY LEVEL
PLE+INVERSE
CINEMA MODE
RESET
ON
1
OFF
3
AUTO
AUTO
:
:
:
:
:
:
SEL.
ADJ.
RETURN
EXIT
F U N C T I O N
OSM
OSM ADJ.
POWER MGT
GRAY LEVEL
PLE+INVERSE
CINEMA MODE
RESET
ON
1
OFF
9
AUTO
AUTO
:
:
:
:
:
:
SEL.
ADJ.
RETURN
EXIT
Setting the brightness level to the minimum
Locking this mode allows you to dim the picture.
Example: Setting the “PLE+INVERSE” to “LOCK”
Press the PROCEED button on the remote controller to
display the MAIN MENU on the screen, then...
1. Use the
▲
and
▼
buttons to select “FUNCTION”, then
press the “PROCEED” button.
The “FUNCTION” screen appears.
2. Use the
▲
and
▼
buttons to select “PLE+INVERSE”.
3. To set the PLE+INVERSE to "LOCK" ...
Use the
§
and
©
buttons to select “LOCK”.
The mode switches as follows each time the
§
or
©
button is pressed:
AUTO
↔
LOCK
↔
LOCK+ON
↔
AUTO+ON
4. Once the setting is completed ...
Press the “EXIT” button to return to the main menu.
The delete the main menu, press the “EXIT” button
once more.
Information
m
PLE+INVERSE
AUTO ............
Normally set to AUTO.
LOCK ............
Sets the brightness level to the mini-
mum.
AUTO+ON .....
Turns on the inverse function.
LOCK+ON .....
Turns on the inverse function as well
as the lock function.
m
Restoring the factory default settings
Select “RESET” under the function menu. Note that this
also restores other settings to the factory defaults.
F U N C T I O N
OSM
OSM ADJ.
POWER MGT
GRAY LEVEL
PLE+INVERSE
CINEMA MODE
RESET
ON
1
OFF
3
AUTO
AUTO
:
:
:
:
:
:
SEL.
ADJ.
RETURN
EXIT
F U N C T I O N
OSM
OSM ADJ.
POWER MGT
GRAY LEVEL
PLE+INVERSE
CINEMA MODE
RESET
ON
1
OFF
3
LOCK
AUTO
:
:
:
:
:
:
SEL.
ADJ.
RETURN
EXIT
Summary of Contents for PlasmaSync PX-42VM1G
Page 10: ...NEC Technologies PlasmaSync Plasma Monitor User s Manual...
Page 118: ...METHOD OF DISASSEMBLY 7 1 1 Diagonal view of the main unit rear panel...
Page 134: ...MEMO...
Page 137: ...9 1 PACKAGING Packing details A Safety bracket SASSY B 1 Safety bag SASSY...
Page 139: ...D CUSHION CARTON BOX 9 3 PACKAGING...
Page 141: ...9 5 PACKAGING F CARTON BOX OUT...
Page 147: ...CONNECTION DIAGRAMS 11 1...
Page 148: ...BLOCK DIAGRAMS 12 1 MAIN PWB BLOCK...
Page 149: ...BLOCK DIAGRAMS 12 2 VIDEO BLOCK...
Page 150: ...BLOCK DIAGRAMS 12 3 AUDIO BLOCK...
Page 151: ......
Page 152: ......
Page 153: ......
Page 154: ......
Page 155: ......
Page 156: ......
Page 157: ......
Page 158: ......
Page 159: ......
Page 160: ......
Page 161: ......
Page 162: ......
Page 163: ......
Page 164: ......
Page 165: ......
Page 166: ......
Page 167: ......
Page 168: ......
Page 169: ......
Page 170: ......
Page 171: ......
Page 172: ......


