


1. Installing Internal Optional Devices
Express5800/T120h User’s Guide
72
Chapter 2 Preparations
12. See Chapter 2 (2 Installation and Connection) to conduct installation and connection, and turn the power
supply ON.
Identifying processor type
The type of processor installed on the server is displayed simply on the POST.
To view this information and additional processor specifications follow the directions below
1.
Reboot the server.
The server restarts and the POST screen is displayed.
2.
Press <F9> key.
System utility screen appears.
3.
Select
System Information
>
Processor Information
.
More information about the processors installed on the server appears on the screen.
4.
Keep pressing <ESC> until the main menu is displayed.
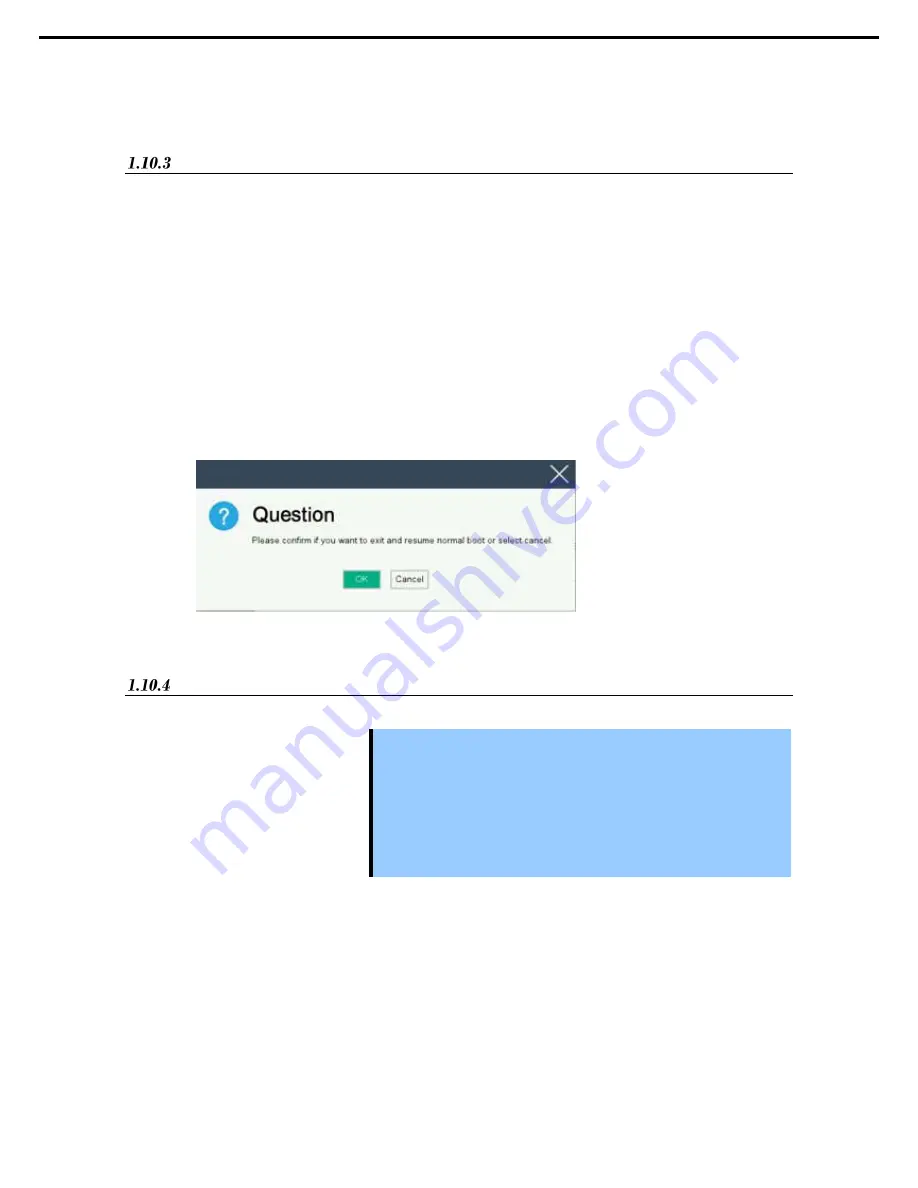
5.
The menu below will appear, select “OK” from the system utility and switch to boot mode.
Removal
Important Do not remove any CPU unless it is failed.
To remove the heat sink from the CPU, first turn the heat sink to the left and
right lightly to make sure that the heat sink can be apart from the CPU.
Removing the heat sink with it adhering to the CPU may cause the CPU
and/or CPU socket to be defected.
In case you take off the CPU but do not fit a protection cover or dummy
cover, the cooling effect declines and the device may break down.
To replace or remove CPU, reverse the installation procedure.
Also follow the steps below if the CPU was removed.
1.
Mount the protective cover to CPU socket.
2.
Remove the redundant fan kit.
3.
Mount the fan blank cover.


