Section 2: PCB Installation and Startup
2-52
Section 2: PCB Installation and Startup
Aspila EX Hardware Man-
Setting Up Extension Circuit Types
Run Program 10-03 to set up extension circuit types as required. The system will automatically detect
and assign most circuit types when the device is connected. Refer to the Software Manual for program-
ming information.
1. Dial 10-03-01.
2. Press HOLD.
3. Select the slot, port or channel (with ESIU PCBs) to be programmed by pressing FLASH.
4. Set the terminal type or option as needed.
Refer to the Software Manual for this information.
If the system has DSS Consoles, Program 30-02 must be used to define DSS extension assign-
ments.
As the system recognizes the extension devices automatically, when replacing the type of device con-
nected, the type must be undefined in Program 10-03 prior to connecting the new device. For example,
if a port was previously used for a system phone and a DSS Console is to be installed in that same port,
it must first be undefined in Program 10-03 before the console is connected.
Saving Your Configuration
When you are done programming, you must be out of a program’s options to exit (pressing the MSG
key will exit the program’s option). Press the SPK key. Any changes made will be saved to the
NTCPU.
1. Press MSG key to exit the program’s options, if needed.
2. Press SPK. You see, "Saving System Data" if changes to were to the system’s programming.
3. The display shows "Complete Data Save" when completed and will exit the phone to an idle
mode.
Upgrading Your Software
1. Insert the PC-ATA card containing the software upgrade into the PCMCIA card slot on the
NTCPU.
2. Push in and hold the Load button.
3. Lift the Reset lever and release.
4. Continue holding the Load button for approximately 3 seconds.
5. Release the Load button.
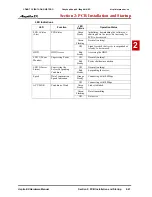
6. Wait until the Status LED’s (LED 0, 2 & 3) on the NTCPU start flashing (approximately 2
minutes), then remove the PC-ATA card.
7. Lift and release the Reset lever to restart the NTCPU.
8. When the system has completed reloading the software, the Status LED will begin flashing on
the NTCPU.
To confirm the new software version has been installed, the system version number can be
viewed by pressing CHECK and then the HOLD key on any display system phone. This can
also be confirmed in Program 90-16-01.
! Important !
To save customer data prior to updating, a blank PC-ATA card is required. Insert the card into
the NTCPU and, using Program 90-03, save the software to the PC-ATA card. (Program 90-
04 is used to reload the customer data if necessary.) Note that a PC-ATA card can only hold
one customer database. Each database to be saved will require its own separate card.
After uploading programming data to the system using Program 90-04, reset the system and
wait a few minutes for the programming to take affect before accessing any lines or special
system features. Otherwise some unusual LED indications may be experienced.
CÔNG TY VIỄN THÔNG VIỆT PRO
Chuyên phân phối tổng đài NEC
http://vietpro.com.vn

