BIOS Setup
7-111
Configuration Choices
Configuration Choice
Settings
Notes
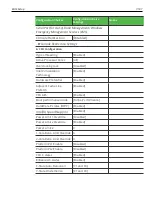
SATA DEVSLEP Idle Timeout
Config
[Disabled]
Serial ATA Port 1/2/3/4/5
Empty
If other Ports are in use
settings have the
possibility of changing. 6
Ports in total.
Software Preserve
Unknown
Port 1/2/3/4/5
[Enabled]
Hot Plug
[Enabled]
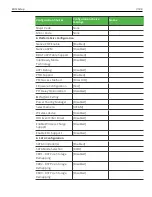
Mechanical Presence
Switch
[Enabled]
External SATA
[Disabled]
Spin Up Device
[Disabled]
SATA Device Type
[Hard Disk Drive]
Topology
[Unknown]
Device Sleep
[Disabled]
SATA DEVSLEP Idle Timeout
Config
[Disabled]
Serial ATA Port 2
Empty
►
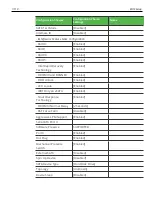
PCI Subsystem Settings
PCI Bus Driver Version
A5.01.08
PCI Latency Timer
[32 PCI Bus Clocks]
PCI-X Latency Timer
[64 PCI Bus Clocks]
VGA Palette Snoop
[Disabled]
PERR# Generation
[Disabled]
SERR# Generation
[Disabled]
Above 4G Decoding
[Disabled]
Don't Reset VC-TC Mapping [Disabled]
►
PCI Hot-Plug Settings
Summary of Contents for POS XR8
Page 1: ...User Guide NCR POS XR8 XR8c 7607 B005 0000 2436 Issue C ...
Page 9: ...vii Touch Screen Cleaning Procedures 141 ...
Page 27: ...Chapter 2 External Connectors Motherboard Release 1 x Release 2 x Display Port Connections ...
Page 28: ...2 18 External Connectors Release 3 x XR8c ...
Page 42: ...2 32 ...
Page 59: ...Hardware Installation 3 49 24V Powered USB and RS232 Cables ...
Page 61: ...Hardware Installation 3 51 24V Powered USB and RS232 Cables ...
Page 70: ...3 60 Hardware Installation NCR 5932 5715 Big Ticket USB Keyboard ...
Page 72: ...3 62 Hardware Installation NCR 5932 6674 POS Compact Alphanumeric USB Keyboard ...
Page 77: ...Hardware Installation 3 67 3 Disconnect the SATA Power connector from the Drive ...
Page 78: ...3 68 Hardware Installation 4 Unscrew the Drive from the Hard Drive chassis Retain the screws ...
Page 79: ...Hardware Installation 3 69 5 Slide the drive out of the chassis bracket ...
Page 80: ...3 70 Hardware Installation 6 Slide in the new drive and secure with the retained screws ...
Page 81: ...Hardware Installation 3 71 7 Connect the SATA Power connector to the Drive ...
Page 82: ...3 72 Hardware Installation 8 Replace the Sled Cover and reconnect power to the terminal ...
Page 92: ...5 82 ...
Page 130: ...7 120 ...
Page 147: ...Configuring a Second HDD for RAID 10 137 7 Select Next ...
Page 152: ...11 142 ...


