3.5 Tool constant settings
+
4
First, align the cursor with the program No., input here the number of a program
which is not currently being used, and press the [Enter] key.
>>This is the number of the program which will now be created for automatically
setting the center of gravity (COG) and weight of tool. An unused number must be
specified here without fail.
It is also possible to input a comment directly from this setting screen.
Align the cursor with the comment field, and press the [ENABLE] + [EDIT] keys.
The soft keyboard appears so that a comment can be registered.
+
5
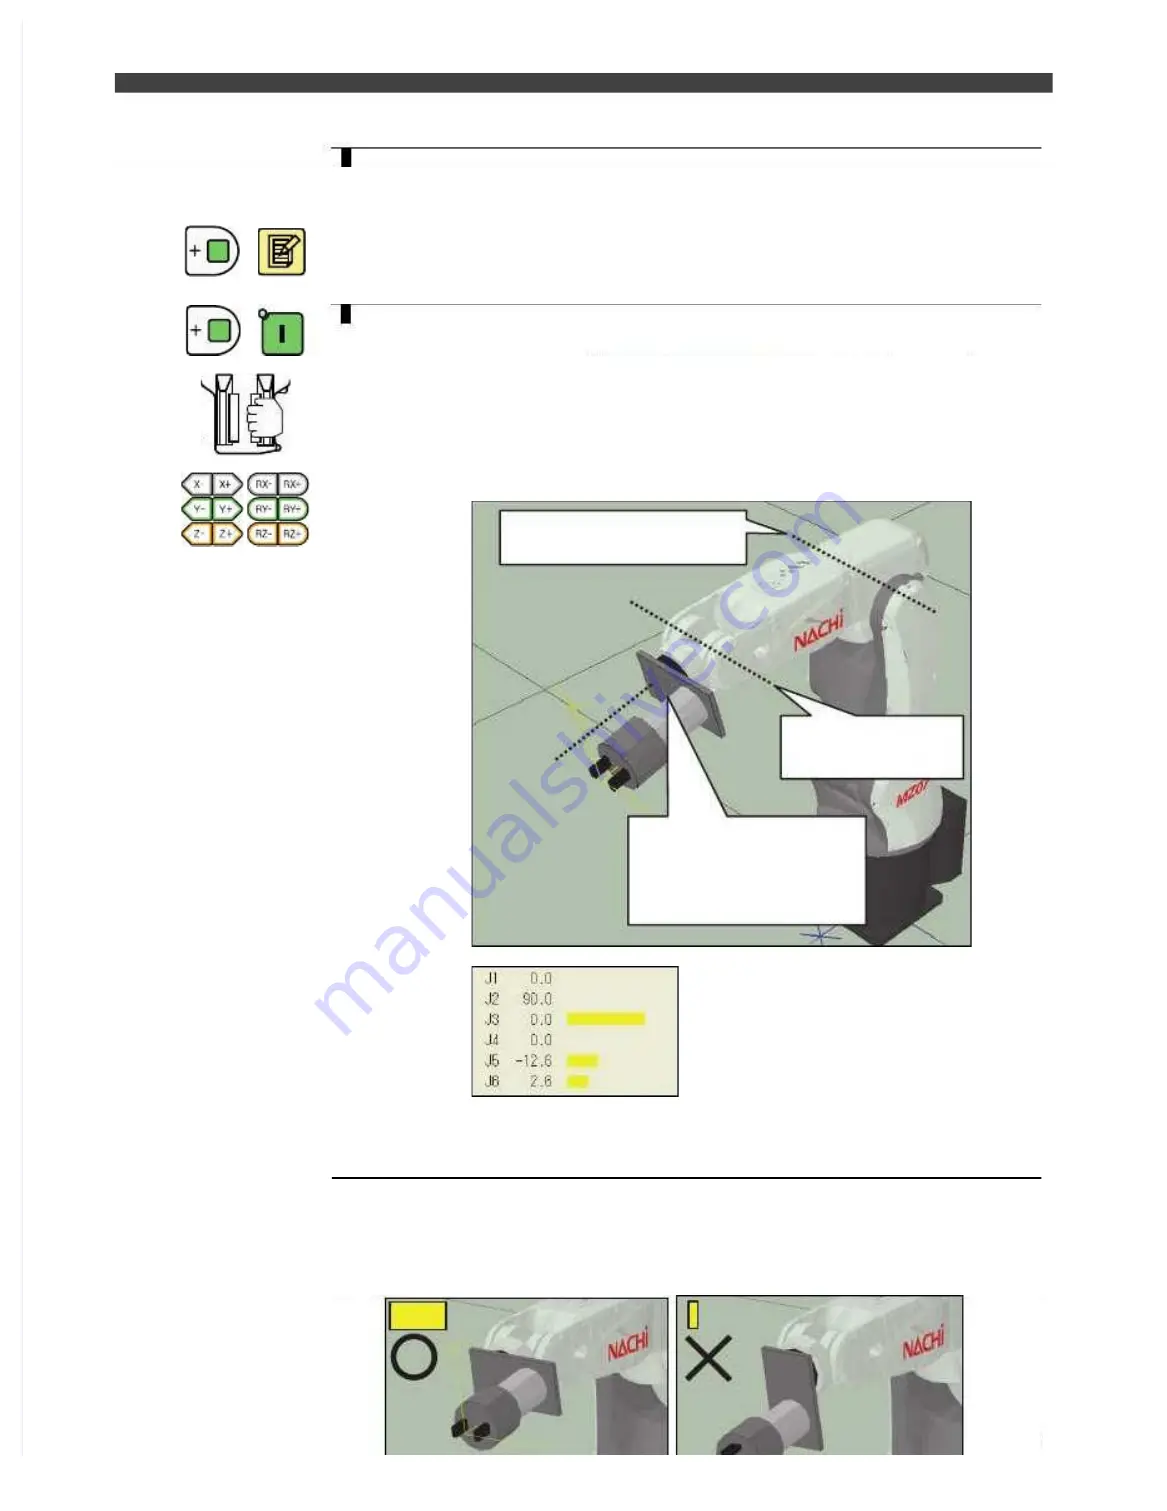
Switch on the motor power, and use the axis operating keys to operate the robot
and set it to a posture in which an unbalanced torque (load resulting from the
effect of the gravity) is applied to the J3, J5 and J6 axes.
>>The posture shown in the figure below, for instance, is ideal. At this time, any
posture may be assumed for the J1 and J2 axes. The torque of each axis is displayed
as a bar graph on the torque monitor at the bottom right of the screen. A posture in
which the bar graph is the longest for the J3, J5 and J6 axes is the ideal one. However,
pay particular attention to the resulting movements of the cables since a posture in
which tension is applied to the application cable or which causes the cables to rub
against the robot body will adversely affect the accuracy.
J3,J5,J6 torque bar should be long
The Torque monitor (bar graph) displays the torque as a ratio to the stalling current of
each axis motor. The higher is this ratio, the greater will be the unbalanced torque
which is applied and the better suited will be the posture to the automatic center of
gravity (COG) and weight of tool settings.
(Supplement for J6 axis)
If the COG (center of gravity) of the tool is not on the rotational center axis of the J6,
please use the posture like the following picture. If the COG in on the rotational center
axis, the angle does not matter.
<OK>Unbalance torque forJ6 is large
<NG> Unbalance torque for J6 is small
J5 is approx.
+/-15[deg]
Add large torque for J6
(The torque can be
checked by the yellow bar)
J3 should be approx. 0[deg]
Summary of Contents for EZ-CFDL Series
Page 2: ......
Page 8: ...Table of Contents NOTE ...
Page 10: ...ぺージあわせのため白文字 白文字のため印刷されないなので気にしないでください 削除しないでください ...
Page 58: ...4 4Interference Territory registration NOTE ...
Page 59: ......
Page 68: ...5 4File transfer FTP server NOTE ...
Page 70: ......
Page 83: ......


