


13
PILOT IGNITION
- Turn the knob to position " pilot on " .
- Press the push button " pilot on " right down and,
holding it pressed, press the piezoelectric lighter
push button at the same time. The pilot flame lights
automatically.
-
The pilot flame can be seen by opening the door.
- Keep the valve push button pressed for 10-15
seconds to heat the thermocouple and then let it
go.
- Repeat this operation if the burner goes out.
MAIN BURNER IGNITION
- Turn the knob to the chosen temperature setting
for cooking.
TURNING OFF
- To switch the main burner off, turn the knob to
position " pilot on " .
- To turn off the pilot push the button " off " , then
release it.
ELECTRIC FRYERS
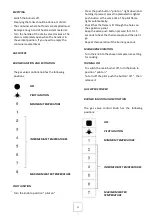
BURNER IGNITION AND EXTINCTION
The control knob has the following positions:
OFF
COOKING TEMPERATURES
SWITCHING ON
Turn the knob to the chosen temperature setting
for cooking.
The green indicator light switches on.
the green lamp indicate that the appliance is
under voltage
The yellow indicator light switches on.
The yellow indicator light switches off when the
oven reaches the set temperature.
TURNING OFF
Turn the knob to position “0”.
12.
PROLONGED DISUSE
Before any prolonged disuse of the appliance,
proceed as follows:
- Clean the appliance thoroughly.
- Rub stainless steel surfaces with a cloth soaked in
vaseline oil to create a protective film.
- Close cocks or main switches ahead of the
appliances.
Following prolonged disuse, proceed as follows:
- Inspect the appliance thoroughly before using it
again.
- Allow electric appliances to operate at the lowest
temperature for at least 60 minutes.
IV.
INSTRUCTIONS FOR CLEANING
13.
REMINDERS FOR CLEANING
READ THIS MANUAL CAREFULLY. IT
PROVIDES IMPORTANT INFORMATION
FOR SAFE INSTALLATION, USE AND
MAINTENANCE OF THE APPLIANCE.
THE MANUFACTURER WILL NOT BE
LIABLE FOR ANY DAMAGE OR INJURY
RESULTING FROM FAILURE TO
OBSERVING THE FOLLOWING RULES.
DISCONNECT THE APPLIANCE ELECTRIC
SUPPLY, IF PRESENT, BEFORE CARRYING
OUT ANY OPERATION.
- Clean the satin finish stainless steel exterior
surfaces, the cooking wells and the surface of the
hotplates every day.
- At least twice a year, have an authorized
technician clean the internal parts of the
appliance.
- Do not use corrosive products to clean the floor
beneath the appliance.
- Do not use direct or high pressure water jets to
clean the appliance.
SATIN FINISH STAINLESS STEEL SURFACES
Summary of Contents for FU 110/40 FRGS13 PW
Page 29: ...29 RU I...
Page 30: ...30 1 PE PP 90...
Page 31: ...31 2 II 3 4 5...
Page 32: ...32 6 10 A1 A1 B21 B21 B11 B11 150 155 300 C 3 2 3 7...
Page 33: ...33 III H05 RN F 150 300 o 100 C 8 TAB1 TAB1 TAB1...
Page 34: ...34 UM A UP Um V UM Z TAB1 UM Z Z A TAB1 V R UP TAB1 R 9 0 1 PP TAB2 III 10...
Page 35: ...35 11...
Page 36: ...36 600 650 H...
Page 37: ...37 10 15 POWER...
Page 38: ...38 10 15 0 12 60 IV 13...
Page 39: ...39 V 14 15 16 17...
Page 40: ...40 18 V UM Z TAB1 UM Z Z A TAB1...
Page 41: ...41 V 19 20...
Page 113: ...113...
Page 114: ...114...
Page 115: ...115...
Page 116: ...116...
Page 117: ...117...
Page 118: ...118...
Page 119: ...119...
Page 120: ...120...
Page 121: ...121...
Page 122: ...122...
Page 123: ...123...
Page 124: ...124...
Page 125: ...125...
Page 126: ...126 VII FIG IMAGE RYSUNKI FIGURER FIGURER BR K FIGURI...
Page 127: ...127...