EN-45
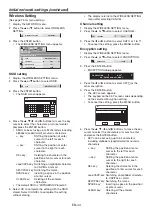
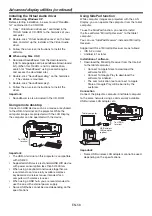
7. Select OK to complete the setting with the
Encryption and KEY stored. Select CANCEL to
complete the setting without storing.
• The display returns to the Wireless Setting menu
after selecting CANCEL.
• The number of characters of KEY varies
depending on the Encryption setting.
• WEP 128bit(ASCII): 13 chars
• WEP 64bit(ASCII): 5 chars
• WEP 128bit(HEX): 26 digits
• WEP 64bit(HEX):
10 digits
• WPA-PSK(ASCII): 8-63
chars
• WPA2-PSK(ASCII):
8-63
chars
• WPA-PSK(HEX): 64
digits
• WPA2-PSK(HEX): 64
digits
• If the entered content is outside character
number range, the KEY screen appears again
after an error dialog is displayed.
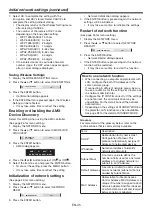
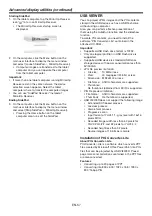
Saving Wireless Settings
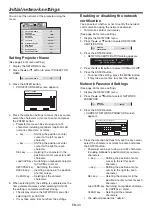
1. Display the WIRELESS SETTING menu.
2. Press the
or
button to select SAVE SETTING.
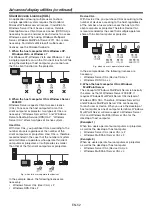
SAVE SETTINGS
OK
3. Press the ENTER button.
• Confi rmation dialog appears.
4. If the ENTER button is pressed again, the Wireless
Setting will be refl ected.
• It may take some time to refl ect the setting.
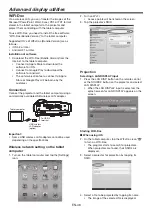
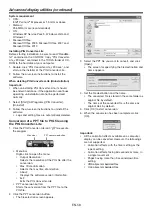
Enabling or disabling the AMX
Device Discovery
Select this setting when using the AMX controller.
(See page 26 for menu setting.)
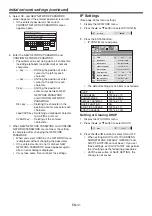
1. Display the NETWORK menu.
2. Press the
or
button to select AMX DEVICE
DISCOVERY.
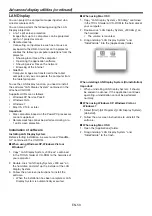
OFF
AMX DEVICE
DISCOVERY
3. Press the ENTER button.
• AMX dialog appears.
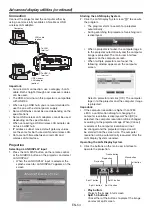
AMX :
CANCEL : MENU
OK : ENTER
OFF
4. Press the
or
button to select ON or OFF .
5. Select the item to set, and press the ENTER button.
• To cancel the setting, press the MENU button.
• It may take some time to refl ect the setting.
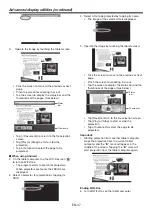
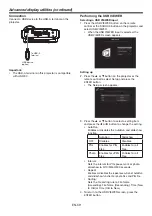
Initialization of network settings
(See page 26 for menu setting.)
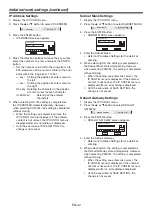
1. Display the NETWORK menu.
2. Press the
or
button to select NETWORK
RESET.
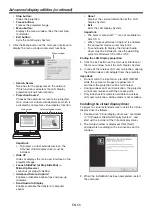
NETWORK RESET
OK
3. Press the ENTER button.
• Network Initialization dialog appears.
4. If the ENTER button is pressed again, the network
settings will be initialized.
• It may take some time to initialize the settings.
Restart of network function
(See page 26 for menu setting.)
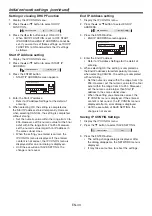
1. Display the NETWORK menu.
2. Press the
or
button to select NETWORK
RESTART.
NETWORK RESTART
OK
3. Press the ENTER button.
• Network Restart dialog appears.
4. If the ENTER button is pressed again, the network
function will be restarted.
• It may take some time to restart the function.
How to use network function
• When connecting a computer and projector with
LAN, confi gure the both IP Addresses in the
same network group.
If connecting in different network group, be sure
to use a router. As for the settings of a router, ask
the network administrator.
• Confi gure the IP CONFIG correctly. If the settings
are not correct, the communication may be
unavailable. For the detail, consult the network
administrator.
• Depending on the settings of STANDBY MODE of
the projector, LAN function may be unavailable.
See page 28 for the detail of STANDBY MODE.
Glossary
For more detail of the glossary below, refer to the
technical book that is commercially available.
Term
Description
DHCP
Abbreviation for Dynamic Host
Confi guration Protocol. This
protocol automatically assigns IP
Address to networked devices.
IP Address
Numerical address to identify
networked computers.
Subnet Mask
A numeric value to defi ne the
number of bits used for a network
address of a divided network (or
subnet) in an IP Address.
Default Gateway
A server (or router) to communicate
across networks (subnets) that are
divided by Subnet Mask.
MAC Address
Abbreviation for Media Access
Control Address. MAC Address is a
unique ID number assigned to each
network adapter. And this is based
on which data are sent and received
between network adapters.
Initial network settings (continued)

