background image

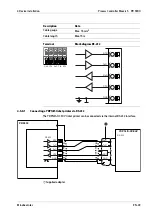
Example:

PR 5900/04

PR 5900/04

RS-485-A

PR 5900

PR 5900

RxD/TxD-P

RxD/TxD-N

A-TxB

A-TxA

A-RxB

A-RxA

GNDI

+ 24 V

GND

DC

DC

1
2
3
4
5
6
7
8

O

N

A

{

S4

S1

S3

S2

120

120

1K6

1K6

K

A

B

J

L

C

H

M

D

G

F

E

L

A

E

G

K

RxD - TxD - P

RxD - TxD - N

GND

RS-485

2

1

3

4

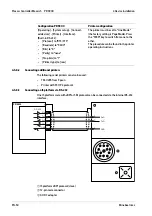
IS platform xBPI protocol (slave)

Half duplex

12-pin male connector

AC/DC adapter

Switch settings

PR 5900

Coniguration PR 5900

ON: S2, S3, S4

OFF: S1

[Operating] - [System setup] - [Weighing points] - [Weighing

point X] - [xBPI scale] - [Interface] - [Option x RS-485-A]

Note:

For further information, see the platform scale operating instructions.

Process Controller Maxxis 5 PR 5900

4 Device installation

EN-62

Minebea Intec

Summary of Contents for Maxxis 5

Page 1: ... 5900 Installation Manual Translation of the Original Installation Manual 9499 050 59000 Edition 6 7 0 08 26 2020 Release 2 26 Minebea Intec GmbH Meiendorfer Str 205 A 22145 Hamburg Germany Phone 49 40 67960 303 Fax 49 40 67960 383 ...

Page 2: ...liied personnel In correspondence concerning this product the type name and release number serial number as well as all license numbers relating to the product have to be cited Note This document is partially protected by copyright It may not be changed or copied and it may not be used without purchasing or written permission from the copyright owner Minebea Intec The use of this product constitut...

Page 3: ...ection 8 2 4 5 RF interference suppression 9 2 4 6 Failure and excessive stress 9 2 4 7 Important note 9 2 4 8 Repairs and maintenance 9 3 Process controller 11 3 1 General notes 11 3 2 Overview of the device 11 3 2 1 Communication protocols 12 3 3 Housing 13 3 3 1 General notes 13 3 3 2 Dimensions 13 3 4 Overview of device front 18 3 5 Overview of connections 19 3 5 1 Plug in cards 20 3 5 2 Appli...

Page 4: ...4 6 3 PR 5900 07 analog input and output 69 4 6 4 PR 5900 10 weighing electronics board 73 4 6 5 PR 5900 12 digital inputs and outputs 83 4 6 6 PR 5900 13 digital inputs and outputs 89 4 6 7 PR 5900 17 digital inputs and outputs 95 4 6 8 ProiBus DP interface 102 4 6 9 DeviceNet interface 106 4 6 10 CC Link interface 110 4 6 11 ProiNet I O interface 112 4 6 12 EtherNet IP interface 117 4 6 13 Ether...

Page 5: ...oltage connection 24 V DC 131 7 4 Efect of ambient conditions 131 7 4 1 Ambient conditions 131 7 4 2 Electromagnetic Compatibility EMC 132 7 4 3 RF interference suppression 132 7 5 Mechanics 132 7 5 1 Design 132 7 5 2 Dimensions 132 7 5 3 Weights 132 7 6 Use in legal metrology 133 7 6 1 Documentation relating to calibration on the CD included 133 7 6 2 Further information 133 8 Appendix 134 8 1 Ce...

Page 6: ... when measures for preventing hazards are not followed DANGER Warning of personal injury DANGER indicates death or severe irreversible personal injury which will occur if the corresponding safety measures are not observed Take the corresponding safety precautions WARNING Warning of hazardous area and or personal injury WARNING indicates that death or severe irreversible injury may occur if appropr...

Page 7: ...he environment may occur if appropriate safety measures are not observed Take the corresponding safety precautions Note User tips useful information and notes 1 6 Hotline Phone 49 40 67960 444 Fax 49 40 67960 474 eMail help minebea intec com 1 Introduction Process Controller Maxxis 5 PR 5900 Minebea Intec EN 5 ...

Page 8: ...uitable measures for self protection The device relects the state of the art No warranty is given that the product is free of faults especially not in conjunction with third party software and hardware components required for operation The manufacturer does not accept any liability for damage caused by third party system components or due to incorrect use of the product The use of this product sig...

Page 9: ... be taken into account at all times With outdoor mounting make sure that adequate weather protection is provided for temperatures see Chapter 7 4 1 2 4 2 Opening the device WARNING Working on the device while it is switched on may have life threatening consequences When removing covers or parts using tools live parts or terminals may be exposed Please note that capacitors in the device may still b...

Page 10: ...from all power sources and wait at least 1 minute Determine and eliminate the cause of the error Reconnect the device to the supply voltage 2 4 3 2 Version 24 V DC This version is designed for UDC 24 V The supply is established via two screw terminals The device is protected against incorrect polarity The device is protected in the line via a fuse see Chap ter 7 3 5 on the back of the device prima...

Page 11: ...ion of the device is not altered to the detriment of safety In particular leakage paths air gaps of live parts and insulating layers must not be reduced Minebea Intec cannot be held responsible for personal injury or property damage caused by a device repaired incorrectly by an operator or installer 2 4 8 Repairs and maintenance 2 4 8 1 General information Repairs are subject to inspection and mus...

Page 12: ...mage from overheating The use of repaired fuses and bypassing the fuse holder is prohibited Only the fuses listed in chapters 7 3 4 and 7 3 5 are permissible Process Controller Maxxis 5 PR 5900 2 Safety instructions EN 10 Minebea Intec ...

Page 13: ...ion Integrated USB 2 0 connection Type A i 200 mA for printer USB stick PC keyboard barcode scanner external splitter hub SD card slot incl SD card Integrated RS 232 interface for e g PC printer or remote display Integrated RS 485 interface for e g PC printer or remote display Can be expanded using the following plug in cards Interface card 2 RS 485 PR 5900 04 Analog I O interface card PR 5900 07 ...

Page 14: ...a a maximum of 4 CAL switches two on the main board and one each on the weighing electronics board Via software 3 2 1 Communication protocols For the internal RS 232 Remote display protocol Printer ModBus protocol xBPI protocol SBI protocol EW Com protocol Field bus slave accessories PR 1721 51 ProiBus DP PR 1721 54 DeviceNet PR 1721 55 CC Link PR 1721 56 ProiNet I O PR 1721 57 EtherNet IP PR 1721...

Page 15: ...see Chapter 3 3 2 3 For blackbox housing for switchbox installation see Chapter 3 3 2 4 3 3 2 Dimensions 3 3 2 1 Control cabinet housing The keypad and the display form one unit with the front A rectangular cut out is required for the installation Cable connections are made at the back of the housing Front view Side view 350 All dimensions in mm 280 172 55 67 92 All dimensions in mm 3 Process cont...

Page 16: ... template and control panel cut out The drilling template shown in a reduced size with control panel cut out is included as an original in the scope of supply 65997 220 91 ø5 ø 7 318 173 All dimensions in mm Process Controller Maxxis 5 PR 5900 3 Process controller EN 14 Minebea Intec ...

Page 17: ...ith the front The cables are fed through entry glands on the bottom of the housing and connected to the electronics Front view Side view turned 350 All dimensions in mm approximations Back view 3 Process controller Process Controller Maxxis 5 PR 5900 Minebea Intec EN 15 ...

Page 18: ... table top housing that comes with a support bracket 2 for wall mounting The housing is ixed in the required position using knurled screws 1 Front view Side view All dimensions in mm Max 38 Process Controller Maxxis 5 PR 5900 3 Process controller EN 16 Minebea Intec ...

Page 19: ...esigned for mounting rail installation 35 mm as per DIN 46277 Cable connections are made at the back of the housing Front view Side view 174 346 All dimensions in mm 76 91 Back view No Description 1 2 1 2 Reset key LED 3 Process controller Process Controller Maxxis 5 PR 5900 Minebea Intec EN 17 ...

Page 20: ... elements 2 Function keys 4 Alphanumeric keypad 5 Indicator keys 6 Application keys 7 Navigation menu keys incl soft keys 8 On of button For a description of the display and operating elements refer to Chapter Display and operating elements in the PR 5900 operating instructions Process Controller Maxxis 5 PR 5900 3 Process controller EN 18 Minebea Intec ...

Page 21: ... 76 EtherNet IP 2 port PR 1721 77 Option 1 Interfaces Option 2 Interfaces Option 1 and or option 2 Serial connections RS 485 2x PR 5900 04 Serial connections RS 232 2x PR 5900 32 One channel can be used for connecting to an IS platform without an external power supply Option 1 and or option 2 Analog inputs outputs PR 5900 07 Option 1 and or option 2 Digital inputs outputs PR 5900 12 PR 5900 13 PR ...

Page 22: ... card SD card slot internal An SD card is used for extra storage and not to transfer data Remote terminal Interface for the re mote terminal CX1 module for the remote terminal PR 5900 6x PR 5900 7x WP A Weighing point A WP B Weighing point B WP A Internal weighing point PR 5900 10 W1 and or WP B Internal weighing point PR 5900 10 W1 or just WP A Internal weighing point with Ex approval PR 5900 10 ...

Page 23: ... see Chapter 4 6 5 Option 1 and or Option 2 PR 5900 13 4 digital inputs 4 digital outputs 4 active opto decoupled inputs 4 relay outputs with potential free change over contacts For more information see Chapter 4 6 6 Option 1 and or Option 2 PR 5900 17 6 digital inputs 8 digital outputs 6 passive opto decoupled inputs 8 passive opto decoupled outputs For more information see Chapter 4 6 7 Option 1...

Page 24: ...e Chapter 4 6 11 Option FB PR 1721 77 EtherNet IP 2 port EtherNet IP with 10 Mbit s and 100 Mbit s auto detection 10 100 HalfDX FullDX For more information see Chapter 4 6 12 Option FB 3 5 2 Application licenses Examples of application licenses Type Function PR 5900 92 PR 1792 OPC server incl AccessIt 2 0 license PR 5900 83 Batching Examples of application packages Counting checkweighing totalizin...

Page 25: ...ackbox housing G4 Note cannot be combined with Y2 Y3 3 3 2 4 Housing backs Designation Code no Description Back plate with cable glands for table top housing L12 Default Back plate with EzEntry 4 and cable glands for table top housing L13 Note cannot be combined with Y2 Y3 EzEntry 4 all dimensions in mm Cable gland 4 3 5 16 5 mm Mounting see supplied installation instructions 3 Process controller ...

Page 26: ...electronics board default PR 5900 10 W2 WP B Weighing electronics board 4 6 4 Analog digital converter PR 5900 10 with Ex approval WE1 WP A Weighing electronics board with intrinsically safe load cell supply for operation of load cells plat forms in zones 1 and 21 Option WE1 additi onal in forma tion Power supply Designation Code no Description Chap L0 110 230 V AC version default 2 4 3 1 Power su...

Page 27: ...ve opto decoupled inputs and 4 relay outputs Digital inputs and outputs PR 5900 13 B27 Option 2 4 active opto decoupled inputs and 4 relay outputs 4 6 6 1 4 6 6 2 B19 Option 1 6 passive opto decoupled inputs and 8 passive opto decoupled outputs Digital inputs and outputs PR 5900 17 B29 Option 2 6 passive opto decoupled inputs and 8 passive opto decoupled outputs 4 6 7 1 4 6 7 2 B14 Option 1 2 seri...

Page 28: ...tions Cable connections Designation Accessories Code no Description PR 5230 30 M39 Ethernet connector RJ 45 plug IP66 Note cannot be combined with Y2 Y3 4 6 13 For internal in terface connection ca ble for network PR 5230 31 M40 Ethernet cable 7 m long metric cable gland RJ 45 plug industry version 4 6 14 X3 Plug connection for internal weighing point WP A Disconnectable plug connecti on X4 Plug c...

Page 29: ...M71 M48 M83 PR 5900 41 Serial cable 9 pins D Sub female connector 6 m M17 M45 M72 M49 M84 PR 5900 42 Serial cable 12 pins Male round connector 6 m M18 M46 M73 M59 M85 PR 5900 43 Serial cable 12 pins Female round connector 6 m M19 M47 M82 M60 M87 PR 5900 44 Other Designation Code no Description See Ex zone approval Y2 ATEX EU zone 2 22 approval CD Ex zone approval Y3 FM approval for class I II II d...

Page 30: ...e consignment make sure that all components are present Safety check inspect all components for damage Make sure that the on site installation is correct and complete including cables e g power cable fuse protection load cells junction box data cables console cabinet etc If necessary install the plug in cards device must be disconnected from all voltage sources Follow all device installation instr...

Page 31: ... cable ends and keep the strands short Connect the screens to the screen clamping rail using screen terminals see Chapter 4 4 1 Establish grounding equipotential bonding between devices system components this is essential for Ex applications see Chapter 4 4 2 4 3 Table top and wall devices 4 3 1 Cable gland and connection The cables have to be fed into the device via glands to ensure leak tightnes...

Page 32: ...n it if necessary Cabling In principle the cables can be taken through all cable glands corresponding to the cable diameters The following igure shows a proposed topology 11 12 6 7 8 9 10 5 4 3 2 1 No Description 1 WP B 1 load cell or junction box 2 USB barcode scanner options M39 N29 3 Equipotential bonding conductor 4 Digital inputs and outputs built in option 1 5 WP A 1 load cell or junction bo...

Page 33: ...t be connected in the metal sleeve 6 of the cable gland Before during and after installation make sure that the sealing ring is seated correctly 1 Unscrew the sleeve screw cap 1 2 Slide the cap 1 and plastic cone 3 onto the cable 2 3 Guide the cable 5 through the gland 6 4 Fold the cable shield 4 over the lower part of the terminal insert 3 approx 10 mm 5 Connect the cable conductors 6 Tighten the...

Page 34: ...screens to the screen clamping rail The screens must be connected to the screen clamping rail using cable clamps as pictured or the supplied screen terminals 4 4 2 Connecting the equipotential bonding conductor 2 1 The equipotential bonding conductor 1 and 2 must be connected as pictured Process Controller Maxxis 5 PR 5900 4 Device installation EN 32 Minebea Intec ...

Page 35: ...tional cards option 1 8 Slot for optional cards option 2 9 Ethernet port internal 10 Connection for RS 485 interface internal 11 Connection for RS 232 interface internal 12 CAL switch 1 see Commissioning Overwrite protection CAL switch in the PR 5900 operating instructions 13 CAL switch 2 see Commissioning Overwrite protection CAL switch in the PR 5900 operating instructions 14 SIL chip 15 Clock b...

Page 36: ...11 14 10 LED Function 1 Load cell supply voltage 9 V 2 Load cell supply voltage 9 V 3 Main supply voltage 24 V 4 5 V 5 5 V bufered 6 60 mA rechargeable battery current illuminates when 13 is charging 7 300 mA rechargeable battery current illuminates when 14 is charging 8 3 3 V 9 3 3 V bufered 10 USB supply 11 to 14 Remote terminal Process Controller Maxxis 5 PR 5900 4 Device installation EN 34 Min...

Page 37: ...100 Mbit s Function tests can be performed via the LEDs green and yellow in the RJ 45 socket Technical data Description Data Connection RJ 45 socket on the device back Green grn lashing on data traic activity Yellow yel lights up when there is an existing connection link Transfer rate 10 Mbit s 100 Mbit s full half duplex auto detection Connection mode Point to point Potential isolation Yes Cable ...

Page 38: ...pter 4 5 4 4 External splitter hub see Chapter 4 5 4 5 CAUTION Data integrity cannot be guaranteed in the case of a power failure when using a USB stick via a splitter HUB Connect the USB stick directly to the USB connection 4 5 4 1 USB stick All commercially available USB sticks can be used 4 5 4 2 External PC keyboard The device has an alphanumeric keypad and a USB connection for an external PC ...

Page 39: ...5 PC keyboard F10 F11 F12 Esc Keys START STOP EXIT C OK Refer to System setup Operating parameters USB keyboard layout in the PR 5900 operating instructions to select the keyboard layout for the connected keyboard German QWERTZ French AZERTY Italian QWERTY Spanish QWERTY English QWERTY 4 Device installation Process Controller Maxxis 5 PR 5900 Minebea Intec EN 37 ...

Page 40: ...anner settings are conigured by scanning the corresponding code see manual We recommend setting 3 redundant read processes to ensure secure read values To conirm each read process via the keypad the automatic CR function of the reader must be switched of 4 5 4 4 Printer The following USB printers can be connected YDP14IS OCEUV EPSON TM U220 and EPSON LQ 300K Line printers Printers with ESC P2 cont...

Page 41: ... for the coniguration and database A copy of the current version of the BIOS irmware and application A copy of the version of the BIOS irmware and application as delivered Manuals You also have the option of saving application data CAUTION The SD card is a ixed component of the device The SD card should only be removed together with the SIL chip during servicing for information on replacing the de...

Page 42: ...d Remote terminal WARNING Warning of hazardous area and or personal injury Using the intrinsically safe interface on a non intrinsically safe device just once can impair and or invalidate the protection type Subsequent use in an intrinsically safe system is only then permitted following a thorough examination by qualiied personnel see also requirement as per IEC 60079 14 Process Controller Maxxis ...

Page 43: ...S PLC or an RS 485 RS 232 converter see Chapter 4 5 7 2 Connecting multiple PR 5900 units to a PC or to an RS 485 RS 232 Converter see Chapter 4 5 7 3 Connecting an IS platform via RS 485 2 wire see Chapter 4 5 7 4 Connecting digital load cells from type Pendeo via RS 485 see Chapter 4 5 7 5 1 2 3 4 5 6 O N RxA RxB TxA TxB GNDI Technical data Description Data Connection Terminal 5 pin Number of ch...

Page 44: ...D TxD N TxA RxB RxA GNDI S4 S1 S5 S3 1K6 1K6 120 120 DC DC S6 1K6 S2 1K6 1 2 3 4 5 6 O N S Function Settings for RS 485 1 Rx bus termination OFF not connected ON RxA 120 Ω RxB 2 Rx pull up resistor OFF not connected ON RxB 1K6 Ω V 3 Rx pull down resistor OFF not connected ON RxA 1K6 Ω V 4 Tx Rx bus termination OFF not connected ON TxA 120 Ω TxB 5 Tx pull up resistor OFF not connected ON TxB 1K6 Ω ...

Page 45: ...s PC via EW Com In terface Built in RS 485 4 5 7 2 Connecting to a PLC or an RS 485 RS 232 converter Point to point connection for the ModBus protocol 2 wire Example RS 485 PR 5900 PR 5900 RxD TxD P RxD TxD N TxB TxA RxB RxA GNDI S4 S1 S2 S3 1K6 1K6 120 120 DC DC 1 2 3 4 5 6 O N S5 1K6 S6 1K6 PLC PLC ModBus RTU master TxB RxB TxA RxA GND 4 Device installation Process Controller Maxxis 5 PR 5900 Mi...

Page 46: ... setup Connected devices ModBus RTU master Interface Built in RS 485 4 5 7 3 Connecting multiple PR 5900 units to a PC or to an RS 485 RS 232 Converter Connection for the EW Com protocol Example Process Controller Maxxis 5 PR 5900 4 Device installation EN 44 Minebea Intec ...

Page 47: ...nected via the RS 485 interface 2 wire RS 485 PR 5900 PR 5900 RxD TxD P RxD TxD N TxB TxA RxB RxA GNDI S4 S1 S2 S3 1K6 1K6 120 120 DC DC S5 1K6 S6 1K6 1 2 3 4 5 6 O N K A B J L C H M D G F E L A E RxD TxD P RxD TxD N GND RS 485 2 1 3 4 IS platform xBPI protocol slave Half duplex 12 pin male connector AC DC adapter Switch settings PR 5900 Coniguration PR 5900 ON S2 S3 S4 S5 S6 OFF S1 Operating Syst...

Page 48: ...s via the xBPI port and the RS 485 interface 2 wire Connections Color code Color Terminal designation Description rd red Supply voltage bu blue Supply voltage gr green B B Signal gy gray A A Signal The following example shows the connection to the PR 6024 68S junction box using 8 digital load cells type Pendeo Process Controller Maxxis 5 PR 5900 4 Device installation EN 46 Minebea Intec ...

Page 49: ... cable gland Screen Equipotential bonding conductor Note For further information see the installation manuals relating to the load cells and junction boxes 4 Device installation Process Controller Maxxis 5 PR 5900 Minebea Intec EN 47 ...

Page 50: ... Connecting a Mettler scale via RS 232 see Chapter 4 5 8 4 GND CTS RxD TxD RTS Technical data Description Data Connection Terminal 5 pin Number of channels 1 Type RS 232 full duplex Transmission rate bit s 300 to 115K2 bit s Parity None odd even Data bits 7 8 Input signal level Logic 1 high 3 to 15 V Logic 0 low 3 to 15 V Output signal level Logic 1 high 5 to 15 V Logic 0 low 5 to 15 V Number of s...

Page 51: ... 8 1 Connecting a YDP14IS ticket printer via RS 232 The YDP14IS OCEUV ticket printer can be connected via the internal RS 232 interface PR 5900 PR 5900 RS 232 TxD RxD CTS GND RTS RxD TxD GND RDY 2 6 8 5 3 YDP 14IS OCEUV YDP 14IS OCEUV RS 232 1 Supplied adapter 4 Device installation Process Controller Maxxis 5 PR 5900 Minebea Intec EN 49 ...

Page 52: ...found in the printer operating instructions 4 5 8 2 Connecting additional printers The following serial printers can also be used TM U295 from Epson Printer with ESC P2 protocol 4 5 8 3 Connecting an IS platform via RS 232 One IS platform scale with xBPI or SBI protocol can be connected via the internal RS 232 interface PR 5900 PR 5900 RS 232 TxD RxD CTS GND RTS K A B J L C H M D G F E E C B TxD R...

Page 53: ...32 interface Example Type XS6002SDR PR 5900 PR 5900 RS 232 TxD RxD CTS GND RTS 5 2 3 7 8 TxD RxD GND CTS RTS 1 Mettler scale type XS6002SDR MT SCIS protocol slave Coniguration PR 5900 Operating System setup Weighing points Weighing point X Mettler Scale Interface Built in RS 232 For the parameter settings for the Mettler scale please refer to System setup Weighing points Mettler Scale Parameters i...

Page 54: ...tal outputs relay outputs 4 relay outputs with potential free change over contacts are permanently built into the device for process control GNDA CH1B CH1O CH1C CH2B CH2O CH2C CH3B CH3O CH3C CH4B CH4O CH4C Process Controller Maxxis 5 PR 5900 4 Device installation EN 52 Minebea Intec ...

Page 55: ... switching current 1 A Switching frequency Max 10 Hz Potential isolation Free relay change over contact Cables Screened Connect the cable screen wire gauge max 1 5 mm2 to the device screen clamping rail Cable length Max 50 m Coding pin Is inserted in the position marked in gray in the image 4 Device installation Process Controller Maxxis 5 PR 5900 Minebea Intec EN 53 ...

Page 56: ...d for free wheel diode Screen clamping rail or cable gland Supply unit UDC 24 V 0 5 A The relay switches when the output is active true To protect the output circuit relays must be equipped with free wheel diodes Process Controller Maxxis 5 PR 5900 4 Device installation EN 54 Minebea Intec ...

Page 57: ...tial free contact Input voltage Passive Logic 0 UDC 0 to 5 V or open Logic 1 UDC 10 to 28 V An external power supply is required Input current 7 mA 24 V 3 mA 12 V Protection against incorrect polarity Input frequency Max 200 Hz 50 ratio Potential isolation Active jointly supplied via potential free voltage Passive via optocoupler Cables Screened Connect the cable screen wire gauge max 1 5 mm2 to t...

Page 58: ...ple Connection Contact input passive order code DE1 Digital input Screen clamping rail or cable gland Supply unit UDC 24 V 0 5 A Process Controller Maxxis 5 PR 5900 4 Device installation EN 56 Minebea Intec ...

Page 59: ... IS platform is connected without an external power supply only one analog weighing electronics unit may be installed in the device The RS 485 interface can be selected and conigured in the Setup menu Using the RS 485 interface is compulsory with a multi point connection Tristate status The RS 485 interface can also be used as a point to point connection The card is inserted in the option 1 and or...

Page 60: ... half duplex 2 wire For external power supply U 24 V 3 W briely up to 6 W Transfer rate 300 to 115 K2 Bit s Signals TxA RxA TxB RxB Potential isolation Yes Cable gauge Max 1 5 mm2 Cable length Max 1000 m Cable type Screened twisted pair e g LifYCY 3x2x0 20 1 pair of wires for ground GND Dimensions LxWxH 50x45x18 mm Weight Approx 35 g Process Controller Maxxis 5 PR 5900 4 Device installation EN 58 ...

Page 61: ...A RxB A TxA A TxB A GNDI 24 V GND 1 2 3 4 5 6 7 8 ON B A B A Coding for option 1 and option 2 Terminal strip Insert the coding pin into the slot in the position marked in gray in the image Terminal Remove nip of the relevant coding nib Note Refer to Chapter 5 2 3 4 for further information on terminal coding 4 Device installation Process Controller Maxxis 5 PR 5900 Minebea Intec EN 59 ...

Page 62: ...5900 04 PR 5900 04 B TxB B TxA B RxB B RxA B GNDI 24 V GND RxD TxD P RxD TxD N S4 120 DC DC A TxB A TxA A RxB A RxA A GNDI 24 V GND S6 1K6 1K6 S1 S3 120 S2 1K6 1K6 B B A A 1 2 3 4 5 6 7 8 ON A B Process Controller Maxxis 5 PR 5900 4 Device installation EN 60 Minebea Intec ...

Page 63: ... Connecting peripheral devices via RS 485 Connecting to a PC or an RS 485 RS 232 converter 4 wire see Chapter 4 5 7 1 Connecting to a PLC or an RS 485 RS 232 converter 2 wire see Chapter 4 5 7 2 Connecting multiple PR 5900 units to a PC or an RS 485 RS 232 converter see Chapter 4 5 7 3 Connecting an IS platform via RS 485 2 wire see Chapter 4 6 1 2 Connecting digital load cells from type Pendeo vi...

Page 64: ... TxD N GND RS 485 2 1 3 4 IS platform xBPI protocol slave Half duplex 12 pin male connector AC DC adapter Switch settings PR 5900 Coniguration PR 5900 ON S2 S3 S4 OFF S1 Operating System setup Weighing points Weighing point X xBPI scale Interface Option x RS 485 A Note For further information see the platform scale operating instructions Process Controller Maxxis 5 PR 5900 4 Device installation EN...

Page 65: ...erface 2 wire Connections Color code Color Terminal designation Description rd red Supply voltage bu blue Supply voltage gr green B B Signal gy gray A A Signal The following example shows the connection to the PR 6024 68S junction box using 8 digital load cells type Pendeo 4 Device installation Process Controller Maxxis 5 PR 5900 Minebea Intec EN 63 ...

Page 66: ... rail or cable gland Screen Equipotential bonding conductor Note For further information see the installation manuals relating to the load cells and junction boxes Process Controller Maxxis 5 PR 5900 4 Device installation EN 64 Minebea Intec ...

Page 67: ...e card is inserted in the option 1 and or option 2 slot A maximum of 2 PR 5900 32 cards can be installed A 24 V B 24 V 1 Technical data Description Data Internal connection Contact strip External connection 2 terminal 7 pin Number of channels 2 Type RS 232 full duplex Transfer rate 300 to 115 K2 Bit s Parity None odd even Data bits 7 8 bit Input signal level Logic 1 high 3 to 15 V Logic 0 low 3 to...

Page 68: ...S B RxD B TxD B RTS B 24 V GND GND A CTS A RxD A TxD A RTS A 24 V GND B A A B 24 V GND B CTS B RxD B TxD B RTS B 24 V GND GND A CTS A RxD A TxD A RTS A 24 V GND B A A B 24 V Coding for option 1 and option 2 Terminal strip Insert the coding pin into the slot in the position marked in gray in the image Terminal Remove nip of the relevant coding nib Note Refer to Chapter 5 2 3 4 for further informati...

Page 69: ...A RxD A CTS GND A RTS A 24 V 24 V GND B B A A 4 6 2 1 Connecting peripheral devices via RS 232 Connecting a YDP14IS ticket printer via RS 232 see Chapter 4 5 8 1 Connecting a Mettler scale via RS 232 see Chapter 4 5 8 4 4 Device installation Process Controller Maxxis 5 PR 5900 Minebea Intec EN 67 ...

Page 70: ...900 32 RS 232 A PR 5900 PR 5900 A TxD A RxD A CTS GND A RTS A 24 V 24 V GND K A B J L C H M D G F E B C E G K RxD 24 V TxD GND GND 2 3 1 IS platform xBPI protocol slave 12 pin male connector AC DC adapter Jumper position Coniguration Channel A A 24 V Operating System setup Weighing points Weighing point X Interface xBPI scale Option x RS 232 A Process Controller Maxxis 5 PR 5900 4 Device installat...

Page 71: ... 5900 07 cards can be installed Technical data Description Data Output Output 1 active current output 0 4 to 20 mA max 24 mA 10 V output voltage via an external 500 Ω resistor Output function Gross Net Display follows or application dependent Output range 0 4 to 20 mA conigurable Output resolution Internal 16 bits 65 536 counts resolution of 20 000 20 mA Output linearity error 0 to 20 mA 0 04 4 to...

Page 72: ... 20 mA measurement input Input resolution Internal 14 bits binary 20 000 counts e g 0 to 20 mA 0 to 10 V Input max error 0 2 Input linearity error 0 02 Input temperature error 75 ppm K Input thresholds 15 i e 1 5 V to 11 5 V Potential isolation Yes joint inputs and outputs Cables 150 m screened Connection Internal connection Contact strip External connection 2 x terminal 6 pin Dimensions L W H 50 ...

Page 73: ... mA Coding for option 1 and option 2 Terminal strip Insert the coding pin into the slot in the position marked in gray in the image Terminal Remove nip of the relevant coding nib Note Refer to Chapter 5 2 3 4 for further information on terminal coding 4 Device installation Process Controller Maxxis 5 PR 5900 Minebea Intec EN 71 ...

Page 74: ... V Iout 0 20 mA AGND AGND Iin 0 20 mA 10 E D A D A DC DC 50 K 25 K 200 E AGND The selection of input current input voltage can be conigured in the application Process Controller Maxxis 5 PR 5900 4 Device installation EN 72 Minebea Intec ...

Page 75: ...ing and to GNDA Number of channels Max 2 cards each with 1 6 wire or 4 wire Load cell supply UDC 12 V symmetrical to zero UDC 6 V Imax 160 mA Capacity number of load cells 75 Ω corresponding to 8 load cells with 650 Ω or 4 load cells with 350 Ω Sense input UDC 6 V with monitoring Measurement input UDC 0 36 mV symmetrical to 0 Dead load suppression UDC max 36 mV dead load range Accuracy 0 8 µV e eq...

Page 76: ...ions LxWxH 85 50 25 mm Weight Approx 60 g 4 6 4 1 Analog connections There are up to 2 connections on the housing rear panel for analog load cells or analog platforms e g CAPP series depending on the model The supply voltage is protected against short circuit and overload Note Do not shorten the load cell cable Connect the prepared cable end and roll up the remaining cable Process Controller Maxxi...

Page 77: ...Connecting a load cell with a 4 wire cable Note The colors listed here apply for the Minebea Intec load cell and connection cables of type PR Color code bk Black bu Blue gn Green gy Gray rd Red wh White For additional information on the connection of load cells and cable junction boxes refer to the corresponding installation manuals 4 Device installation Process Controller Maxxis 5 PR 5900 Minebea...

Page 78: ...quipotential bonding conductor or 4 6 4 3 Connecting a load cell with a 6 wire cable Note The colors listed here apply for the Minebea Intec load cell and connection cables of type PR Color code bk Black bu Blue gn Green gy Gray rd Red wh White For additional information on the connection of load cells and cable junction boxes refer to the corresponding installation manuals Process Controller Maxx...

Page 79: ...ctions are made via cable junction box PR 6130 using connection cable PR 6135 or PR 6136 Note The colors listed here apply for the Minebea Intec load cell and connection cables of type PR Color code bk Black bu Blue gn Green gy Gray rd Red wh White For additional information on the connection of load cells and cable junction boxes refer to the corresponding installation manuals 4 Device installati...

Page 80: ...d cell supply circuit Load resistance of load cell circuit 75 Ω e g 8 load cells of 650 Ω each The supply voltage is ixed at UDC 12 V and protected against short circuits For further technical data see Chapter 7 3 Cable junction box The cable screen is connected to the load cell housing Process Controller Maxxis 5 PR 5900 4 Device installation EN 78 Minebea Intec ...

Page 81: ...ied out with a multimeter Note In the case of an external load cell supply voltage or use of an isolating unit the internal load cell supply is not relevant Measuring voltage 0 12 mV LC with 1 0 mV V 0 24 mV LC with 2 0 mV V V M M V S S V GNDA V 0 V 0 5 V 6 V 0 4 V 6 V 0 4 V 6 V 0 4 V 6 V 0 4 V 4 Device installation Process Controller Maxxis 5 PR 5900 Minebea Intec EN 79 ...

Page 82: ...xt supply should be connected to GNDA to ensure that the voltage reacts symmetrically to 0 The internal supply is not connected Note The colors listed here apply for the Minebea Intec load cell and connection cables of type PR Color code bk Black bu Blue gn Green gy Gray rd Red wh White For additional information on the connection of load cells and cable junction boxes refer to the corresponding i...

Page 83: ... shown here are valid for example for a CAPP4 500 x 400 and a CAPP1 320 x 420 The assignments of cable colors are listed in the relevant weighing platform operating instructions Cable screens should be connected to the screen clamping rail of the device If the measuring lines M M are screened these screens must be connected to the GNDA in the terminal block Cable colors for CAPP1 and CAPP4 Green g...

Page 84: ...4 wire connection from Supply V to Sense S from Supply V to Sense S Meas Meas Supply Sense Sense Supply Ground analog black blue red white GNDA PR 5900 PR 5900 1 2 3 4 5 6 Screen Screen clamping rail or cable gland Equipotential bonding conductor or Process Controller Maxxis 5 PR 5900 4 Device installation EN 82 Minebea Intec ...

Page 85: ...uctor or 4 6 5 PR 5900 12 digital inputs and outputs The plug in card has 4 passive opto decoupled inputs for process control The plug in card also has 4 relay outputs with potential free change over contacts for process control The card is inserted in the option 1 and or option 2 slot A maximum of 2 PR 5900 12 plug in cards can be installed 4 Device installation Process Controller Maxxis 5 PR 590...

Page 86: ...current 7 mA 24 V 3 mA 12 V Protection against incorrect polarity Input frequency Max 200 Hz 50 ratio Output Change over contact Max switching voltage UDC 30 V UAC 24 V Max switching current 1 A Switching frequency Max 0 5 Hz Potential isolation Inputs Yes via optocoupler Outputs Free relay change over contact Cables Screened Connect cable screen to the device Cable length Max 50 m Dimensions L W ...

Page 87: ... CH 2 CH 3 CH 4 2K87 3V0 2K87 3V0 2K87 3V0 2K87 3V0 CH 1 CH 2 CH 3 CH 4 Coding for option 1 and option 2 Terminal strip Insert the coding pin into the slot in the position marked in gray in the image Terminal Remove nip of the relevant coding nib 4 Device installation Process Controller Maxxis 5 PR 5900 Minebea Intec EN 85 ...

Page 88: ... further information on terminal coding Example Connection for PR 5900 12 Digital inputs Screen clamping rail or cable gland UDC 24 V 0 5 A power supply unit Process Controller Maxxis 5 PR 5900 4 Device installation EN 86 Minebea Intec ...

Page 89: ... CH4B CH4O CH4C CH1B CH1O CH1C CH2B CH2O CH2C CH3B CH3O CH3C CH4B CH4O CH4C Coding for option 1 and option 2 Terminal strip Insert the coding pin into the slot in the position marked in gray in the image Terminal Remove nip of the relevant coding nib 4 Device installation Process Controller Maxxis 5 PR 5900 Minebea Intec EN 87 ...

Page 90: ...power output Inductive load for free wheel diode Screen clamping rail or cable gland UDC 24 V 0 5 A power supply unit The relay switches when the output is active true To protect the output circuit relays must be equipped with free wheel diodes Process Controller Maxxis 5 PR 5900 4 Device installation EN 88 Minebea Intec ...

Page 91: ...stance must be 2 2 kΩ 1 kΩ 4 6 6 PR 5900 13 digital inputs and outputs The plug in card has 4 active opto decoupled inputs for process control The plug in card also has 4 relay outputs with potential free change over contacts for process control The card is inserted in the option 1 and or option 2 slot A maximum of 2 PR 5900 13 plug in cards can be installed 4 Device installation Process Controlle...

Page 92: ...tact Input frequency Max 200 Hz Output Change over contact Max switching voltage UDC 31 V UAC 24 V Max switching current 1 A Switching frequency Max 0 5 Hz Potential isolation Inputs Yes via optocoupler Outputs Free relay change over contact Cables Screened Connect cable screen to the device Cable length Max 50 m Dimensions L W H 60 106 22 mm Weight 70 g Process Controller Maxxis 5 PR 5900 4 Devic...

Page 93: ...V0 12 V DC GNDI CH 1 CH 2 CH 3 CH 4 2K87 3V0 12 V DC GNDI 2K87 3V0 12 V DC GNDI 2K87 3V0 12 V DC GNDI 2K87 3V0 12 V DC GNDI Coding for option 1 and option 2 Terminal strip Insert the coding pin into the slot in the position marked in gray in the image Terminal Remove nip of the relevant coding nib 4 Device installation Process Controller Maxxis 5 PR 5900 Minebea Intec EN 91 ...

Page 94: ...pter 5 2 3 4 for further information on terminal coding Example Connection for PR 5900 13 Digital inputs Screen clamping rail or cable gland Process Controller Maxxis 5 PR 5900 4 Device installation EN 92 Minebea Intec ...

Page 95: ... CH4B CH4O CH4C CH1B CH1O CH1C CH2B CH2O CH2C CH3B CH3O CH3C CH4B CH4O CH4C Coding for option 1 and option 2 Terminal strip Insert the coding pin into the slot in the position marked in gray in the image Terminal Remove nip of the relevant coding nib 4 Device installation Process Controller Maxxis 5 PR 5900 Minebea Intec EN 93 ...

Page 96: ...power output Inductive load for free wheel diode Screen clamping rail or cable gland UDC 24 V 0 5 A power supply unit The relay switches when the output is active true To protect the output circuit relays must be equipped with free wheel diodes Process Controller Maxxis 5 PR 5900 4 Device installation EN 94 Minebea Intec ...

Page 97: ...he load resistance must be 2 2 kΩ 1 kΩ 4 6 7 PR 5900 17 digital inputs and outputs The plug in card has 6 passive opto decoupled inputs and 8 passive opto decoupled outputs for process control All inputs and outputs have a common GND The card is inserted in the option 1 and or option 2 slot A maximum of 2 PR 5900 17 plug in cards can be installed 4 Device installation Process Controller Maxxis 5 P...

Page 98: ...4 V 3 mA 12 V Number of outputs 8 CH1 CH2 CH3 CH4 CH5 CH6 CH7 CH8 Output supply voltage Max 24 V 10 external to connector Output voltage drop I_Load 55 Ω 1 V output conducting Output max switching cur rent 25 mA Signals GND common for all inputs and outputs Potential isolation Yes via optocoupler Cables Screened Connect cable screen to the device Cable length Max 50 m Dimensions L W H 52 52 19 mm ...

Page 99: ...4 CH 5 CH 6 GND CH 1 GND CH 2 CH 3 CH 4 CH 5 CH 6 GND Coding for option 1 and option 2 Terminal strip Insert the coding pin into the slot in the position marked in gray in the image Terminal Remove nip of the relevant coding nib 4 Device installation Process Controller Maxxis 5 PR 5900 Minebea Intec EN 97 ...

Page 100: ... further information on terminal coding Example Connection for PR 5900 17 Digital inputs Screen clamping rail or cable gland Power supply unit UDC 24 V 0 5 A Process Controller Maxxis 5 PR 5900 4 Device installation EN 98 Minebea Intec ...

Page 101: ...Example Connection for PR 5900 17 Digital inputs without potential isolation PR 5900 17 PLC Power supply 4 Device installation Process Controller Maxxis 5 PR 5900 Minebea Intec EN 99 ...

Page 102: ...Example Connection for PR 5900 17 Digital inputs with potential isolation PR 5900 17 PLC Power supply Process Controller Maxxis 5 PR 5900 4 Device installation EN 100 Minebea Intec ...

Page 103: ...ND CH2 CH1 CH3 CH4 GND GND Coding for option 1 and option 2 Terminal strip Insert the coding pin into the slot in the position marked in gray in the image Terminal Remove nip of the relevant coding nib Note Refer to Chapter 5 2 3 4 for further information on terminal coding 4 Device installation Process Controller Maxxis 5 PR 5900 Minebea Intec EN 101 ...

Page 104: ...free wheel diodes 4 6 8 ProiBus DP interface The ProiBus DP interface card has the type designation PR 1721 51 Communication protocols and syntax comply with the ProiBus DP standard to IEC 61158 with transfer rates up to 12 Mbit s Connection to the ProiBus is established using the 9 pin D Sub female connector on the back of the device The card is inserted in the FB option slot see Chapter 5 2 3 Pr...

Page 105: ...plemented via the integrated terminating resistor in the ProiBus plug Cable type ProiBus special color violet screened twisted pair cable Cable impedance 150 Ω Cable length The max distance of 200 m can be extended at 1 5 Mbit s by means of an additional repeater Dimensions LxWxH 55x50x22 mm Weight Approx 33 g Certiicates Proibus test center Comdec in Germany and PNO Proibus User Organization Indu...

Page 106: ...NECT For benchtop and wall housing we recommend the D Sub bus plug SUBCON PLUS PROFIB SC2 from PHOENIX CONTACT Allocation of the 9 pin D sub female connector Pin assignment Signal Color Description Housing S Screen 1 Not connected 2 Not connected 3 RxD TxD P positive ac cording to RS 485 specii cation Red Send receive data Data core B D P Process Controller Maxxis 5 PR 5900 4 Device installation E...

Page 107: ... integrated terminating resistors may be used The terminating resistor must be turned on in the last slave 4 6 8 1 LEDs Identii cation Description OP Operating mode LED ST Status LED Operating mode OP LED status Description Comments Of Module is oline No power Constant green Module is online Data exchange is possible 1 Hz lashing green Module is online Module is ready for data exchange 1 Hz lashin...

Page 108: ...by 5 pin terminal The card is inserted in the FB option slot see Chapter 5 2 3 Technical data Description Data Internal connection Pin strip 50 pin External connection 5 pin terminal plug in in the module cover Transfer rate 125 250 and 500 kbit s Protocol DeviceNet Master Slave Polling procedure polled IO CRC error recognition according to IEC 62026 EN 50325 Max 64 station nodes Data width max 51...

Page 109: ...tory of the respective device The current ile is also available to download online http www minebea intec com DeviceNet terminal Allocation of the 5 pin terminal Pin assignment Signal Color Description Cable sheath Special DeviceNet cable certiied 1 V black Negative power supply 2 CAN_L Blue CAN_L bus signal 3 S Cable screen 4 CAN_H white CAN_H bus signal 5 V Red Positive power supply 4 Device ins...

Page 110: ...d green in alternation Self test running Module status MS LED status Description Comments Of Module is not initialized No power Module has the status SETUP or NW_INIT Constant green Module is initialized Normal operation 1 Hz lashing green Missing or incomplete coniguration The device must be set up again Constant red Exception error Module has the status EXCEPTI ON The exception error monitoring ...

Page 111: ...4 6 9 2 Connection diagram for a master with three slaves PR 5900 receives 33 mA from the DeviceNet bus supply 4 Device installation Process Controller Maxxis 5 PR 5900 Minebea Intec EN 109 ...

Page 112: ...ing to IEC 62026 EN 50325 Max 64 station nodes 128 I O bits and 16 32 bit words Coniguration CSPP ile 0x0608_Maxxis_5_1 00_en CSPP Potential isolation Yes optocoupler and DC DC converter Bus termination 110 Ω at the cable ends Bus load 100 mA Cable type 2x2 screened twisted pair Cable length 100 m 10 Mbps 1200 m 156 kbps Dimensions LxWxH 55x50x22 mm Weight Approx 33 g Certiicates Type ABCC CCL CC ...

Page 113: ...0 1 LEDs Identii cation Description RUN LED sequence ERR LED error Sequence RUN LED status Description Comments Of Module is oline No network connection No power Constant green Module is online Network connection exists Normal operation Constant red Exception error Module has the status EXCEPTI ON The exception error monitoring system closes all open connec tions to the module 4 Device installatio...

Page 114: ...onnecting circuitry with transfer rates of 10 and 100 Mbit s The card is inserted in the FB option slot see Chapter 5 2 3 Technical data Description Data Internal connection Pin strip 50 pin External connection One RJ 45 socket PR 1721 56 or two standard RJ 45 sockets PR 1721 76 in the module cover Transfer rate 10 Mbit s and 100 Mbit s Auto detection 10 100 HalfDX FullDX Protocol ProiNet I O Conn...

Page 115: ...ice The current ile is also available to download online http www minebea intec com Note Fieldbus parameters Recommendation for a Siemens S7 for example Fieldbus slave setting Use DHCP on as per the default settings and activate the master as a DHCP server W Allocate IP adr via IO controller NOTICE Slave master device names A unique device name must be assigned out of the master This name is given...

Page 116: ...le status MS LED status Description Comments Of Module is not initialized No power Module has the status SETUP or NW_INIT Constant green Module is initialized Normal operation 1 Hz lashing green Error after test Error occurred after test 2 Hz lashing green This is used for node identiication in the network Constant red Exception error Module has the status EXCEPTI ON The exception error monitoring...

Page 117: ...green Activity There is an Ethernet connection Communication is available PR 1721 76 Identii cation Description NS Network status LED MS Module status LED grn Green lashes when there is data traic activity yel Yellow lights up when there is an existing connection link Network status NS LED status Description Comments Of Module is oline No power No connection to the I O control ler Constant green M...

Page 118: ... lashing red Coniguration error Expected identiication deviates from the available identiication Module status MS LED status Description Comments Of Module is not initialized No power Module has the status SETUP or NW_INIT Constant green Normal operation Module no longer has the status NW_INIT 1 Hz lashing green Diagnostic event Diagnostic event s is are running Exception error Module has the stat...

Page 119: ...1 57 or two standard RJ 45 sockets PR 1721 77 in the module cover Transfer rate 10 Mbit s and 100 Mbit s Auto detection 10 100 HalfDX FullDX Protocol EtherNet IP Connection mode Network Coniguration EDS ile PR 1721 57 sag_5900_ethernetip eds PR 1721 77 min_5900_ethernetip eds Potential isolation Yes Cable type Twisted pairs screened e g patch cable CAT5 Autolink stra ight or crossover Cable impeda...

Page 120: ...LED Network status NS LED status Description Comments Of Module is oline No power No IP address Constant green Module is online One or more connections exist CIP class 1 or 3 1 Hz lashing green Module is online No connection Constant red Critical connection error Duplicate IP address 1 Hz lashing red One or more connections has excee ded the connection time CIP class 1 or 3 Module status MS LED st...

Page 121: ...tus Description Comments Of Module has no connecti on No connection No communication Constant green Module has a connection There is an Ethernet connection No communication Flickering green Activity There is an Ethernet connection Communication is available PR 1721 77 Identii cation Description NS Network status LED MS Module status LED grn Green lashes when there is data traic activity yel Yellow...

Page 122: ...in the idle state Constant red Exception error Module has the status EXCEPTI ON Severe error etc Flashing red Error that can be correc ted The module is conigured but the sa ved parameters are diferent from tho se being used 4 6 12 2 Connection 1 Guide the cable e g patch cable CAT5 into the instrument through the metal sleeve of the cable gland strip the insulation and mount the supplied RJ 45 pl...

Page 123: ...for PR 5230 30 Note For the built in Ethernet interface only 4 6 14 Ethernet cable for PR 5230 31 Note For the built in Ethernet interface only 4 Device installation Process Controller Maxxis 5 PR 5900 Minebea Intec EN 121 ...

Page 124: ...t if necessary 5 2 1 1 Changing the battery for date time The device is equipped with a lithium battery for backing up the time calendar chip If the voltage drops below the speciied minimum or in case of defect the battery must be replaced by Minebea Intec customer service or by an equivalent trained technician For disposal information see Chapter 6 For battery lifespan see Chapter 7 3 1 If the ba...

Page 125: ...nectors The cable screens and grounding equipotential bonding conductor can remain on the screen clamping rail 2 Remove the screws to the housing 3 Carefully remove the housing and set aside 4 Open the bracket 1 and carefully remove the connection card 2 5 Remove both screws 3 6 Carefully loosen and remove the weighing electronics from the pin strip 7 Insert the new weighing electronics into the c...

Page 126: ...rew 6 Fieldbus card 2 Unscrew both screws 3 to loosen the clamp 7 Carefully loosen and remove the plug in card from the pin strip 8 Optional card 4 Insert the new plug in card into the correct pin strip and ix to the connection card 5 with the screw 9 Fieldbus card 2 Insert the new plug in card into the correct pin strip and ix to the connection card 5 with both screws 3 10 Replace the housing car...

Page 127: ...rd has not been installed WP B PR 5900 W1 PR 5900 W1 Weighing elec tronics Weighing elec tronics Internal weighing electronics A and B 5 2 3 4 Terminal coding The relevant plug connections will be coded when delivered according to the combinations speciied when placing the order The plug connections will only need to be coded if plug in cards are supplied subsequently The coding position for each ...

Page 128: ...hip of the old device must also be connected to the new device CAUTION The SD card is a ixed component of the device The SD card should only be removed together with the SIL chip during servicing The SD card may not be used for data transfers 4 Remove nip of the corresponding coding nib 5 from the terminal 6 5 Re insert the terminal 6 into the terminal strip 4 1 To back up the data on the device o...

Page 129: ...t the same time to trigger a cold start for presets see System setup Operating parameters in the PR 5900 operating instructions WP A WP A Max 3000g d 0 1g 0 0 g g 0g 3000g SD card don t belong to this device SD card don t belong to this device Accept SD card without updating software Use SD card to update the software Select this function if the software from the SD card is being transferred from ...

Page 130: ... switch 2 is closed or if the Settings locked parameter is activated whilst W M mode is selected for at least one weighing point WP A WP A Max 3000g d 0 1g 0 0 g g 0g 3000g No database found Do you want to restore the last saved database from the SD card Yes No A selection window opens if no database ile is found in the directory 6 Press the Yes soft key to restore the database from the faulty dev...

Page 131: ...sorted municipal waste so that it can then be recycled Before disposing of or scrapping the product any batteries should be removed and taken to a suitable collection point Please see our T Cs for further information Service addresses for repairs are listed in the product information supplied with the product and on our website www minebea intec com We reserve the right not to accept products that...

Page 132: ...rent number Is increment according to the year group table of Minebea Intec 7 3 General data The following characteristics are valid after a warm up time of at least 60 minutes reference temperature 23 C 7 3 1 Backup for date time The lithium battery for backing up the date time chip is activated before the instrument leaves the factory Device continuously connected to mains voltage up to 10 years...

Page 133: ...07 7 4 Efect of ambient conditions 7 4 1 Ambient conditions Temperature range Ambient temperature for operation 10 50 C Ambient temperature veriiable Ambient temperature in Ex areas 10 40 C Power on temperature 0 C Limits for storage transport 20 70 C Moisture 95 non condensing acc to IEC 60068 2 Protection class Control cabinet housing IP65 back IP20 Blackbox housing IP20 Table top housing IP65 W...

Page 134: ...quency coupling 0 15 80 MHz EN 61000 4 6 10 V Voltage dips EN 61000 4 11 0 40 70 20 200 500ms Mains inputs Mains failure link EN 61000 4 11 20 ms 7 4 3 RF interference suppression Interference emission EN 55011 Group 1 Limit class A for industrial sectors 7 5 Mechanics 7 5 1 Design Control cabinet housing made of stainless steel Blackbox housing made of stainless steel Table top housing made of st...

Page 135: ...issioning Overwrite protection CAL switch in the PR 5900 operating manual Ensure that the parameter settings see System setup Weighing points Internal weighing point Parameters in the PR 5900 operating manual selected comply with the legal requirements as well as the provisions of EC type approval certiication The party installing the scale is responsible for selecting legally permissible settings...

Page 136: ...t no 1 EU Declaration of Conformity MEU17032 2 Declaration of Conformity MDC17004 3 EC type approval Certiicate NMi T7884 The documents listed in the table can be found on the PR 5900 CD Process Controller Maxxis 5 PR 5900 8 Appendix EN 134 Minebea Intec ...

Page 137: ......

Page 138: ...Published by Minebea Intec GmbH Meiendorfer Strasse 205 A 22145 Hamburg Germany Phone 49 40 67960 303 Email info minebea intec com www minebea intec com ...

Reviews: