Description of the “Data Acquisition” View
Page 56
-
Display extended information of a point: Press the correspondent button (see Fig. 4.10) to acti-
vate or deactivate the "Pipette" mode. Press the left mouse button on the desired point. The infor-
mation for the point will now be displayed in a tooltip next to the mouse pointer.
Fig. 4.10: "Pipette" button
-
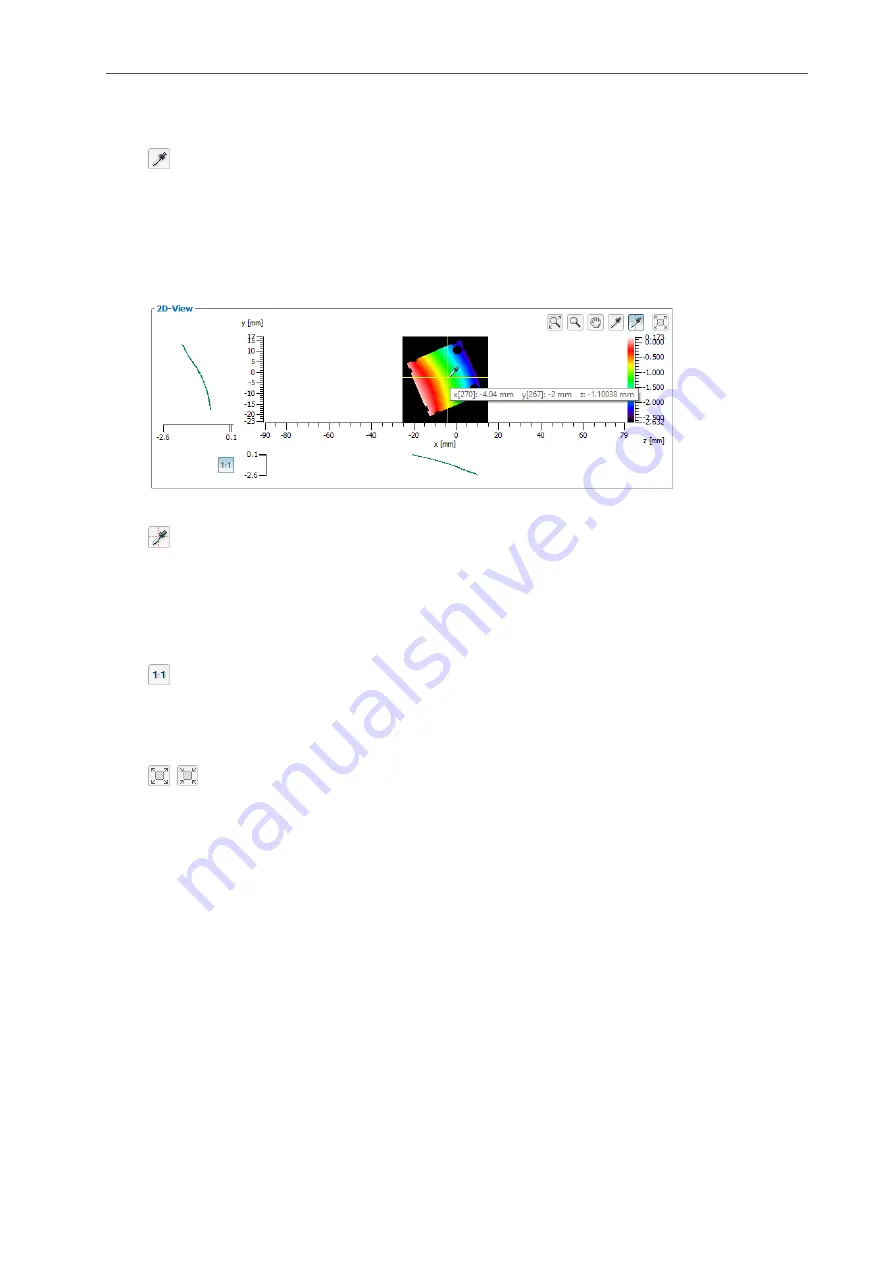
Profile mode: 3DInspect offers the possibility to display the height information along the X and Y
axis at a defined point as profile section (see Fig. 4.11). Press the "Profile" button (see
Fig. 4.12) in order to activate the profile mode. Press the left mouse button on the desired point.
The information for the point will now be displayed in a tooltip next to the mouse pointer and the
profile section will be displayed under and accordingly next to the respective axis.
Fig. 4.11: "Profile mode" view
Fig. 4.12: "Profile" button
To compare the profile evaluation along the X and Y axis, press the "Keep z scaling for row and col-
umn data" button (see Fig. 4.13). Activating this option both profile views are scaled equally in z
direction. Deactivating this option the scaling is adapted separately in both profile views to the ac-
tual values in z direction.
Fig. 4.13: "Keep z scaling for row and column data" button
-
Maximize 2D-View: 3DInspect offers the possibility to maximize the 2D-View. Press the button
"Maximize 2D-View" or "Restore 2D-View" (see Fig. 4.14).
Fig. 4.14: "Maximize/Restore 2D-View" button
Summary of Contents for reflectCONTROL RCS
Page 1: ...3DInspect 1 1 Instruction Manual ...
Page 25: ...Working with 3DInspect Page 25 ...
Page 72: ...Description of the Data Preprocessing View Page 72 ...
Page 74: ...Description of the Data Preprocessing View Page 74 ...
Page 129: ...Appendix Page 129 ...
Page 133: ......


