35
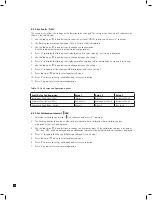
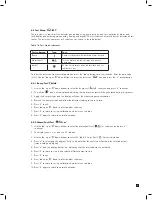
8.2.5 Set Date and Time ‘timE’
1. Select the set date and time ‘timE’ submenu and press ‘
✓
’ to accept.
2. The flashing display will show the current date format mm:dd or dd:mm.
3. Use the ‘
▲
’ up or ‘
▼
’ down buttons to change the date format.
4. Press ‘
✓
’ to display the flashing current year setting.
5. Use the ‘
▲
’ up or ‘
▼
’ down buttons to change the year setting (between 2003 and 2030).
6. Press ‘
✓
’ to display the flashing current month setting.
7. Use the ‘
▲
’ up or ‘
▼
’ down buttons to change the month setting (between 1 and 12)
8. Press ‘
✓
’ to display the flashing current day setting.
9. Use the ‘
▲
’ up or ‘
▼
’ down buttons to change the day setting (between 1 and 31)
10. Press ‘
✓
’ to display the flashing hours of current time.
11. Use the ‘
▲
’ up or ‘
▼
’ down buttons to change the hours setting (between 00 and 23).
12. Press ‘
✓
’ to display the flashing minutes of current time.
13. Use the ‘
▲
’ up or ‘
▼
’ down buttons to change the minutes setting (between 00 and 59).
14. Press ‘
✓
’ to update the changes (UPdt displayed) and return to step 1.
15. Press ‘
▲
’ up or ‘
▼
’ down to select another submenu.
16. Press ‘X’ to return to set-up, calibration and test menu selection.
17. Press ‘X’ again to return to normal operation.
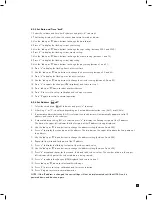
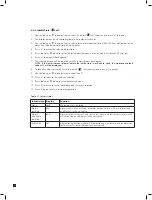
8.2.6 Set Address ‘
nET’
1. Select the set address ‘
nEt’ submenu and press ‘
✓
’ to accept.
2. A flashing ‘n’ or ‘Y’ is displayed depending on if auto address detection is on (AU Y) or off (AU n).
3. If automatic address detection (AU Y) is selected then the detector will automatically appoint a valid IP
address and return to the submenu.
4. If manual address setting (AU n) is selected press ‘
✓
’ to display the flashing first part of the IP address.
The dot on the upper left indicates that the first part of the IP address is being displayed.
5. Use the ‘
▲
’ up or ‘
▼
’ down buttons to change the address setting (between 0 and 255)
6. Press ‘
✓
’ to display the second part of the address. The two dots on the upper left indicate the 2nd portion of
the address.
7. Use the ‘
▲
’ up or ‘
▼
’ down buttons to change the address setting (between 0 and 255).
8. Repeat for the third and forth parts of the IP address.
9. Press ‘
✓
’ to display the flashing first part of the sub net mask value.
10. Use the ‘
▲
’ up or ‘
▼
’ down buttons to change the address setting (between 0 and 255).
11. Press ‘
✓
’ accept and repeat for the second, third and forth sub net values. The number of dots in the upper
left indicates which part of the sub net address is being viewed.
12. Press ‘
✓
’ to update the changes (UPdt displayed) and return to step 1.
13. Press ‘
▲
’ up or ‘
▼
’ down to select another submenu.
14. Press ‘X’ to return to set-up, calibration and test menu selection.
15. Press ‘X’ again to return to normal operation.
NOTE: If the IP address is changed the new settings will not be implemented until the MIDAS
®
unit is
powered down and back on again.

