55
route number appears. In this example, however, we’ll use route number
one.
Beneath the route number is the route name menu. If you wish to name
the route, highlight the “NAME” field, then press the right arrow key. Use
the arrow keys to name the route, then press the ENT key when you’re
finished.
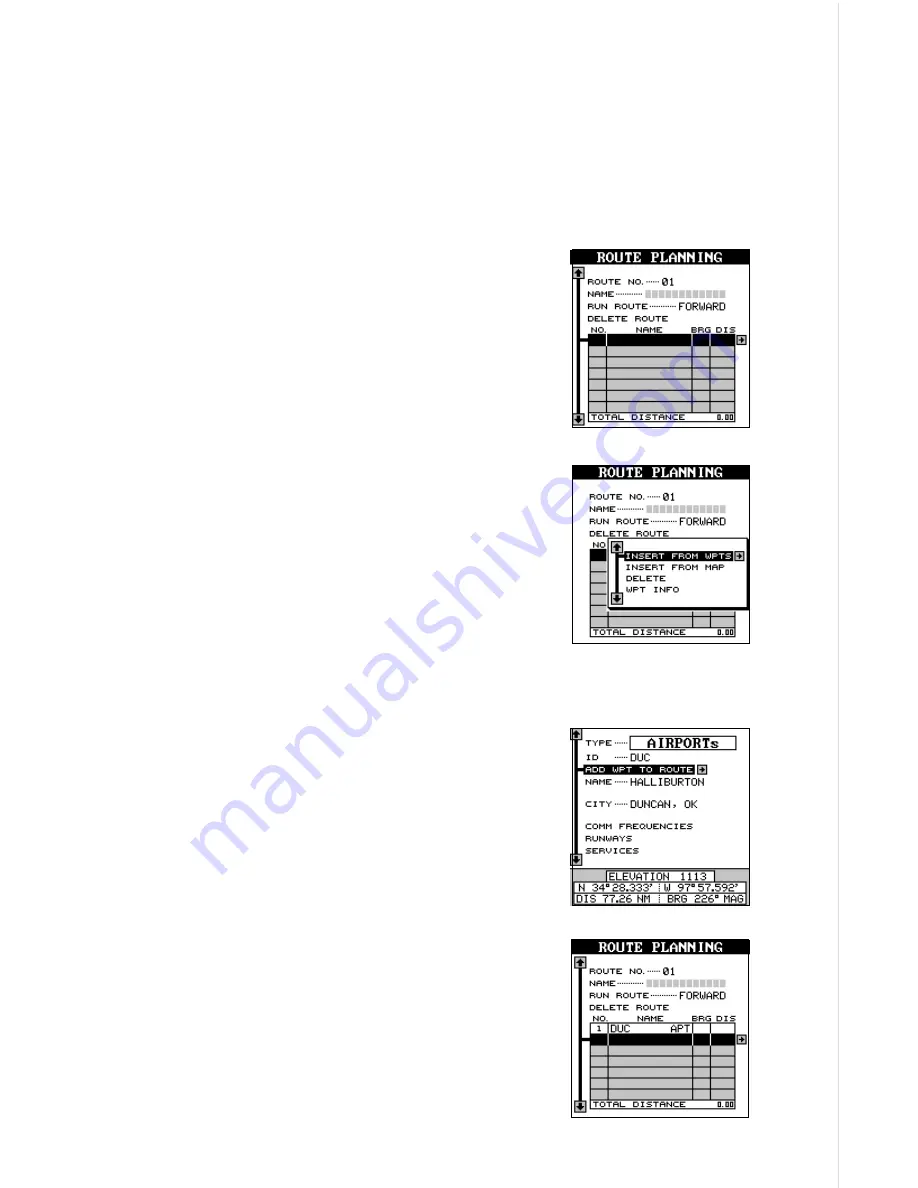
Now highlight the top of the stack of gray boxes at
the bottom of this screen as shown at right. This is
the list of waypoints used in your route. To select
the first waypoint in the route, press the right ar-
row key. A new menu appears as shown below.
Select Waypoints - Waypoint list
Select the first waypoint from the user waypoint,
airports, VOR’s, NDB’s, or intersections menus. As
you move through the list of saved waypoints, their
date and time saved, icon, position, distance and
bearing from your present position show at the
bottom of the screen. When the desired location
appears that you want to use as the first waypoint
on the route, move the black box to the “Add WPT
To Route” label, then press the right arrow key. The
unit returns to the route planning screen with this
waypoint placed in the first location on the list as
shown at right.
You can place a waypoint using the waypoint list
or from locations on the map, or both. For the first
waypoint, we’ll use the “Insert From WPTS”
method. With the black box on this menu, press
the right arrow key. A screen similar to the one
below appears.
Summary of Contents for AirMap 300
Page 1: ...INSTALLATION AND OPERATION INSTRUCTIONS AirMap 300 TM...
Page 85: ...81 WINDOW BOXES These boxes are used on Map 3 and Nav 1 only 1 2 3 4 5 6 7 8 9 10 11 12...
Page 86: ...82 13 14 15 16...
Page 87: ...83 WINDOW GROUPS This is a listing of window groups A through O A B C D E F G H I J K L...
Page 88: ...84 M N O...
Page 94: ...90...


