7
IMPORTANT!
There are arrows molded into the bottom of the battery cover and battery
holder. Make certain the arrows are properly aligned! Otherwise, the bat-
tery holder won’t slide all the way into the cover and the battery pack
won’t slide onto the unit.
Slide the battery pack onto the unit and the AirMap 300 is ready for use.
EXTERNAL POWER
Instead of batteries, the AirMap 300 can operate on 6 to 35 volts DC from
an external power source. To use external power, an adapter cable is
supplied with your unit that will plug into your vehicle’s cigarette lighter. To
use this cable, simply plug one end into the AirMap 300 and the other end
into the cigarette lighter. A rubber plug is supplied with your AirMap 300 to
cover the external power jack on the side of the unit when it’s not in use.
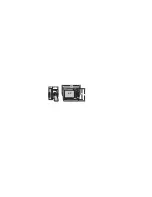
You can leave the battery pack on when using external power, no damage
to the batteries or the unit will occur. However, if you remove the battery
pack from the AirMap 300, we recommend that the battery contact cover
be placed onto the battery pack as shown below. This will prevent the
battery pack contacts from shorting against metal objects.
A separate cover is provided for the bottom of the AirMap 300.
Summary of Contents for AirMap 300
Page 1: ...INSTALLATION AND OPERATION INSTRUCTIONS AirMap 300 TM...
Page 85: ...81 WINDOW BOXES These boxes are used on Map 3 and Nav 1 only 1 2 3 4 5 6 7 8 9 10 11 12...
Page 86: ...82 13 14 15 16...
Page 87: ...83 WINDOW GROUPS This is a listing of window groups A through O A B C D E F G H I J K L...
Page 88: ...84 M N O...
Page 94: ...90...


