


2
Click
Settings
>
Fax Settings
>
Analog Fax Setup
.
3
In the Fax Name or Station Name field, enter the name to be printed on all outgoing faxes.
4
In the Fax Number or Station Number field, enter the printer fax number.
5
Click
Submit
.
Choosing a fax connection
Notes:
•
The printer is an analog device that works best when directly connected to the telephone wall outlet. Other
devices(such as a telephone or answering machine) can be successfully attached to pass through the printer, as
described in the setup steps.
•
If you want a digital connection such as ISDN, DSL, or ADSL, then a third-party device (such as a DSL filter) is
required. Contact your DSL provider for a DSL filter. The DSL filter removes the digital signal on the telephone
line that can interfere with the ability of the printer to fax properly.
•
You
do not
need to attach the printer to a computer, but you
do
need to connect it to an analog telephone line
to send and receive faxes.
Equipment and service options
Fax connection setup
Connect directly to the telephone line.
See “Connecting to an analog telephone line” on page 125.
Connect to a Digital Subscriber Line (DSL or ADSL) service. See “Connecting to a DSL service” on page 126.
Connect to a Private Branch eXchange (PBX) or Integrated
Services Digital Network (ISDN) system.
See “Connecting to a PBX or ISDN system” on page 126.
Use a Distinctive Ring service.
See “Connecting to a distinctive ring service” on page 127.
Connect through an adapter used in your area.
See “Connecting to an adapter for your country or region” on
page 127.
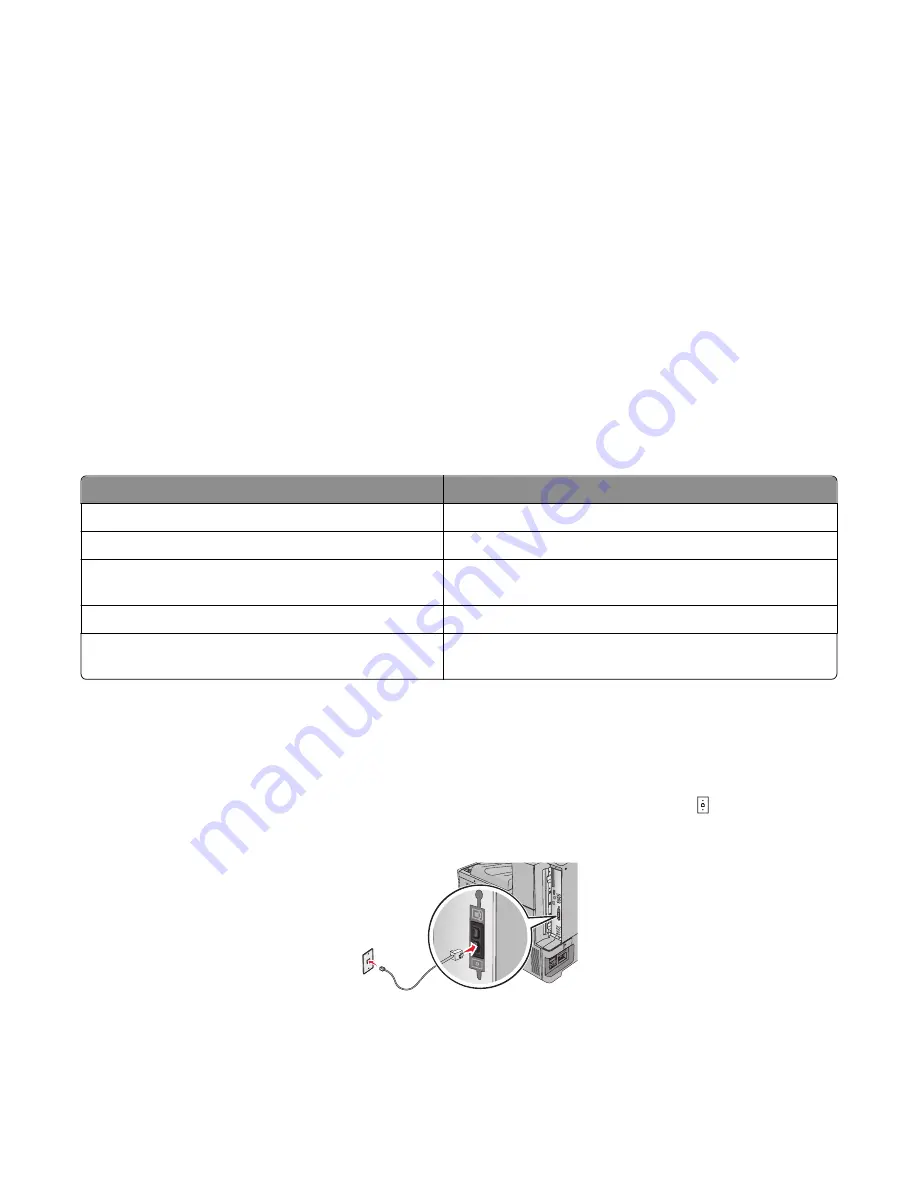
Connecting to an analog telephone line
If your telecommunications equipment uses a US
‑
style (RJ11) telephone line, then follow these steps to connect the
equipment:
1
Connect one end of the telephone cable that came with the printer to the printer LINE port .
2
Connect the other end of the telephone cable to an active analog telephone wall jack.
Faxing
125
Summary of Contents for X950 Series
Page 28: ...Touch To Reset Reset values on the screen Understanding the home screen 28 ...
Page 242: ...4 Locate the printhead wipers Maintaining the printer 242 ...
Page 259: ...7 Lower the cover 8 Slide out the printhead wipers 3x 3x 3x Maintaining the printer 259 ...
Page 260: ...9 Slide the printhead wipers back into place 10 Close the cover Maintaining the printer 260 ...
Page 266: ...3 Hold the tabs on both sides of the staple cartridge Maintaining the printer 266 ...
Page 267: ...4 Rotate the booklet staple cartridge at an angle Maintaining the printer 267 ...


