3-8
Service Manual
5022-xxx
Motor tests
The motor tests are run primarily to locate noises in the printer.
General motor tests
In some instances, when you enter a particular test, you will be given the choice to run the motor in forward or
reverse. Other times, there will only be the option to run the motor in forward direction.
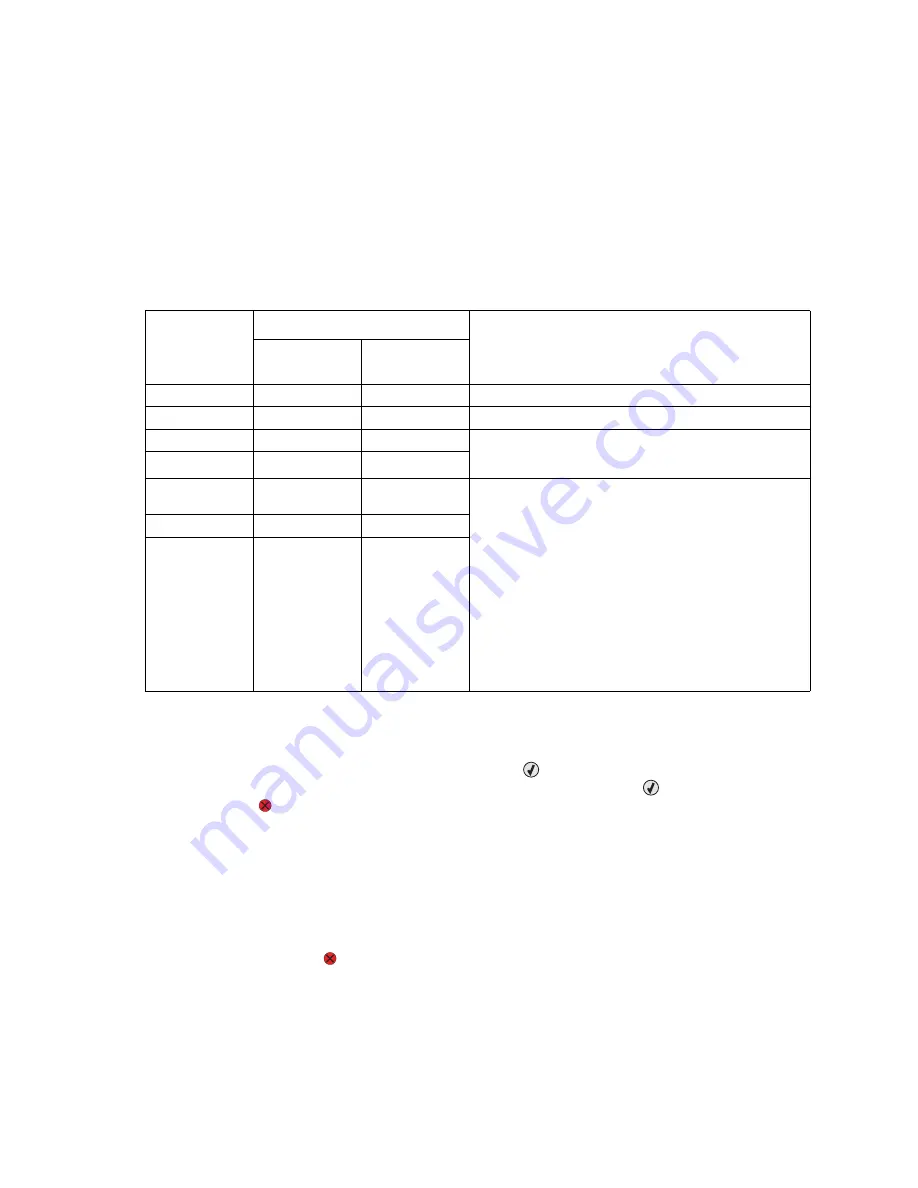
Before you run any particular motor test, ensure you have configured the printer as directed in the following
table:
To run the motor tests:
1.
Select MOTOR TESTS from DIAGNOSTICS.
2.
Select the motor that you need to test, and press Select (
).
3.
Select the direction if a choice is offered (Forward or Reverse). Press Select (
).
4.
Press Stop (
) to end the test.
Mirror Motor Test
1.
Select MOTOR TESTS from DIAGNOSTICS.
2.
Select Mirror Motor Test.
The panel displays
Mirror Motor Test
.
After the test completes, the panel displays either
Pass
or
Fail
.
To stop the test, press Stop (
).
Motor test
Setup requirements
Notes
Top access
cover
Front access
door
Align Motor Test Closed
Closed
Select Forward or Reverse.
Fuser
Closed
Closed
Select Forward or Reverse.
Tray 1
Not applicable
Not applicable
Remove all paper from the input source tray to avoid
paper jams while performing this test. Select Forward
or Reverse.
Tray 2
Not applicable
Not applicable
Bottom
cartridge
Closed
Open
1. Close the top access cover and front access door.
2. Enter MOTOR TESTS.
3. Open the top access cover and front access door,
activate the top right bellcrank by hand, close the
top access cover.
4. Remove the toner cartridges if you plan to test for
any length of time.
5. Run the desired motor tests.
To finish:
1. Open the top access cover.
2. Deactivate the top right bellcrank
3. Close the top access cover and the front access
door.
Top cartridge
Closed
Open
Transfer
Closed
Open
Summary of Contents for C52 series
Page 13: ...Laser notices xiii 5022 xxx Japanese Laser Notice ...
Page 14: ...xiv Service Manual 5022 xxx Korean Laser Notice ...
Page 125: ...Diagnostic aids 3 31 5022 xxx ...
Page 150: ...3 56 Service Manual 5022 xxx ...
Page 164: ...4 14 Service Manual 5022 xxx Cover removals ...
Page 177: ...Repair information 4 27 5022 xxx Installation note Be sure the tab B is fully engaged B ...
Page 180: ...4 30 Service Manual 5022 xxx 9 Remove the linkage screw C C ...
Page 184: ...4 34 Service Manual 5022 xxx 10 Remove the linkage screw C C ...
Page 256: ...4 106 Service Manual 5022 xxx ...
Page 257: ...Locations and connectors 5 1 5022 xxx 5 Locations and connectors Locations Covers ...
Page 260: ...5 4 Service Manual 5022 xxx Rear ...
Page 263: ...Locations and connectors 5 7 5022 xxx CRU and FRUs ...
Page 264: ...5 8 Service Manual 5022 xxx Sensors Toner level sensor Toner patch sensor TPS ...
Page 265: ...Locations and connectors 5 9 5022 xxx Motors ...
Page 266: ...5 10 Service Manual 5022 xxx Printer cards ...
Page 267: ...Locations and connectors 5 11 5022 xxx Connectors System card network models C52x ...
Page 268: ...5 12 Service Manual 5022 xxx System card non network models C52x ...
Page 274: ...5 18 Service Manual 5022 xxx System card network models C53x ...
Page 280: ...5 24 Service Manual 5022 xxx ...
Page 282: ...6 2 Service Manual 5022 xxx ...
Page 284: ...7 2 Service Manual 5022 xxx Assembly 1 Covers 15 1 2 3 4 9 5 8 10 12 13 14 6 7 11 ...
Page 286: ...7 4 Service Manual 5022 xxx Assembly 2 Front ...
Page 288: ...7 6 Service Manual 5022 xxx Assembly 3 Right ...
Page 290: ...7 8 Service Manual 5022 xxx Assembly 4 Rear ...
Page 292: ...7 10 Service Manual 5022 xxx Assembly 5 Left 1 2 3 ...
Page 294: ...7 12 Service Manual 5022 xxx Assembly 6 Top 1 2 ...
Page 296: ...7 14 Service Manual 5022 xxx Assembly 7 Customer replaceable units CRUs 3 4 1 2 5 6 2 ...
Page 298: ...7 16 Service Manual 5022 xxx Assembly 8 Contact springs ...
Page 300: ...7 18 Service Manual 5022 xxx Assembly 9 Cable parts packet ...
Page 312: ...I 10 Service Manual 5022 xxx ...
Page 313: ......
Page 314: ......


