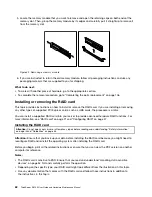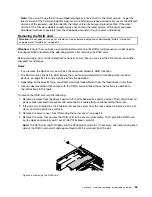
7. Press Enter to initiate volume creation.
8. When prompted, press Y to accept the warning message and create the volume.
9. If desired, return to step 2 to create additional RAID volumes.
10. When finished, select
Exit
and press Enter.
Deleting RAID volumes
This section describes how to use the Intel Rapid Storage Technology enterprise option ROM configuration
utility to delete RAID volumes.
To delete RAID volumes, do the following:
1. Press Ctrl+I when prompted to enter the Intel Rapid Storage Technology enterprise option ROM
configuration utility during system startup.
2. Use the up and down arrow keys to select
Delete RAID Volume
and press Enter.
3. Use the arrow keys to select the RAID volume to be deleted and press Delete.
4. When prompted, press Y to confirm the deletion of the selected RAID volume. Deleting a RAID volume
will reset the hard disk drives to non-RAID.
5. After deleting a RAID volume, you can:
• Return to step 2 to delete additional RAID volumes.
• See “Creating RAID volumes” on page 49 for RAID volume creation.
• Use the up and down arrow keys to select
Exit
and press Enter.
Resetting disks to non-RAID
This section describes how to reset your hard disk drives to non-RAID.
To reset your hard disk drives to non-RAID, do the following:
1. Press Ctrl+I when prompted to enter the Intel Rapid Storage Technology enterprise option ROM
configuration utility during system startup.
2. Use the up and down arrow keys to select
Reset Disks to Non-RAID
and press Enter.
3. Use the arrow keys and the space key to mark individual physical hard disk drives to be reset, and then
press Enter to complete the selection.
4. When prompted, press Y to confirm the reset action.
5. After resetting the hard disk drives to non-RAID, you can:
• See “Deleting RAID volumes” on page 50 for RAID volume deletion.
• See “Creating RAID volumes” on page 49 for RAID volume creation.
• Use the up and down arrow keys to select
Exit
and press Enter.
Configuring the advanced SATA or SAS hardware RAID
Some server models come with a required RAID card to provide advanced SATA/SAS hardware RAID
functions to the server. You also can purchase the RAID card from Lenovo and install it into server models
that support the RAID card to get advanced SATA/SAS hardware RAID functions. See “RAID card” on page
21 and “Installing or removing the RAID card” on page 62 for more information.
Note:
For server models with SAS hard disk drives, a RAID card must be installed.
The RAID card provides the WebBIOS Configuration Utility program to help you configure RAID
independently of the operating system. You also can install the MegaRAID Storage Manager program
and the MegaCLI Configuration Utility program to help you manage the RAID array and RAID controller in
an operating system environment. The supported RAID levels are RAID 0, 1, and 10 by default. For the
50
ThinkServer RS140 User Guide and Hardware Maintenance Manual
Summary of Contents for ThinkServer RS140
Page 16: ...4 ThinkServer RS140 User Guide and Hardware Maintenance Manual ...
Page 18: ...6 ThinkServer RS140 User Guide and Hardware Maintenance Manual ...
Page 48: ...36 ThinkServer RS140 User Guide and Hardware Maintenance Manual ...
Page 122: ...110 ThinkServer RS140 User Guide and Hardware Maintenance Manual ...
Page 128: ...116 ThinkServer RS140 User Guide and Hardware Maintenance Manual ...
Page 132: ...120 ThinkServer RS140 User Guide and Hardware Maintenance Manual ...
Page 145: ......
Page 146: ......


