


CAUTION:
Turn off the computer and wait three to five minutes to let the computer cool before removing the
computer cover.
To open the computer cover, do the following:
1. Remove any media from the drives and turn off all attached devices and the computer.
2. Disconnect all power cords from electrical outlets.
3. Disconnect the power cord, Input/Output cables, and any other cables that are connected to the
computer. See “Locating connectors, controls, and indicators on the front of your computer” on page
28 and “Locating connectors on the rear of your computer” on page 29.
4. Remove any locking device that secures the computer cover, such as an integrated cable lock or a
padlock. See “Attaching a Kensington-style cable lock” on page 61 or “Locking the computer cover”
on page 59.
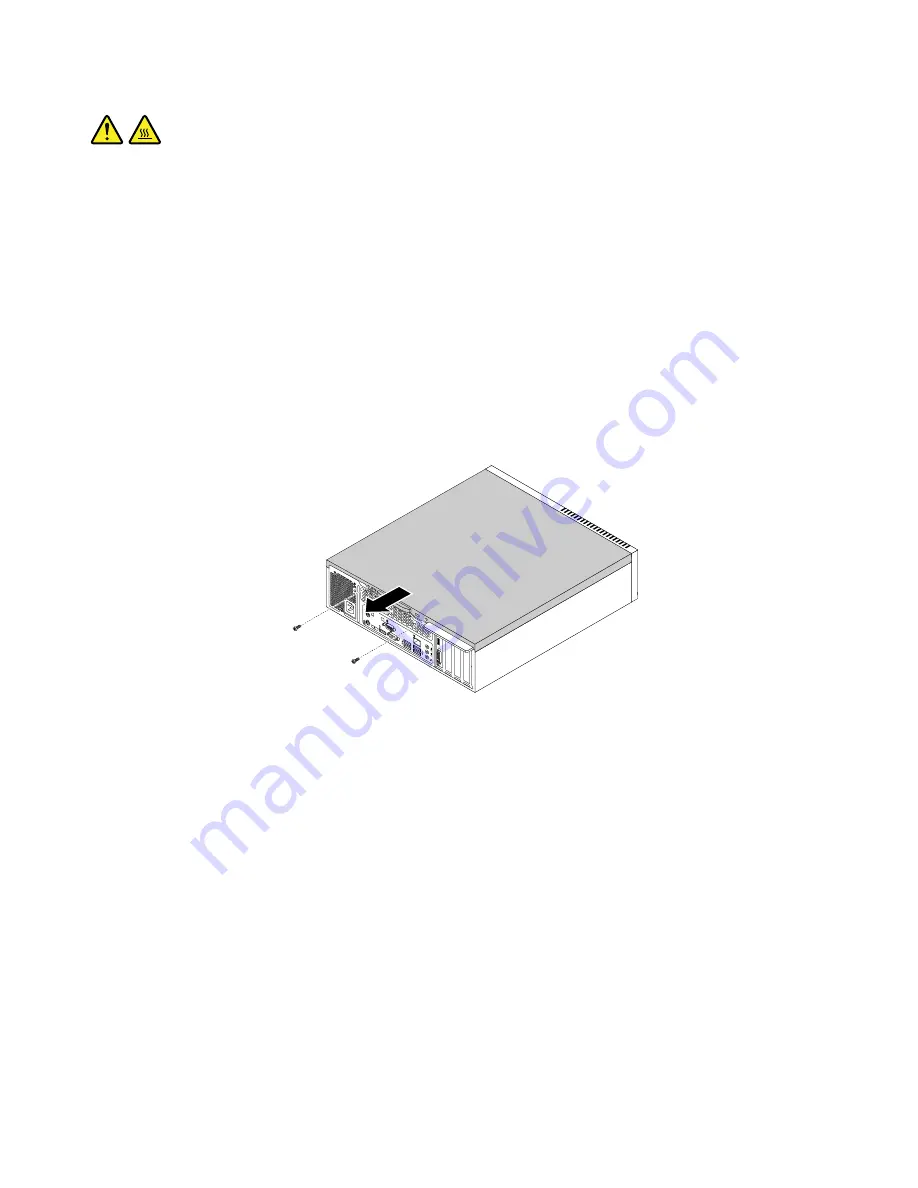
5. Remove the two screws that secure the computer cover and slide the computer cover to the rear to
remove it.
5
6
3
4
Figure 10. Removing the computer cover
Removing and reinstalling the front bezel
Attention:
Do not open your computer or attempt any repair before reading and understanding the Chapter
1 “Read this first: Important safety information” on page 1.
To remove and reinstall the front bezel, do the following:
1. Remove any media from the drives and turn off all attached devices and the computer. Then, disconnect
all power cords from electrical outlets and disconnect all cables that are connected to the computer.
2. Remove the computer cover. See “Removing the computer cover” on page 105.
106
ThinkCentre M79 Hardware Maintenance Manual
Summary of Contents for ThinkCentre M79
Page 1: ...ThinkCentre M79 Hardware Maintenance Manual Machine Types 10CT 10CU 10CV and 10CW ...
Page 6: ...iv ThinkCentre M79 Hardware Maintenance Manual ...
Page 8: ...vi ThinkCentre M79 Hardware Maintenance Manual ...
Page 16: ... 18 kg 37 lb 32 kg 70 5 lb 55 kg 121 2 lb 8 ThinkCentre M79 Hardware Maintenance Manual ...
Page 19: ...1 2 Chapter 1 Read this first Important safety information 11 ...
Page 20: ...1 2 12 ThinkCentre M79 Hardware Maintenance Manual ...
Page 21: ...Chapter 1 Read this first Important safety information 13 ...
Page 27: ...Chapter 1 Read this first Important safety information 19 ...
Page 31: ...Chapter 1 Read this first Important safety information 23 ...
Page 40: ...Figure 4 Component locations 32 ThinkCentre M79 Hardware Maintenance Manual ...
Page 68: ...Figure 8 Installing a padlock 60 ThinkCentre M79 Hardware Maintenance Manual ...
Page 80: ...72 ThinkCentre M79 Hardware Maintenance Manual ...
Page 98: ...90 ThinkCentre M79 Hardware Maintenance Manual ...
Page 112: ...104 ThinkCentre M79 Hardware Maintenance Manual ...
Page 168: ...160 ThinkCentre M79 Hardware Maintenance Manual ...
Page 172: ...164 ThinkCentre M79 Hardware Maintenance Manual ...
Page 175: ...Appendix D China Energy Label Copyright Lenovo 2014 167 ...
Page 176: ...168 ThinkCentre M79 Hardware Maintenance Manual ...
Page 178: ...170 ThinkCentre M79 Hardware Maintenance Manual ...
Page 184: ...176 ThinkCentre M79 Hardware Maintenance Manual ...
Page 185: ......
Page 186: ......


