3-14
CHAPTER 3 MECHANICAL SYSTEMS
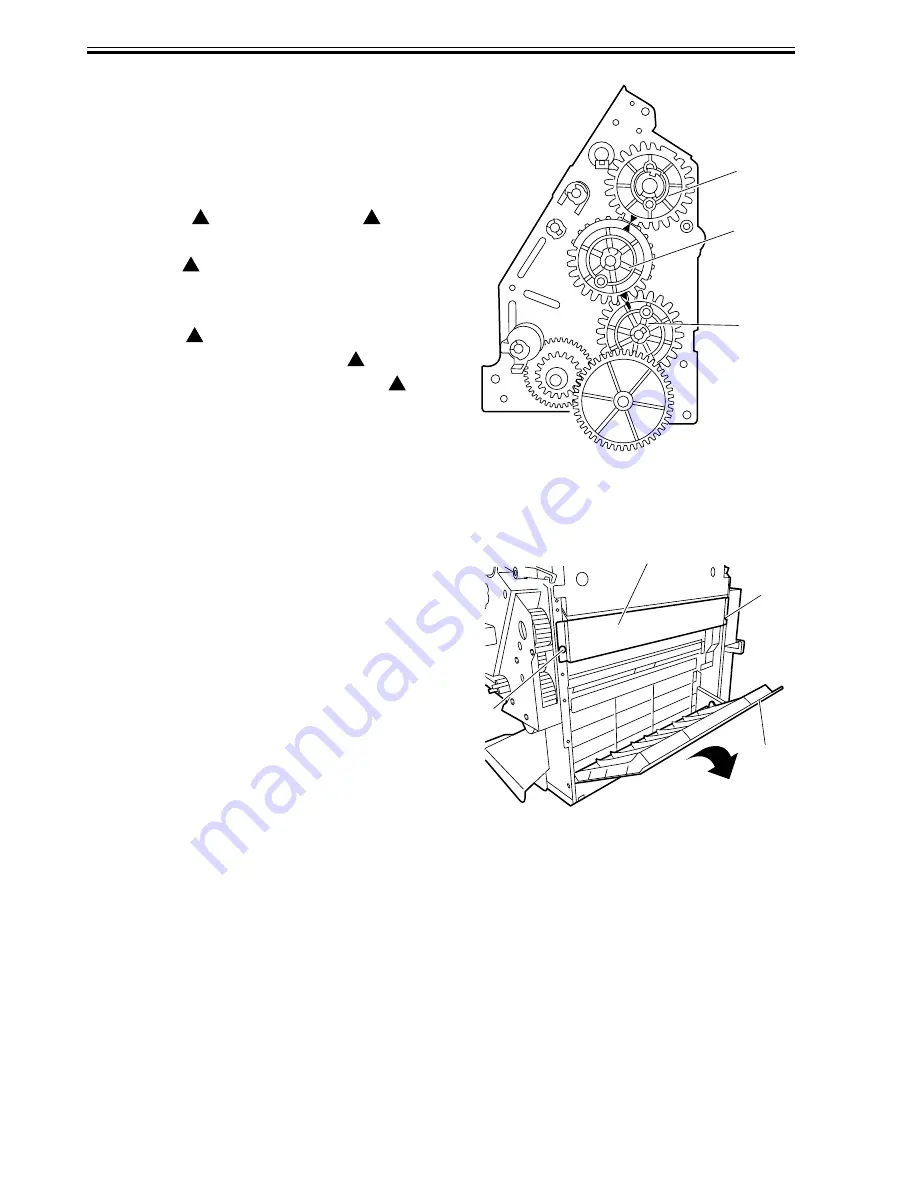
2) With the paper fold rollers and saddle
cam positioned as shown in Figure F03-
102-14, mount gears as shown in figure
F03-102-15.
• Align the mark (either of two
marks) on the saddle cam drive gear [3]
with the
mark on the relay gear [4]
(on the half of the periphery where gears
with a smaller face width are arranged).
• With the mark on the saddle cam
drive gear [3] aligned with the mark
on the relay gear [4], align the other
mark on the relay gear withy the rib of
the paper folding roller drive gear [5].
F03-102-15
1.2.4 Removing the Saddle Unit
1) Remove the front cover. (See 1.1.2.)
2) Remove the rear cover. (See 1.1.3.)
3) Open the jam removal cover [1]; then,
remove the two screws [2] and the right
stay [3].
F03-102-16
[3]
[2]
[1]
[2]
[3]
[4]
[5]
Summary of Contents for DF-75
Page 1: ...SERVICE MANUAL Published in Aug 01 5FG70760 DF 75...
Page 12: ...CHAPTER 1 GENERAL DESCRIPTION...
Page 24: ...CHAPTER 2 OUTLINE OF OPERATION...
Page 89: ...CHAPTER 3 MECHANICAL SYSTEMS...
Page 132: ...CHAPTER 4 MAINTENANCE AND INSPECTION...
Page 135: ...CHAPTER 5 TROUBLESHOOTING...
Page 142: ...5 7 CHAPTER 5 TROUBLESHOOTING...
Page 145: ...5 10 CHAPTER 5 TROUBLESHOOTING 2 1 2 Motor PCBs M7 M8 M5 M4 M3 M6 M1 M2 1 F05 201 02...
Page 175: ...5 40 CHAPTER 5 TROUBLESHOOTING...
Page 176: ...APPENDIX...
Page 180: ...A 4...
Page 184: ...A 8 APPENDIX...
Page 198: ...A 22...


