14
EN
DRIVE
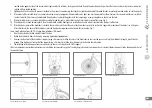
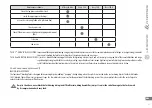
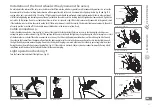
Switches, both the front one and the rear one, allow a fluid ride in every terrain. In order for the drive to operate efficiently, quietly and wear out more slowly, and the gears
did not repeat, the chain layout on the sprockets in the front and the ratchets in the rear, see Fig. 47. Layout of the chain on particular gears is achieved using levers present
on the handlebars. Efficient gear change depends mainly on the shifts and their adjustment. Gear change should be performed only during the ride, while pedalling. In case
of rear multi-gear axle (bicycle without an external switch), in order to change gears, stop pedalling for a while, making the change while the gear change when the drive
is stationary.
!
In case of bicycles with a multi-gear axle, gear change during pedalling may result in damage to the rear axle
Maximum reach out
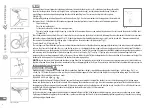
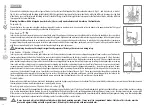
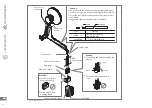
In order to adjust the switches, both the front and the rear one, one has to set the maximum reach out of switch guides. Fig. 48 (outside and inside reach), so the chain
does not fall outside the discs and ratchets. This adjustment is performed using screws of maximum reach out placed on the bodies of the switches (usually marked with
letters H and L). In case of a properly adjusted switch, the guide falls in a line with the smallest and the biggest ratchet or disc.
Gears
Adjustment of fluid gear change is performed as follows:
Line of the front switch must have enough tension for the guide to move the chain between the discs efficiently. The adjustment may be performed at the screw fixing the
line to the switch (5-8 Nm) or using the barrel screw at the lever:
•
Loosen the line of the back switch;
•
Set the chain on the middle disc in the front and on the smallest ratchet in the back;
•
Pull the line of the rear switch, fixing it with a screw (5-8 Nm) so the carriage of the switch is found directly in a straight line under the smallest ratchet in the rear
(where the chain is);
•
The rear switch should change gears fluidly. Small corrections are made by changing tension of the line using a barrel screw at the switch or at the lever.
Chain tension and adjustment
Depending on the conditions and rides frequency, the chain is wearing out and increases its length, at the same time damaging the ratchets. In order to check the proper
tension of the chain, set the gears in such a way that the chain is located on the biggest rear ratchet and on the biggest disc in the front. Next, try pulling the chain away from
the disc. If the chain reaches a distance of more than 3 mm, it must be replaced. Turn to an authorised service station for help. In case of bicycles with only one gear or with
the switch built into the rear axle, chain tension may be adjusted by the user, by moving the rear wheel in the hooks of the frame.
Chain tension adjustment
In case of bicycles having only one gear or with the gear system built into an axle, chain tension must be checked systematically (its tension decreases during use). Too
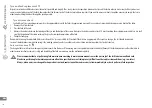
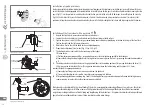
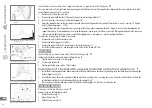
high tension may increase the effort put into pedalling and decrease chain durability. Too low tension may cause the chain to fall. With a properly tensed chain, its vertical
deflection may not exceed 10 mm. Fig. 49.1. One can adjust the tension by moving the rear wheel in relation to the frame.
Maintenance
Frequent washing and oiling the drive will ensure good operation of the bike and will make it useful and operational in
years to come. Wipe the chain, switch discs and ratchets regularly with a wipe cloth and grease them every 200 km or
more often, if the chain is dry. Switches should be dusted and have mud removed after each ride. Using the thumb and the
index finger, press teeth of switch discs through the wipe cloth and spin the crank. Insert the cloth between the ratchets of
the multigear assembly and move the cloth back and forth. Thoroughly clean the switches and front discs using the wipe
cloth. Replace the shields and the lines at least once a year. In order to clean the chain, catch it through the cloth and at the
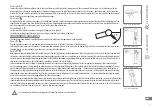
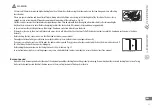
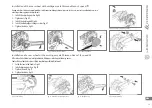
same time, spin the crank. Use oil for bicycle chains (thick oil – wet conditions, thin oil – dry conditions). Pour a drop of oil
onto each chain roller. Fig. 49. Grab the chain through the cloth, simultaneously spin the crank and gently wipe the excess
oil off the chain. In some Kross/Le Grand bicycles a solution including the switch located in the rear axle has been used. In
this case, all repairs and maintenance should be performed by an authorised service station..
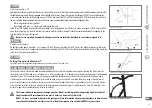
Fig. 47. Proper use of switches
Fig. 48. Rear switch – screws of
extreme reach out
Fig. 49. Chain oiling
Fig.49.1


