


10-11
10.2
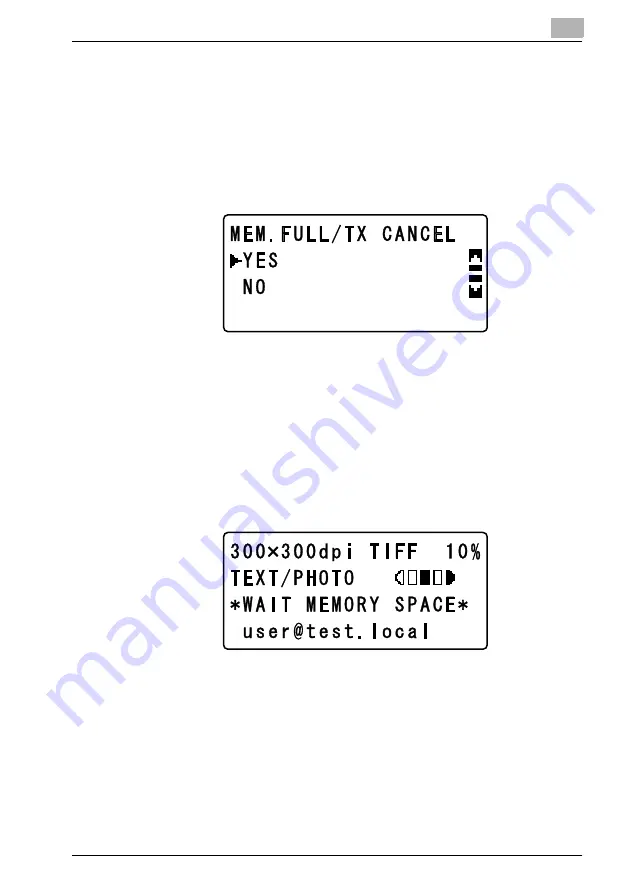
If the memory becomes full while scanning documents
If the memory becomes nearly full while documents are being scanned, a warning
message appears. Select whether to continue the transmission or to cancel it.
After a message appears warning that the memory is nearly full, the “MEM. FULL/
TX CANCEL” menu appears.
%
Press the [
,
] or [
+
] key until “YES” or “NO” is selected, and then press the
[OK] key.
– If the memory became full while scanning a document from the original
glass, select “NO” when the warning message appears, and then press the
[OK] key to begin sending the scanned pages. When the transmission is
finished, the message “COMPLETE” appears, and then the Scan mode
screen appears again.
– If “YES” is selected and the [OK] key is pressed, the message “ACCEPT-
ED” appears, and then the Scan mode screen appears again.
– If “NO” is selected and the [OK] key is pressed, the message “*WAIT
MEMORY SPACE*” appears, and transmission of the scanned page be-
gins. After the transmission is finished, the scanning of the remaining pag-
es begins automatically.
Summary of Contents for PCL-400
Page 1: ...Key for Imaging Solutions...
Page 17: ...x 16 Explanation of manual conventions...
Page 27: ...1 10 Press the 3 key 6 times Press the 0 key Press the 123 ABC key Press the 0 key...
Page 209: ...8 26...
Page 259: ...9 50...
Page 298: ...11 27 Scan tab Speed Dial Setting Registered speed dial settings can be viewed...
Page 300: ...11 29 Network tab Summary The basic network settings can be viewed...
Page 305: ...11 34 System tab Save Setting Easy Web Management settings can be saved and restored...
Page 347: ...11 76...
Page 356: ...1 1...
Page 357: ...1 2...


