


4-30
Creating a new watermark
A new watermark can be registered.
1
Click the Watermark tab.
2
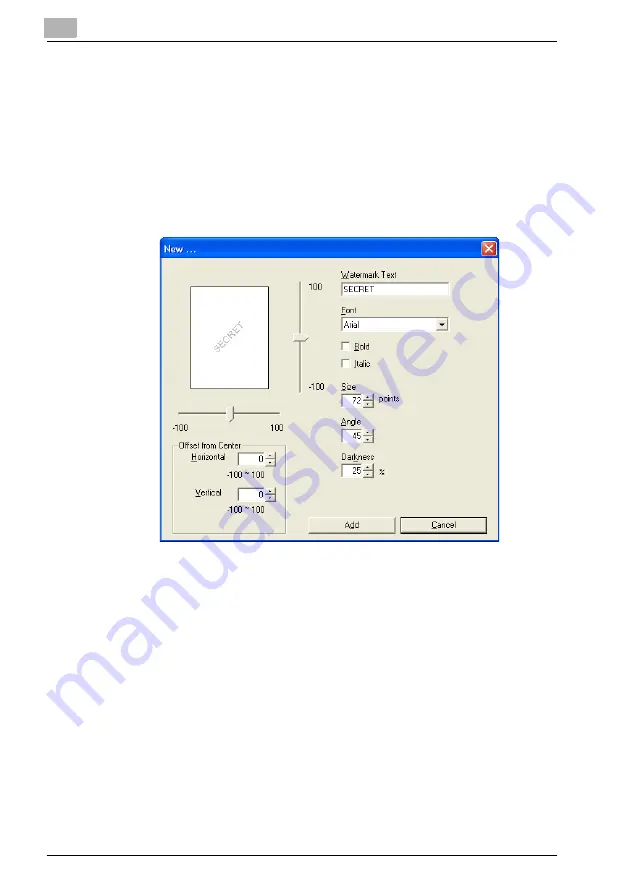
Click the [New] button.
The New dialog box appears.
3
In the “Watermark Text” box, type in the text to be used as the watermark.
– A maximum of 20 characters can be entered for the text.
– A maximum of 32 watermarks can be registered (including “No Water-
mark”).
4
Specify the desired settings.
– Font: Select the font for the watermark. Any font installed on the computer
can be selected.
– Bold: Select to use bold text.
– Italic: Select to use italic text.
– Size: Specify a character size between 7 and 300 points.
– Angle: Specify the angle that the text is printed on the paper. A setting be-
tween 0° and 359° can be specified.
– Darkness: Specify the density of the text. A setting between 10% and 100%
can be specified.
Summary of Contents for PCL-400
Page 1: ...Key for Imaging Solutions...
Page 17: ...x 16 Explanation of manual conventions...
Page 27: ...1 10 Press the 3 key 6 times Press the 0 key Press the 123 ABC key Press the 0 key...
Page 209: ...8 26...
Page 259: ...9 50...
Page 298: ...11 27 Scan tab Speed Dial Setting Registered speed dial settings can be viewed...
Page 300: ...11 29 Network tab Summary The basic network settings can be viewed...
Page 305: ...11 34 System tab Save Setting Easy Web Management settings can be saved and restored...
Page 347: ...11 76...
Page 356: ...1 1...
Page 357: ...1 2...


