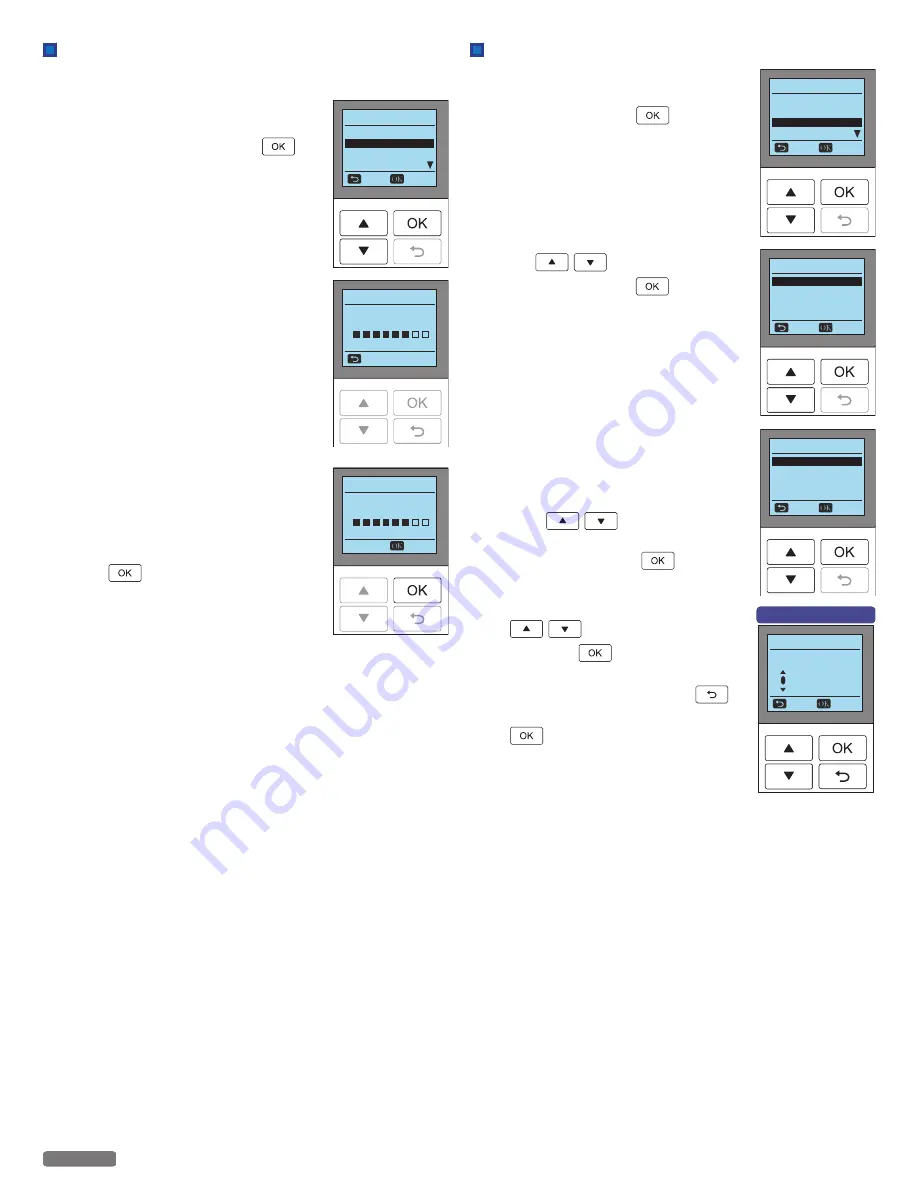
Wi-Fi Protected Setup
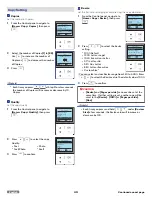
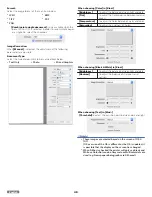
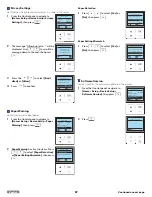
If your Wi-Fi Router has WPS function, the unit starts to connect your
Wi-Fi Router by selecting
[Wi-Fi Protected Setup]
.
1
From the Control panel, navigate to
[Home > Setup > Wi-Fi Setup > Wi-Fi
Protected Setup]
, then press
.
2
Press WPS button on the Router.
3
[Connected to XXXXXXXX]
appears on
the Menu display, WPS (Wi-Fi Protected
Setup) is completed.
●
The XXXXXXXX represents the SSID of
your Router.
4
Press
on
[Wi-Fi setup]
screen.
Wi-Fi Setup
Network and Password
IP Address
Proxy
Back
Select
Wi-Fi Protected Setup
Wi-Fi Protected Setup
Push WPS buon
on Wi-Fi router.
120
Cancel
Wi-Fi Protected Setup
Connected to
XXXXXXXX
Next
IP Address
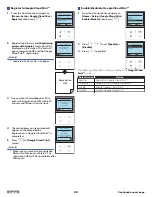
1
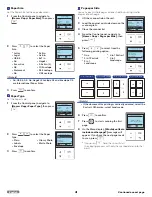
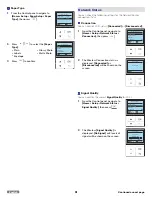
From the Control panel, navigate to
[Home > Setup > Wi-Fi Setup > IP
Address]
, then press
.
2
Press
to select
[Auto]
or
[Manual]
, then press
.
[Auto] DHCP (Dynamic Host
Configuration Protocol) mode
It's easy to Automatically get the IP
address of this unit from the Network.
[Manual] Static mode
Set the Network address manually.
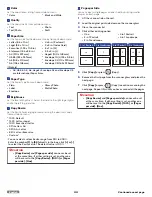
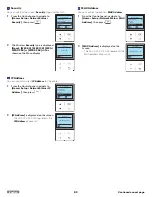
3
If you select
[Manual]
, set the items
below.
●
IP Address
●
Subnet Mask
●
Gateway
●
DNS
–
Press
to select
[IP
Address]
,
[Subnet Mask]
,
[Gateway]
or
[DNS]
, then press
.
–
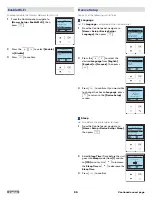
Set digits one at a time. Press
to select from
[0]
to
[9]
,
then press
.
–
When you enter a wrong number, then
you can correct it by pressing
.
–
After you select the last digit, then press
to set IP Address and return to the
previous screen.
Wi-Fi Setup
Network and Password
Wi-Fi Protected Setup
Proxy
Back
Select
IP Address
IP Address
Manual
Back
Select
Auto
IP Address
Subnet Mask
Gateway
DNS
Back
Select
IP Address
IP Address
Back
Select
1
92 . 168 . 011 . XXX
e.g.) [IP Address] screen
54
English
Continued on next page.

