Load paper
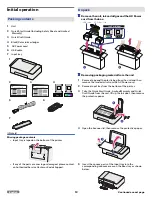
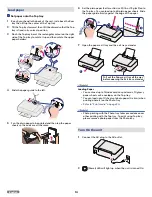
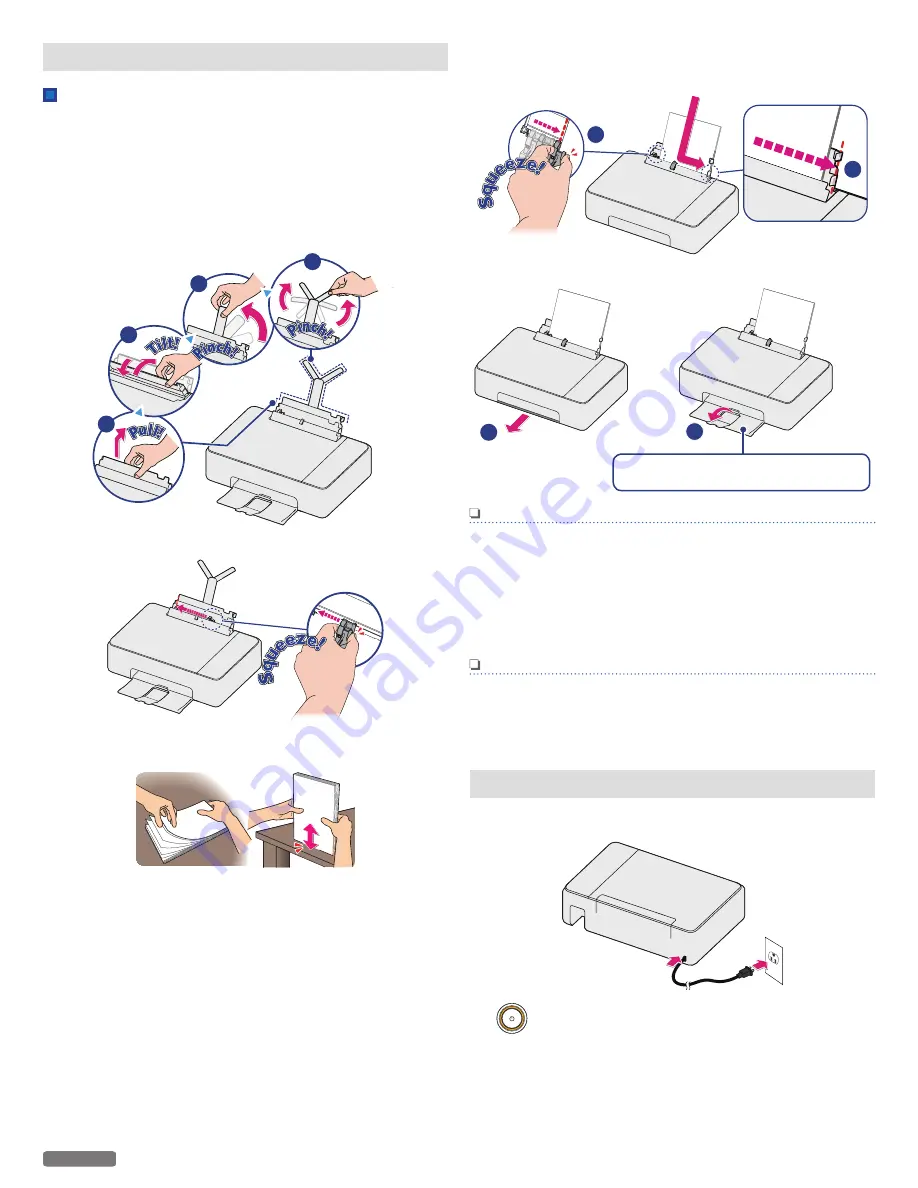
Set paper onto the Top tray
1
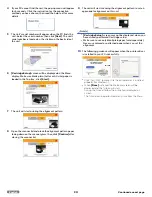
Reach your hand to the back of the unit, just above the Rear
tray then lift up the center of the Top tray.
2
Tilt the Top tray forward, then tilt it backward so that the Top
tray is fixed in its correct position.
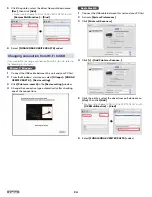
3
Pinch the Top tray bar at the rectangular cutout on the right
side of the Top tray to rotate it up and then rotate the upper
paper holders.
1
2
3
4
4
Slide the paper guide to the left.
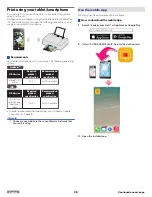
5
Fan the plain paper to be printed and then tap the paper
sheets so the ends are all the same.
6
Set the plain paper (Letter or A4 size 20 lb. or 75 g/m2) onto
the Top tray. You can load up to 60 plain paper sheets. Slide
the paper guide firmly against the edge of the paper.
1
2
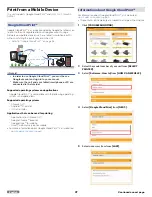
7
Open the paper exit tray and the exit tray extender.
1
2
Pull out the Paper exit tray all the way
before opening the Exit tray extender.
Note(s)
Loading Paper
●
You can load up to 15 index cards or postcards, 10 glossy
paper sheets or 5 envelopes on the Top tray.
●
You can load up to 10 sheets of photo paper (4 x 6 in.) when
printing photo(s) on the Photo tray.
» Refer to “Print media” on page 30.
Note(s)
●
Photo printing with the Photo tray takes precedence over
other printing with the Top tray. To print using Top tray,
please remove photo paper from the Photo tray.
Turn On the unit
1
Connect the AC plug to the AC outlet.
2
(Power) LED will light up, when the unit is turned On.
14
English


