


Mirus for H2 Classic GrainGage
59
H2 Classic GrainGage Calibration
7. Pour the grain sample into the hopper (to simulate harvest). Release the isolation gate so that the
grain drops into the GrainGage uniformly.
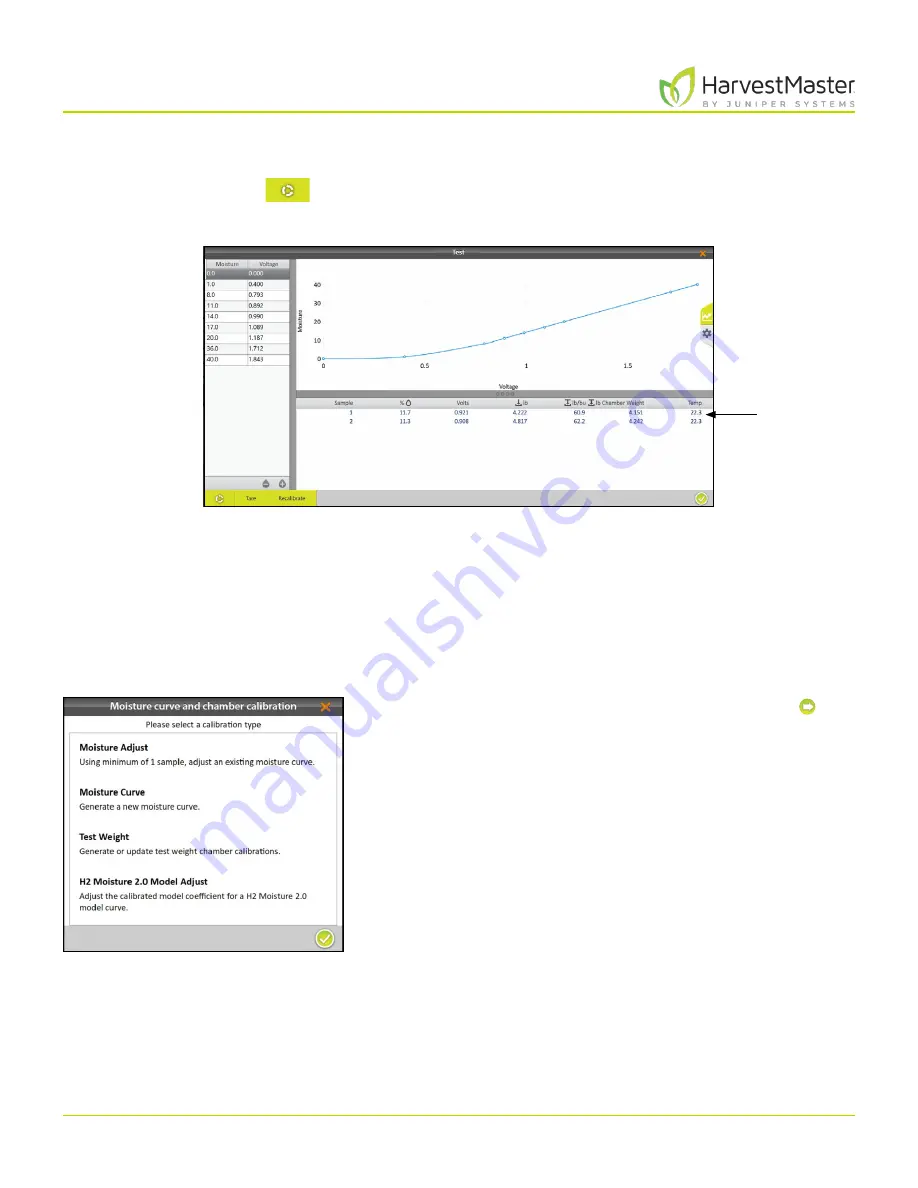
8. Tap the
Cycle
button
.
Mirus displays the moisture, voltage, bucket weight, test weight, and temperature of the sample.
9. Cycle the sample through the GrainGage (repeat steps 7 and 8) two more times. This allows Mirus to
average the moisture readings for the sample.
10. If the moisture curve needs to be tuned to match the sample, tap
Recalibrate
.
The Recalibrate feature is designed to adjust previously created moisture curves to match a new grain
sample. The slope of the curve is not changed. The entire curve shifts to match the new sample. Fine tuning
of a curve is often done later in the season as additional moisture samples are available.
11. Select
Moisture Adjust
and tap the next arrow .
Note: Multiple samples can be used to adjust an
existing moisture curve. If test weight needs to be
adjusted, see the next section.
New
sample
readings
Summary of Contents for HarvestMaster mirus H2
Page 1: ......
Page 7: ...CHAP TER ONE Mirus Ins tallation...
Page 11: ...Mirus and GrainGage S etup CHAP TER T WO...
Page 32: ...H2 Clas sic GrainGage Diagnos tic s and Aler t s CHAP TER THREE...
Page 42: ...GrainGage Calibration CHAP TER FOUR...
Page 71: ...Field Maps CHAP TER FIVE...
Page 98: ...Har ves t Mode CHAP TER SIX...
Page 120: ...Standard Grain Information APPENDIX A...
Page 123: ...Troubleshooting APPENDIX B...
Page 129: ...Limited Warrant y APPENDIX C...


