background image

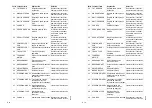
E 15

0

608

.E

50

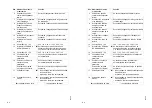
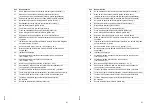
SENSOR HORIZON Piloto múltiple-rotura de 

cable inclinador de 
horquillas en horizontal

Desconectar / conectar, 
llamar al servicio técnico

51

TEACH IN WRONG Teach-In: potenciómetro de 

valores reales de dirección

Desconectar / conectar, 
llamar al servicio técnico

52

TEACH IN WRONG Teach-In: potenciómetro 

del imán de freno

Desconectar / conectar, 
llamar al servicio técnico

53

TEACH IN WRONG Teach-In: potenciómetro de 

valores teóricos de 
dirección

Desconectar / conectar, 
llamar al servicio técnico

54

CABEL MOTOR

Ruptura del cable del motor Desconectar / conectar, 

llamar al servicio técnico

55

SHORTCIRCUIT M

Cortocircuito en motor

Desconectar / conectar, 
llamar al servicio técnico

56

CONECTION MOTO Cortocircuito en motor

Desconectar / conectar, 
llamar al servicio técnico

57

STEER CONTROL

El motor no se mueve

Desconectar / conectar, 
llamar al servicio técnico

58

STEER ANGLE

Valor real ángulo dirección 
oscila

Desconectar / conectar, 
llamar al servicio técnico

59

SHAFT POTI

El valor teórico del ángulo 
dirección oscila

Desconectar / conectar, 
llamar al servicio técnico

60

STEER CONTROL

La traviesa giratoria no 
reacciona ante la activación 
del volante de dirección

Desconectar / conectar, 
llamar al servicio técnico

61-

62

CONTROLLER

Fallo en etapa final del 
mando

Desconectar / conectar, 
llamar al servicio técnico

63

CONTROLLER

Tensión de alimentación 
del sensor fuera del rango

Desconectar / conectar, 
llamar al servicio técnico

64

CONTROLLER

Versión de software 
diferente

Desconectar / conectar, 
llamar al servicio técnico

65

SWITCH MIDDLE

Piloto múltiple-rotura de 
cable desplazador centro

Desconectar / conectar, 
llamar al servicio técnico

66

SWITCH 180-360

Piloto múltiple- rotura de 
cable conmutación de 
dirección 180° / 360°

Desconectar / conectar, 
llamar al servicio técnico

67

DRIVEDIRECTION

Piloto múltiple-transmisor 
del valor teórico pulsador 
del sentido de la marcha 
atascado

Desconectar / conectar, 
llamar al servicio técnico

68

DEADMAN KEY

Ruptura cable del 
interruptor seguridad

Desconectar / conectar, 
llamar al servicio técnico

69

LIFT / LOWER SW

Petición simultánea de 
elevación y descenso

Desconectar / conectar, 
llamar al servicio técnico

Fallo Texto del fallo

Explicación

Solución

Summary of Contents for ETR 314

Page 1: ...Operating instructions 50 452 907 ETR 314 320 u 06 06 11 09 07 08 E Manual de instrucciones...

Page 2: ...es loads and other special data t Indicates component fitted as standard o Indicates optional extra 0108 USA Foreword Safe operation of the industrial truck requires specialist knowledge which is acqu...

Page 3: ...Aktiengesellschaft Am Stadtrand 35 22047 Hamburg GERMANY Phone 49 0 40 6948 0 www jungheinrich com 0108 USA It is impossible for the manufacturer to foresee every possible operational circumstance th...

Page 4: ...1 5 Change of vehicle parameters E 26 2 Starting the vehicle E 27 2 1 Preparing for operation E 28 I 1 0608 USA Table of contents A Compliance with regulations Legislation and common sense B Recognit...

Page 5: ...discharge monitor operating hours counter F 6 6 1 Operator display t F 6 6 2 Onboard computer o F 8 0608 USA I 2 3 Driving steering braking lifting E 30 3 1 Driving E 30 3 2 Steering E 33 3 3 Braking...

Page 6: ...icle during transportation H 3 4 Parking brake transport lock H 4 5 Commissioning H 5 6 Startup H 6 I 3 0608 USA G Industrial truck maintenance 1 Operational safety and environmental protection G 1 2...

Page 7: ...0608 USA I 4 0608 USA I 4...

Page 8: ...operator Safe operation is the responsibility of the operator ASME B56 1 2004 Part II Section 5 1 1 A 1 0606 USA A Compliance with regulations Legislation and common sense In 1998 OSHA produced a repo...

Page 9: ...0606 USA A 2 0606 USA A 2...

Page 10: ...aware of the position of colleagues and of other trucks and must pay attention to local conditions B 1 0107 USA B Recognition and avoidance of risks In its 1998 investigation into the use of powered...

Page 11: ...r Group even if original spare parts are used and our company logo can still be seen on the machine 0107 USA B 2 The manufacturer shall not be held liable for the consequences of the dismantling of th...

Page 12: ...third parties repair or modify the machine without the approval of our customer service department C 1 0606 USA C Appropriate use NOTICE This Operating Manual contains all necessary information for t...

Page 13: ...nd instruction signs are in place and are legible see Position of signs and nameplates in Chapter D 0606 USA C 2 Attachment of accessories The attachment or installation of accessories and modificatio...

Page 14: ...onsequence 10 The industrial truck must only be used in the manner for which the truck was designed C 3 0606 USA Qw W The use of an industrial truck involves certain risks which cannot be fully exclud...

Page 15: ...responsible for ensuring that the load is stable and secure This should be checked where necessary 0606 USA C 4 11 Read the safety instructions applicable for this industrial truck and comply with th...

Page 16: ...load capacity Load center ETR 314 3000 lb 1400 kg 24 in 600 mm ETR 320 4500 lb 2000 kg 24 in 600 mm D 1 0107 USA D Vehicle description 1 Description of use The ETR is a four wheel electric operator pl...

Page 17: ...ay 8 t Multipilot 9 t EMERGENCY STOP switch t Fitted as standard o Optional extra 2 3 4 5 6 7 1 8 9 0107 USA D 2 2 Description of components and functions Item Designation 1 t Overhead guard 2 t Clear...

Page 18: ...a smooth even ride strong acceleration and electronically controlled breaking with energy recovery D 3 0107 USA 2 1 Vehicle Safety devices A closed vehicle contour with rounded edges makes operating...

Page 19: ...an switch on the right The vehicle brakes if the driver s hand is removed from the operating switch 0107 USA D 4 Braking system The electrical braking system consists of independent brake systems Rele...

Page 20: ...ay 8 t Multipilot 9 t EMERGENCY STOP switch t Fitted as standard o Optional extra 2 3 4 5 6 7 1 8 9 D 5 0107 USA Item Designation 1 t Overhead guard 2 t Clear view lift mast 3 t Load forks 4 t Wheel a...

Page 21: ...lift is performed by two short free lift cylinders at the sides without changing the overall height 0107 USA D 6 Controls and indicators Controls and display instruments are clearly arranged at the dr...

Page 22: ...speed back in mast travel 33 5 0 17 33 5 0 17 fpm m s Climbing ability with without load 7 10 7 10 D 7 0107 USA 3 Technical data for standard model NOTICE The technical data specification complies wi...

Page 23: ...s 40 X 48 in 1016 x 1219 mm long 118 7 3014 114 4 2907 inch mm Service weight see nameplate vehicle 0107 USA D 8 3 2 Dimensions Fork length 42 inch 1070 mm Safe distance a 0 Designation ETR 314 ETR 32...

Page 24: ...D 9 0107 USA D 9 0107 USA...

Page 25: ...3091 inch mm h3 Lift height 196 3 400 4987 10160 inch mm h4 Max height 234 3 438 5951 11124 inch mm 0107 USA D 10 3 3 Standard ETR Mast Models Designation Two mast triplex mast DZ h1 Overall height 91...

Page 26: ...D 11 0107 USA D 11 0107 USA...

Page 27: ...pressure level while driving lifting and at idle The sound pressure level is measured at ear level 0107 USA D 12 3 4 US standards Continuous sound pressure level at ear level 71db A determined by the...

Page 28: ...ge voltage The frequency range was expanded to include the low frequency interference in the wiring D 13 0107 USA Electromagnetic compatibility EMC The manufacturer confirms compliance with the limit...

Page 29: ...arning sign 21 Charging unit warning label 25 19 18 20 23 24 10 21 17 14 13 12 11 26 27 16 15 22 28 0107 USA D 14 4 Position of signs and nameplates Item Designation 10 Nameplate vehicle 11 Electrical...

Page 30: ...max 43 Option 36 Manufacturer s logo Item Designation 37 36 39 33 40 32 41 31 42 30 43 29 38 35 34 D 15 0107 USA 4 1 Nameplate vehicle NOTICE In the event of queries about the vehicle or when orderin...

Page 31: ...s 1 105 kg 44 16 45 500 600 700 850 850 600 X XXXX XX XX 1250 1105 850 1250 1105 850 2900 3600 4250 0107 USA D 16 4 2 Load capacity label load capacity load center lift height The load capacity label...

Page 32: ...of the controls and indicators on the industrial truck 1 2 18 17 4 5 3 6 7 8 9 10 11 12 13 14 15 16 E 1 0608 USA E Operation 1 Description of controls and indicators 1 1 Arrangement of the controls an...

Page 33: ...Side shift left right Horn button Additional hydraulics HF5 o t Fitted as standard o Optional extra 0608 USA E 2 Item Control or indicator Function 1 Operator display t Display of important driving an...

Page 34: ...E 3 0608 USA 1 2 18 17 4 5 3 6 7 8 9 10 11 12 13 14 15 16 E 3 0608 USA 1 2 18 17 4 5 3 6 7 8 9 10 11 12 13 14 15 16...

Page 35: ...pressed Driving locked vehicle brakes Pressed Driving enabled t Fitted as standard o Optional extra 0608 USA E 4 Item Control or indicator Function 6 Side shift pushbutton Center position o Side shift...

Page 36: ...E 5 0608 USA 1 2 18 17 4 5 3 6 7 8 9 10 11 12 13 14 15 16 E 5 0608 USA 1 2 18 17 4 5 3 6 7 8 9 10 11 12 13 14 15 16...

Page 37: ...nd 12 hour am pm display 43 49 50 59 58 57 56 55 60 44 45 46 47 48 42 41 51 54 52 53 40 39 38 37 36 0608 USA E 6 1 2 Operator display t The operator display is the user interface for the vehicle It is...

Page 38: ...ng brake 58 Slow travel key to curb driving speed 59 Not used 60 Overtemperature red graphic symbol E 7 0608 USA Item Designation 36 End of lift reached yellow graphic symbol o 37 Service mode is acti...

Page 39: ...d red graphic symbol Warning warning triangle red graphic symbol Error STOP sign red graphic symbol 0608 USA E 8 Using the four short stroke keys 55 58 you can Curb the speed Slow travel key Engage or...

Page 40: ...symbol SYMBOL Warning warning triangle red graphic symbol SYMBOL Error STOP sign red graphic symbol E 9 0608 USA 1 2 1 Illuminated symbols on the operator display SYMBOL Side shifter in center positio...

Page 41: ...ed or released brake key Switch the display to service mode shift key Select driving and lift modes 0608 USA E 10 1 2 2 Keys on the operator display Driving speed is curbed slow travel key Parking bra...

Page 42: ...arning symbol buzzer Undervoltage INFO 48 Warning symbol buzzer Horizontal impact of Level 1 in ISM E 11 0608 USA 1 2 3 Warning messages on the operator display Display Further action Meaning Dead man...

Page 43: ...f the operator display the LCD not readable at very low temperatures Display Further action Meaning 0608 USA E 12 INFO 49 Warning symbol buzzer Horizontal impact of Level 1 in ISM INFO 50 Warning symb...

Page 44: ...ire ZH3 potentiometer Turn off on call service 34 CAN BUS CANBus disrupted Turn off on call service E 13 0608 USA 1 2 4 Error messages on Operator Display Error Error text Explanation Solution 1 LOW V...

Page 45: ...ce 57 STEER CONTROL Motor not moving Turn off on call service Error Error text Explanation Solution 0608 USA E 14 35 ZERO DRIVE SEN No neutral position drive Do not engage dead man and drive pedal on...

Page 46: ...ting switch pressed at the same time Turn off on call service Error Error text Explanation Solution E 15 0608 USA 58 STEER ANGLE Steering angle actual value fluctuating Turn off on call service 59 SHA...

Page 47: ...ce 103 ISM PARAM ISM parameter error Turn off on call service Error Error text Explanation Solution 0608 USA E 16 79 KEY DEAD MAN Pushbutton switch and dead man switch pressed at the same time Turn of...

Page 48: ...ry 252 Incorrect entry Height preselection Make correct entry Error Error text Explanation Solution E 17 0608 USA 104 Sensor bearing does not deliver pulse on system start Turn off on call service 105...

Page 49: ...keys 67 Menus OK 0 CE 8 TUV 7 PQRS 9 WXYZ 5 JKL 4 GHI 6 MNO 2 ABC 1 3 DEF 0009 h 08 45 66 63 67 67 0608 USA E 18 1 3 Onboard computer o The onboard computer represents the user interface for the vehi...

Page 50: ...ate BATTERY CHARGE LEVEL Ready to drive warning state critical The lift function is turned off STOP E 19 0608 USA 1 3 1 Display symbols of the onboard computer ESCAPE Jumps up one level DRIVING PROFIL...

Page 51: ...red PIN current field placeholder PIN input placeholder Video system Fork horizontal 08 45 0009 h P 0608 USA E 20 Display symbols Video system o The camera is fastened onto the inside of the right for...

Page 52: ...the vehicle is used for the first time change the master and operator codes 1 2 3 4 5 6 7 8 9 0 Set E 21 0608 USA 1 4 Keypad CANCODE o The keypad comprises 10 number keys a set key and a o key The ope...

Page 53: ...tings codes travel program enables automatic shutdown etc 1 2 3 4 5 6 7 8 9 0 Set 58 56 57 61 60 59 0608 USA E 22 Startup When the EMERGENCY OFF switch and the switch latch if applicable are turned on...

Page 54: ...Repeat the process to enter additional parameter settings When you have finished press the o key 61 E 23 0608 USA 1 4 3 Parameter settings To change the vehicle settings you must enter the master code...

Page 55: ...99999 2580 LED 59 flashes Enter a code Confirm Set LED 60 flashes Repeat the code entry Confirm Set 0608 USA E 24 The following parameters can be entered Code lock parameter list No Function Setting r...

Page 56: ...c shutdown 00 31 00 00 none Shutdown 01 to 30 Shutdown time in minutes 31 Shutdown after 10 seconds E 25 0608 USA LED 58 60 are located in keys 1 3 No Function Setting range Standard setting Notes Pro...

Page 57: ...PIN IMPORTANT Only the manufacturer s authorized service personnel may make changes in service mode 0608 USA E 26 Keypad error messages The following errors are indicated by the LED 57 flashing red Ne...

Page 58: ...e battery lock before starting to drive No more than one person is allowed on the driver s platform E 27 0608 USA 2 Starting the vehicle Qw W Before the vehicle can be started operated or used to lift...

Page 59: ...start PIN 14016 and confirm with OK 1 4 13 1 2 3 4 5 6 7 8 9 0 Set 1a 4a 13 BITTE PINCODE EINGEBEN 0608 USA E 28 2 1 Preparing for operation Pull out the EMERGENCY OFF 13 switch Insert the key in the...

Page 60: ...Dead man switch foot switch must be pressed once NOTICE This checks the function of the foot switch E 29 0608 USA NOTICE If the vehicle is equipped with an ISM access module see the ISM Access Module...

Page 61: ...fferent operation variants are shown on the following stickers Standard t Option 1 o 1 Option 2 o 2 0608 USA E 30 3 Driving steering braking lifting Emergency off Press the EMERGENCY OFF 13 downward A...

Page 62: ...n V should be limited to shunting and to picking up and setting down loads 13 19 V 17 18 R V 26 V R E 31 0608 USA Qw W Do not drive the vehicle unless all covers are closed and properly locked The mai...

Page 63: ...e NOTICE The travel speed is controlled with the function switch 19 Multipilot 5 19 V R R 5 V R 5 V 0608 USA E 32 Preparing for operation Step down on and press the dead man switch 18 and brake switch...

Page 64: ...hen making individual adjustments to the parameters Make sure to check vehicle reactions on startup E 33 0608 USA 3 2 Steering Opposite action steering o During travel in the fork direction turning th...

Page 65: ...after a time delay Braking with the EMERGENCY OFF switch Press the EMERGENCY OFF 13 switch 17 19 13 0608 USA E 34 Braking with the reversible brake Press function switch 19 t Multipilot 5 o 1 o 2 duri...

Page 66: ...d load capacity of the vehicle Drive the fork tines as far as possible under the load unit 21 20 22 E 35 0608 USA 3 4 Adjusting the fork tines Qw W In order to pick up the load securely the tines shou...

Page 67: ...TANT Avoid setting the load unit down hard to protect the load and the rack base 5 H S 19 H S S H 5 0608 USA E 36 3 6 Raising and lowering Qw W Persons must not stand under the lifted load t Tilt Mult...

Page 68: ...The tilt of theMulti Pilot 5 or the function switch 19 controls the shift speed 5 U T 24 T U 19 T U E 37 0608 USA 3 7 Forward shift t Tilt Multi Pilot 5 in the T direction to move the fork carrier for...

Page 69: ...direction V to tilt forward o 1 or tilt Multi Pilot 5 in direction R to tilt backward 24 V R R V 5 0608 USA E 38 NOTICE The fork tilt function works exactly the same way for the Standard t operating...

Page 70: ...on 25 Tilt Multi Pilot 5 in direction X2 Qw W Shifting reduces load capacity 24 25 X1 Y1 X2 X1 5 25 E 39 0608 USA NOTICE An attachment or the integrated side shifter work exactly the same way for the...

Page 71: ...tch 4 into the 0 position remove the key or for code lock press the o key V R 25 24 H S U T 26 4 13 0608 USA E 40 3 10 Picking up lifting and transporting load units Bring fork tines horizontal Drive...

Page 72: ...courses as a condensed version of the main course and periodic assessment of the operator in action E 41 0608 USA 4 Important general aspects affecting the safe use of the industrial truck 4 1 Trainin...

Page 73: ...acity of elevators Other special operating conditions and hazards that the operator could encounter 0608 USA E 42 The principal duty of the operator is the safe operation of the powered industrial tru...

Page 74: ...safety at work from industrial truck operators associations and from safety consultants for example E 43 0608 USA 3 Operating the powered industrial truck including Systematic inspection before each s...

Page 75: ...guard manufactured in accordance with the manufacturer s requirements as set out in ASME B56 1 2004 0608 USA E 44 4 2 Damage and repairs to the industrial truck Damage and defects If damage or defects...

Page 76: ...closed to industrial trucks and be clearly identified by signs markers light signals or other means E 45 0608 USA 4 4 Operating environment Danger zone The danger zone refers to the area in which peop...

Page 77: ...from being moved accidentally 1 The recommendations for loading ramps apply also to loading aisles 0608 USA E 46 Parts of the load machine materials or structural equipment projecting permanently or...

Page 78: ...ustrial truck are laid down in an agreement between the owner and the industrial truck manufacturer E 47 0608 USA When loading and unloading railroad cars appropriate precautions must be taken to prev...

Page 79: ...by industrial trucks This includes equipment designed to interact with the industrial truck system 0608 USA E 48 4 5 Safety devices and warning signs Safety devices and warning signs The safety devic...

Page 80: ...ad obstacles and power cables Keep your hands and feet away from all controls not needed at present E 49 0608 USA 4 6 Lifting of people Lifting of people The lifting or carrying of people is prohibite...

Page 81: ...people wish to join or leave the platform Never attempt to climb up or get off the raised platform 0608 USA E 50 When there are people on the platform move the truck and or platform slowly and execut...

Page 82: ...he emergency lowering valve Qw W Do not start up the vehicle until the problem has been resolved 23 E 51 0608 USA 4 7 Emergency stop device NOTICE The vehicle is equipped with an emergency stop device...

Page 83: ...stems Load carrying attachments Chains Limit switches Brakes Ground lock s or wheel lock s Steering 0608 USA E 52 5 Operating the vehicle 5 1 Safety regulations for industrial truck operators Areas of...

Page 84: ...hese areas can be used The truck must not be modified with additional equipment or in any other way E 53 0608 USA If it is determined that the industrial truck needs repair is unsafe or can no longer...

Page 85: ...e If the load restricts your view to the front you should drive so that the load is facing the rear 0608 USA E 54 Travel ways and working areas Only travel ways and routes expressly cleared for indust...

Page 86: ...vement Even at very low speeds the steering mechanism must be turned at a moderate and steady speed E 55 0608 USA Reduce speed and drive down sloped pathways with caution 1 Loaded industrial trucks wi...

Page 87: ...capacity of the truck and of the attachments and always work within the stated load capacity range 0608 USA E 56 5 3 Ensuring that the industrial truck is properly equipped All driver operated high l...

Page 88: ...f that is not possible a second person must walk ahead to provide appropriate warning of any hazard E 57 0608 USA Take special care when securing handling positioning and transporting loads with the a...

Page 89: ...nly after the industrial truck is in its final position and must exit the elevator before the truck 0608 USA E 58 Negotiating slopes and dips Driving over sloping ground is only permitted if there are...

Page 90: ...he EMERGENCY STOP switch You must not block access to fire escape routes staircases or fire systems E 59 0608 USA 5 5 Supervising and securing the industrial truck A powered industrial truck is regard...

Page 91: ...people wish to join or leave the platform Never attempt to climb up or down off the raised platform 0608 USA E 60 5 6 Lifting of people If an industrial truck is not fitted with controls that can be o...

Page 92: ...o Name 1 1 95 600 230 Socket wrench SW 8 mm 1 2 2 1 95 608 130 Crank 3 1 27 636 010 Cardan joint 27 E 61 0608 USA 5 7 Mechanical substitute steering emergency steering mode The mechanical substitute s...

Page 93: ...ontal target position Item Designation 16 o Fork horizontal pushbutton o Fork horizontal display 16 0608 USA E 62 5 8 Fork horizontal pushbutton Activating the Fork horizontal 16 pushbutton locks all...

Page 94: ...tions or waste disposal regulations The manufacturer s instructions for disposal should be observed F 1 0107 USA F Battery Maintaining recharging replacing 1 Safety regulations for handling lead acid...

Page 95: ...strial truck Capacity Weight 48 V Battery 500 Ah 1984 lb 900 kg 48 V Battery 750 Ah 2646 lb 1200 kg 0107 USA F 2 Qw W Batteries contain acid which is toxic and corrosive Protective clothing and safety...

Page 96: ...urer Qw W The safety instructions of the battery and charging station manufacturer must be followed F 3 0107 USA 3 Charging the battery Uncover the battery Qw W The surfaces of the battery cells must...

Page 97: ...sible damage Covers must be securely closed Qw W The battery can only be removed completely 1 4 3 2 0107 USA F 4 4 Removing and installing the battery Uncover the battery Qw W To prevent short circuit...

Page 98: ...0 39 0 59 inches above the top of the plates Now close the stops If necessary re charge the battery F 5 0107 USA 5 Check the battery condition the acid level and acid density The battery manufacturer...

Page 99: ...e the battery NOTICE It toggles between the time and the remaining operating time 49 50 62 56 48 61 0107 USA F 6 6 Battery discharge indicator battery discharge monitor operating hours counter 6 1 Ope...

Page 100: ...field 2 61 Operating hours Lift height Operating hours Lift height max Lift height Lift height max F 7 0107 USA Operating hours counter Briefly press the shift key 56 to display alternate information...

Page 101: ...ol format R 00 00 OK 0 CE 8 TUV 7 PQRS 9 WXYZ 5 JKL 4 GHI 6 MNO 2 ABC 1 3 DEF 0009 h 08 45 11 12 13 0107 USA F 8 6 2 Onboard computer o Battery discharge indicator The charge level of the battery 11 i...

Page 102: ...the battery full or fully discharged NOTICE The display goes out when the energy recovery has ended F 9 0107 USA Operating hours counter The operating hours are displayed next to the set time The oper...

Page 103: ...0107 USA F 10 0107 USA F 10...

Page 104: ...rk is immobilized and secured by a chain of appropriate strength NOTICE Jacking point see chapter D G 1 0708 USA G Industrial truck maintenance 1 Operational safety and environmental protection The ch...

Page 105: ...laced after a period of use of six years Qw W Only trained service personnel may replace wheel arms 0708 USA G 2 Cleaning The industrial truck must not be cleaned with flammable liquids Before cleanin...

Page 106: ...ining information about load capacity operation and maintenance must be kept in a legible condition G 3 0708 USA Safety regulations for maintenance and inspection The lifting of an industrial truck fo...

Page 107: ...ssbeams must be inspected carefully at regular intervals and maintained in a safe working condition 0708 USA G 4 Batteries motors regulators limit switches protective devices electrical conductors and...

Page 108: ...the fork carrier the fork must not be brought back into service until it has been properly repaired G 5 0708 USA Inspection and repair of the forks used on industrial trucks The forks that are used mu...

Page 109: ...04 The test load per fork must be the rated load capacity specified on the industrial truck however 0708 USA G 6 7 Legibility of markings where originally present If the fork identification marking is...

Page 110: ...0 operating hours the owner must check the wheel nuts and wheel bolts and tighten them if necessary G 7 0708 USA 3 Maintenance and inspection A thorough and professional maintenance service is one of...

Page 111: ...s and replace any worn parts t 7 7 Check that electronic components are clean and seated securely t 0708 USA G 8 4 Maintenance checklist Maintenance intervals Standard t W A B C Refrigerated warehouse...

Page 112: ...ad t 14 2 On completion of maintenance demonstrate the vehicle in front of an authorized person k t G 9 0708 USA Maintenance intervals Standard t W A B C Refrigerated warehouse k Electric motors 8 1 C...

Page 113: ...ox oil filler neck Hydraulic oil filler neck a Gearbox oil drain plug Use in refrigerated warehouse 0708 USA G 10 5 Lubrication plan A G E F E F B B C 1 3 9 l 195 10 Nm 2 1 Mixing ratio for use in ref...

Page 114: ...tration at 25 C NLG1 Class Handling temperature C E Lithium 185 265 295 2 35 120 F 310 340 1 52 100 G 11 0708 USA 5 1 Operating resources Handling of operating resources Operating resources must alway...

Page 115: ...ins must never be cleaned with high pressure steam cleaners cleaner solvents or chemical cleaners 1 0708 USA G 12 6 Description of maintenance and servicing jobs Qw W The welding of load bearing parts...

Page 116: ...of the correct specification into the filler neck 2 hydraulic fluid specification see section 5 2 3 G 13 0708 USA 6 3 Inspecting the lift chains Impermissible wear and external damage According to off...

Page 117: ...eath the backrest To close place the fuse cover on the guide pins and press down Lock the hexagon 4 0708 USA G 14 6 5 Open the armature cover Open the door to the engine compartment Turn steering whee...

Page 118: ...roller 30 A 24 3F13 48V control circuit 30 A 5 6 7 8 9 10 11 12 13 14 15 16 17 18 19 20 21 22 24 23 G 15 0708 USA 6 7 Checking the electrical fuses Qw W Only authorized personnel may test and replace...

Page 119: ...the battery in Chapter F Disconnect the battery and clean it Apply pole grease to the battery poles 0708 USA G 16 6 8 Restarting the vehicle after cleaning or maintenance The vehicle must not be resta...

Page 120: ...n the control contacts Qw W Test the brakes several times immediately after starting up the vehicle G 17 0708 USA NOTICE In addition all instructions of the battery manufacturer must be followed Spray...

Page 121: ...attached to the truck This label shows the month and year in which the inspection must be repeated 0708 USA G 18 8 Safety inspections at regular intervals and after exceptional events NOTICE Carry ou...

Page 122: ...STOP switch Turn switch latch to position 0 Turn switch latch to position I Faulty fuse Check fuses G 19 0708 USA 9 Final de commissioning disposal NOTICE Final proper decommissioning or disposal of t...

Page 123: ...0708 USA G 20 0708 USA G 20...

Page 124: ...attached at the interface between the base unit and the mast and the vehicle placed into operation H 1 0606 USA H Transportation and commissioning 1 Transport Transport can ensue depending on the ove...

Page 125: ...f the battery NOTICE To remove the battery see Removing and installing the battery in Chapter F 1 2 0606 USA H 2 2 Handling by crane 2 1 Crane points IMPORTANT Use only lifting gear with an adequate l...

Page 126: ...e upper load bar of the mast and the overhead guard to secure the device with the attached mast 3 4 H 3 0606 USA 3 Securing the vehicle during transportation Qw W For transport on a freight truck or t...

Page 127: ...nect the battery Turn on the EMERGENCY OFF switch and switch latch The vehicle is now ready for use 0606 USA H 4 4 Parking brake transport lock Qw W If the vehicle is delivered without a battery or wi...

Page 128: ...hat only load handling equipment masts and basic vehicles with the same serial number are assembled H 5 0606 USA Moving the vehicle without the battery Pull out the battery connector Disconnect the tw...

Page 129: ...titute steering see Chapter E NOTICE After initial startup you may hear the brakes rubbing slightly 0606 USA H 6 6 Startup IMPORTANT Operate the vehicle under battery power only Rectified alternating...

Page 130: ...arca de identificaci n de equipamiento de serie o Marca de identificaci n de equipamiento adicional 0108 E Pr logo Para el servicio seguro de la carretilla industrial se requieren los conocimientos es...

Page 131: ...iengesellschaft Am Stadtrand 35 22047 Hamburg ALEMANIA Tel fono 49 0 40 6948 0 www jungheinrich com 0108 E El fabricante no puede prever todas y cada una de las posibles condiciones de servicio que pu...

Page 132: ...Puesta en servicio del veh culo E 28 2 1 Establecimiento de la disponibilidad para el servicio E 29 I 1 0608 E ndice A Cumplimiento de la normativa la legislaci n y el sentido com n B C mo reconocer y...

Page 133: ...a contador de horas de servicio F 6 6 1 Display del conductor t F 6 6 2 Ordenador de a bordo o F 8 0608 E I 2 3 Marcha direccionamiento frenado elevaci n E 31 3 1 Marcha E 31 3 2 Direccionamiento E 3...

Page 134: ...ansporte del freno de estacionamiento H 4 5 Primera puesta en servicio H 5 6 Puesta en servicio H 6 I 3 0608 E G Mantenimiento de la carretilla 1 Seguridad durante el servicio y protecci n del medio a...

Page 135: ...0608 E I 4 0608 E I 4...

Page 136: ...usuario El servicio seguro es responsabilidad del operario ASME B56 1 2004 Parte II apartado 5 1 1 A 1 0606 E A Cumplimiento de la normativa la legislaci n y el sentido com n En 1998 la OSHA Agencia...

Page 137: ...0606 E A 2 0606 E A 2...

Page 138: ...ar a personas Adem s en caso de realizar estas actividades se debe seguir el procedimiento correcto B 1 0107 E B C mo reconocer y evitar los peligros En el estudio llevado a cabo en 1998 sobre el uso...

Page 139: ...izasen piezas de repuesto originales y siguiera visible en el equipo el logotipo de nuestra empresa 0107 E B 2 Son de obligado cumplimiento en todo momento las normas de circulaci n Siempre se debe pr...

Page 140: ...nci n autom tica se deber n tener en cuenta los efectos de la automatizaci n en las dem s funciones C 1 0606 E C Uso previsto NOTA El presente manual de instrucciones contiene toda la informaci n nece...

Page 141: ...son importantes y para impedir que las indicaciones se empleen por error para otro equipo distinto 0606 E C 2 En caso necesario se deber n automatizar otras funciones en determinada medida NOTA En ca...

Page 142: ...e su responsabilidad igualmente deber n estar capacitadas para manejar de modo seguro la carretilla C 3 0606 E El operario ser responsable de hacer que todas las placas de caracter sticas las indicaci...

Page 143: ...suficientes resultando responsable de ambos aspectos En caso necesario se requerir una comprobaci n 0606 E C 4 7 Aseg rese de que la carretilla no pueda ser manipulada cuando no est en uso 8 Est prohi...

Page 144: ...gravedad de la carga ETR 314 3000 lb 1400 kg 24 pulg 600 mm ETR 320 4500 lb 2000 kg 24 pulg 600 mm D 1 0107 E D Descripci n del veh culo 1 Descripci n del uso La ETR es una carretilla apiladora retr...

Page 145: ...erruptor de PARADA DE EMERGENCIA t equipamiento de serie o equipamiento adicional 2 3 4 5 6 7 1 8 9 0107 E D 2 2 Descripci n de los grupos constructivos y del funcionamiento Pos Denominaci n 1 t Tejad...

Page 146: ...y suave una aceleraci n potente y un frenado de regulaci n electr nica con recuperaci n de energ a D 3 0107 E 2 1 El veh culo Dispositivos de seguridad gracias al contorno cerrado del veh culo con bo...

Page 147: ...or de hombre muerto a la derecha El veh culo frena si se retira la mano del conmutador de la marcha 0107 E D 4 Sistema de freno el sistema de freno el ctrico est compuesto por unos sistemas de freno i...

Page 148: ...erruptor de PARADA DE EMERGENCIA t equipamiento de serie o equipamiento adicional 2 3 4 5 6 7 1 8 9 D 5 0107 E Pos Denominaci n 1 t Tejadillo protector del conductor 2 t M stil de elevaci n con buena...

Page 149: ...modificar la altura total con ayuda de dos cilindros de elevaci n libre cortos situados al lateral 0107 E D 6 Elementos de manejo e indicaci n los elementos de mando y los instrumentos de indicaci n...

Page 150: ...en elevador del m stil 33 5 0 17 33 5 0 17 fpm m s Capacidad de inclinaci n con sin carga 7 10 7 10 D 7 0107 E 3 Datos t cnicos de la ejecuci n est ndar NOTA Indicaci n de los datos t cnicos de confor...

Page 151: ...x 1219 mm longitudinales 118 7 3014 114 4 2907 pulg mm Tara v ase Placa de caracter sticas veh culo 0107 E D 8 3 2 Dimensiones Longitud de la horquilla 42 pulg 1070 mm Distancia de seguridad a 0 Denom...

Page 152: ...D 9 0107 E D 9 0107 E...

Page 153: ...mm h3 Carrera de elevaci n 196 3 400 4987 10160 pulg mm h4 Altura m x 234 3 438 5951 11124 pulg mm 0107 E D 10 3 3 Versiones est ndar con m stil de elevaci n ETR Denominaci n M stil triple de doble e...

Page 154: ...D 11 0107 E D 11 0107 E...

Page 155: ...urante la marcha la elevaci n y la marcha en vac o La presi n ac stica se mide a la altura del o do 0107 E D 12 3 4 Normas US Presi n ac stica continua medida en el o do 71 db A seg n el procedimiento...

Page 156: ...e descarga Se ha ampliado el rango de frecuencias para incluir las bajas frecuencias en el cableado D 13 0107 E Compatibilidad electromagn tica EMC El fabricante declara que el producto respeta los va...

Page 157: ...de serie grabado en el chasis del veh culo 25 19 18 20 23 24 10 21 17 14 13 12 11 26 27 16 15 22 28 0107 E D 14 4 Lugares de marcaci n y placas de caracter sticas Pos Denominaci n 10 Placa de caracter...

Page 158: ...de elevaci n m x 43 Opci n 36 Logotipo del fabricante 37 36 39 33 40 32 41 31 42 30 43 29 38 35 34 D 15 0107 E 4 1 Placa de caracter sticas veh culo NOTA Le rogamos que en caso de tener preguntas sob...

Page 159: ...de 1105 kg 44 16 45 500 600 700 850 850 600 X XXXX XX XX 1250 1105 850 1250 1105 850 2900 3600 4250 0107 E D 16 4 2 Placa de capacidades de carga capacidad de carga centro de gravedad de la carga altu...

Page 160: ...los elementos de manejo e indicaci n en la carretilla 1 2 18 17 4 5 3 6 7 8 9 10 11 12 13 14 15 16 E 1 0608 E E Manejo 1 Descripci n de los elementos de manejo e indicaci n 1 1 Disposici n de los ele...

Page 161: ...ador del claxon Sistema hidr ulico adicional HF5 o t equipamiento de serie o equipamiento adicional 0608 E E 2 Pos Elemento de manejo e indicaci n Funci n 1 Display del conductor t Indicaci n de par m...

Page 162: ...E 3 0608 E 1 2 18 17 4 5 3 6 7 8 9 10 11 12 13 14 15 16 E 3 0608 E 1 2 18 17 4 5 3 6 7 8 9 10 11 12 13 14 15 16...

Page 163: ...el veh culo frena Accionado la marcha est liberada t equipamiento de serie o equipamiento adicional 0608 E E 4 Pos Elemento de manejo e indicaci n Funci n 6 Pulsador de posici n central del desplazado...

Page 164: ...E 5 0608 E 1 2 18 17 4 5 3 6 7 8 9 10 11 12 13 14 15 16 E 5 0608 E 1 2 18 17 4 5 3 6 7 8 9 10 11 12 13 14 15 16...

Page 165: ...en formato de 12 h am pm 43 49 50 59 58 57 56 55 60 44 45 46 47 48 42 41 51 54 52 53 40 39 38 37 36 0608 E E 6 1 2 Display del conductor t El display del conductor representa la interfaz del usuario p...

Page 166: ...nta para limitar la velocidad de marcha 59 No ocupado 60 Exceso de temperatura s mbolo gr fico rojo E 7 0608 E Pos Denominaci n 36 Se ha alcanzado el final de elevaci n s mbolo gr fico amarillo o 37 M...

Page 167: ...rojo aviso tri ngulo de advertencia s mbolo gr fico rojo Fallo letrero de STOP s mbolo gr fico rojo 0608 E E 8 Con las cuatro teclas de poca elevaci n 55 58 se puede reducir la velocidad de marcha tec...

Page 168: ...so tri ngulo de advertencia s mbolo gr fico rojo S MBOLO Fallo letrero de STOP s mbolo gr fico rojo E 9 0608 E 1 2 1 Superficies luminosas del display del conductor S MBOLO Posici n central del despla...

Page 169: ...ambio de la indicaci n al modo de servicio tecla Shift Selecci n de los modos de marcha y elevaci n 0608 E E 10 1 2 2 Teclas del display del conductor Se reduce la velocidad de marcha tecla de marcha...

Page 170: ...os de marcha INFO 31 S mbolo Aviso zumbador El pedal del acelerador no est en la posici n de reposo E 11 0608 E 1 2 3 Avisos de advertencia del display del conductor Indicaci n Otra acci n Significado...

Page 171: ...uctor ya que el LCD no es legible a temperaturas demasiado bajas Indicaci n Otra acci n Significado 0608 E E 12 INFO 32 S mbolo Aviso Sin referencia del recorrido de empuje INFO 33 S mbolo Aviso zumba...

Page 172: ...t cnico 29 SHIFT SENSOR Ruptura cable potenc empuje Desconectar conectar llamar al servicio t cnico E 13 0608 E 1 2 4 Avisos de fallo en el display del conductor Fallo Texto del fallo Explicaci n Solu...

Page 173: ...averiada Desconectar conectar llamar al servicio t cnico Fallo Texto del fallo Explicaci n Soluci n 0608 E E 14 30 TILT SENSOR Ruptura cable potenc inclinaci n Desconectar conectar llamar al servicio...

Page 174: ...descenso Desconectar conectar llamar al servicio t cnico Fallo Texto del fallo Explicaci n Soluci n E 15 0608 E 50 SENSOR HORIZON Piloto m ltiple rotura de cable inclinador de horquillas en horizontal...

Page 175: ...activado Desconectar conectar llamar al servicio t cnico Fallo Texto del fallo Explicaci n Soluci n 0608 E E 16 70 SELFTEST Un com po nente no ha respondido al autotest o lo ha hecho incorrectamente D...

Page 176: ...correcto Desconectar conectar llamar al servicio t cnico Fallo Texto del fallo Explicaci n Soluci n E 17 0608 E 91 ELECTR SYSTEM Tensi n fuera del margen de tolerancia Desconectar conectar llamar al s...

Page 177: ...de la preselecci n alturas Introducir un valor correcto Fallo Texto del fallo Explicaci n Soluci n 0608 E E 18 109 BREAK PEDAL Pedal del freno averiado Desconectar conectar llamar al servicio t cnico...

Page 178: ...nci n 67 Men s OK 0 CE 8 TUV 7 PQRS 9 WXYZ 5 JKL 4 GHI 6 MNO 2 ABC 1 3 DEF 0009 h 08 45 66 63 67 67 E 19 0608 E 1 3 Ordenador de a bordo o El ordenador de a bordo representa la interfaz del usuario pa...

Page 179: ...TER A Lista para la marcha advertencia de estado cr tico Se desconecta la funci n de elevaci n STOP 0608 E E 20 1 3 1 S mbolos de display del ordenador de a bordo ESCAPE Salta a un nivel mayor PERFIL...

Page 180: ...po actual variable introducci n PIN Equipo de v deo Horquilla en posic on horizontal 08 45 0009 h P E 21 0608 E S mbolos en la pantalla Equipo de V deo o La c mara est sujeta a la parte interior de la...

Page 181: ...imera puesta en servicio modifique el c digo maestro y el c digo de usuario 1 2 3 4 5 6 7 8 9 0 Set 0608 E E 22 1 3 2 Teclado de mando CANCODE o El teclado de mando se compone de 10 teclas num ricas u...

Page 182: ...i n de los programas de marcha desconexi n autom tica etc 1 2 3 4 5 6 7 8 9 0 Set 58 56 57 61 60 59 E 23 0608 E Puesta en servicio El diodo luminoso o LED 57 emite una luz roja tras conectar el interr...

Page 183: ...ros basta con repetir este proceso Para finalizar la introducci n de par metros pulse la tecla o 61 0608 E E 24 1 3 5 Ajustes de los par metros Para modificar la configuraci n del veh culo se tiene qu...

Page 184: ...troducir un c digo Confirmarlo Set El LED 60 parpadea Repetir el c digo introducido Confirmarlo Set E 25 0608 E Es posible introducir los siguientes par metros Lista de par metros del acceso codificad...

Page 185: ...0 31 00 00 sin desconexi n 01 a 30 tiempo de desconexi n en minutos 31 desconexi n tras 10 segundos 0608 E E 26 Los LED 58 60 se encuentran en los sectores 1 3 del teclado N Funci n Rango de valores d...

Page 186: ...en el modo de servicio s lo podr n ser realizadas por el servicio t cnico autorizado del fabricante E 27 0608 E Avisos de fallo del teclado de mando Los siguientes fallos se indican a trav s del parpa...

Page 187: ...a antes de iniciar la marcha Est prohibido que suban a la plataforma del conductor varias personas 0608 E E 28 2 Puesta en servicio del veh culo Qw W Antes de poder poner en servicio el veh culo mane...

Page 188: ...arranque 14016 y confirmarlo con OK 1 4 13 1 2 3 4 5 6 7 8 9 0 Set 1a 4a 13 BITTE PINCODE EINGEBEN E 29 0608 E 2 1 Establecimiento de la disponibilidad para el servicio Tire hacia fuera del interrupt...

Page 189: ...dor de pedal de hombre muerto NOTA De ese modo se comprueba el funcionamiento del pulsador de pedal 0608 E E 30 NOTA Si se trata de un veh culo dotado de un m dulo de acceso ISM consulte el manual de...

Page 190: ...riantes de manejo vienen indicadas en los siguientes adhesivos Est ndar t Opci n 1 o 1 Opci n 2 o 2 E 31 0608 E 3 Marcha direccionamiento frenado elevaci n Parada de emergencia Empuje hacia abajo el i...

Page 191: ...l sentido de la carga V para maniobrar y para recoger o depositar la carga 13 19 V 17 18 R V 26 V R 0608 E E 32 Qw W Conduzca el veh culo nicamente estando las cubiertas cerradas y debidamente bloquea...

Page 192: ...cidad de marcha se ajusta mediante el selector de funciones 19 piloto m ltiple 5 19 V R R 5 V R 5 V E 33 0608 E Establezca la disponibilidad para el servicio Accione el pulsador de hombre muerto 18 y...

Page 193: ...comportamientos de frenado y marcha Al volver a poner en servicio el veh culo compruebe su reacci n 0608 E E 34 3 2 Direccionamiento Direcci n contrarrotativa o En caso de marcha en el sentido de la h...

Page 194: ...con el interruptor de PARADA DE EMERGENCIA Pulse el interruptor de PARADA DE EMERGENCIA 13 17 19 13 E 35 0608 E Frenado con el freno por inversi n Durante la marcha accione el selector de funciones 19...

Page 195: ...aga avanzar los dientes de la horquilla lo m ximo posible por debajo de la unidad de carga 21 20 22 0608 E E 36 3 4 Ajuste de los dientes de la horquilla Qw W Para recoger la carga de modo seguro los...

Page 196: ...sitar la unidad de carga con brusquedad para no da ar la mercanc a ni el estante 5 H S 19 H S S H 5 E 37 0608 E 3 6 Elevaci n y descenso Qw W Est prohibida la presencia de personas bajo la carga en su...

Page 197: ...piloto m ltiple 5 o del selector de funciones 19 regula la velocidad de empuje 5 U T 24 T U 19 T U 0608 E E 38 3 7 Avance t incline el piloto m ltiple 5 para que el portador de horquilla avance hacia...

Page 198: ...Incline el piloto m ltiple 5 en el sentido R para efectuar la inclinaci n hacia atr s 24 V R R V 5 E 39 0608 E NOTA El manejo de la funci n de inclinaci n de la horquilla es id ntico para la variante...

Page 199: ...n cuenta la reducci n de la capacidad de carga en caso de empuje hacia fuera 24 25 X1 Y1 X2 X1 5 25 0608 E E 40 NOTA El manejo de un equipo accesorio o del desplazador lateral es id ntico para la vari...

Page 200: ...0 y retire la llave o si se dispone de acceso codificado pulse la tecla o V R 25 24 H S U T 26 4 13 E 41 0608 E 3 10 Recogida elevaci n y transporte de las unidades de carga Ponga los dientes de la ho...

Page 201: ...iclaje a modo de versi n resumida del curso principal y evaluaci n peri dica del operario en acci n 0608 E E 42 4 Aspectos generales importantes que influyen en el uso y manejo seguros de la carretill...

Page 202: ...lla se maneje en conjunci n con otras carretillas accionadas y veh culos y en presencia de peatones E 43 0608 E La tarea principal del operario consiste en garantizar el manejo seguro de la carretilla...

Page 203: ...las asociaciones de entidades explotadoras de carretillas y a los asesores en materia de seguridad 0608 E E 44 uso y capacidad de carga de los montacargas otras condiciones de servicio especiales y p...

Page 204: ...e una carretilla por una pendiente o con una carga que quede con mucho fuera del centro de gravedad E 45 0608 E 4 2 Da os y reparaciones en la carretilla Da os y defectos si detecta da os o defectos e...

Page 205: ...l sistema de freno de emergencia detenga el veh culo antes de que ste colisione contra el obst culo 0608 E E 46 As mismo algunos usuarios han establecido determinados requisitos de estabilidad para lo...

Page 206: ...Las recomendaciones referidas a las rampas de carga tambi n son v lidas para los pasillos de carga E 47 0608 E En caso de que se modifiquen las condiciones del entorno se deben extremar las precaucio...

Page 207: ...da os debido a la intensidad de las fuerzas Todo el proceso de apertura de la puerta debe resultar 0608 E E 48 Todos los modelos de rampas de carga deber n disponer de una superficie antideslizante q...

Page 208: ...se establecen por medio de un acuerdo entre la entidad explotadora y el fabricante de la carretilla E 49 0608 E visible para el operario La carretilla debe estar siempre colocada de tal forma que la p...

Page 209: ...gro Entre estas instalaciones se incluyen las que deban interactuar con el sistema de la carretilla 0608 E E 50 4 5 Dispositivos de seguridad y letreros de advertencia Dispositivos de seguridad y letr...

Page 210: ...a las manos y los pies alejados de todos los elementos de manejo que no se necesiten en ese momento E 51 0608 E 4 6 Elevaci n de personas Elevaci n de personas est prohibido transportar personas o ele...

Page 211: ...l nivel del suelo No intente nunca escalar para subirse a la plataforma elevada ni para abandonarla 0608 E E 52 mueva la carretilla o la plataforma despacio y realice movimientos horizontales suaves n...

Page 212: ...ayuda de la direcci n mec nica de repuesto servicio de direcci n de emergencia v ase el apartado 5 E 53 0608 E 4 7 Dispositivo de parada de emergencia NOTA El veh culo est dotado de un dispositivo de...

Page 213: ...cia Qw W No efect e la puesta en servicio del veh culo hasta despu s de haber subsanado el fallo 23 0608 E E 54 4 8 Bajada de emergencia Qw W Cuando se recurra a la bajada de emergencia est prohibida...

Page 214: ...adenas interruptores de limitaci n frenos elemento s de fijaci n al suelo o de las ruedas direcci n E 55 0608 E 5 Funcionamiento del veh culo 5 1 Normas de seguridad para el operario de la carretilla...

Page 215: ...en una carretilla accionada mientras el fabricante no haya incluido un asiento seguro a tal efecto 0608 E E 56 Si resulta necesario reparar la carretilla sta se encuentra en un estado que provoca ins...

Page 216: ...se la visibilidad por la parte delantera debe conducir de tal forma que la carga apunte hacia atr s E 57 0608 E No permita que le acompa en en la marcha personas subidas al portador de horquilla o a l...

Page 217: ...idades muy reducidas el mecanismo de la direcci n debe girarse a una velocidad constante y mesurada 0608 E E 58 Reduzca la velocidad y descienda por los trayectos en pendiente descendente con precauci...

Page 218: ...e la misma y de los equipos accesorios y trabaje dentro del margen de capacidades de carga indicado E 59 0608 E 5 3 Comprobando si el equipamiento de la carretilla es el correcto Todas las carretillas...

Page 219: ...retilla ya que una vez que sta haya cubierto un determinado recorrido los achatamientos desaparecen 0608 E E 60 Extreme especialmente las precauciones cuando fije manipule coloque y transporte las car...

Page 220: ...una posici n final segura dichas personas deber n abandonar el montacargas antes que la carretilla E 61 0608 E La entidad explotadora debe adoptar otras medidas de seguridad y o unas medidas adiciona...

Page 221: ...ERGENCIA Est prohibido bloquear el acceso a las salidas de incendios las escaleras o los extintores 0608 E E 62 5 5 Vigilancia y seguridad de la carretilla Se considerar que una carretilla accionada e...

Page 222: ...ajarse hasta el nivel del suelo No intente escalar para subirse a la plataforma ni para abandonarla E 63 0608 E 5 6 Elevaci n de personas En el caso de que una carretilla no disponga de elementos de m...

Page 223: ...inserto de llave de tubo SW 8 mm 1 2 2 1 95 608 130 manivela 3 1 27 636 010 articulaci n cardan 27 0608 E E 64 5 7 Direcci n mec nica de repuesto servicio de direcci n de emergencia La direcci n mec...

Page 224: ...no Pos Denominaci n 16 o Pulsador Horquillas en horizontal o Indicaci n Horquillas en horizontal 16 E 65 0608 E 5 8 Pulsador de horquillas en horizontal Accionando el pulsador 16 Horquillas en horizon...

Page 225: ...0608 E E 66 0608 E E 66...

Page 226: ...lo se deber n tener en cuenta las indicaciones del fabricante respecto a la eliminaci n de desechos F 1 0107 E F Mantenimiento recarga y recambio de la bater a 1 Normas de seguridad relativas a la man...

Page 227: ...estable Capacidad Peso Bater a de 48 V 500 Ah 1984 lb 900 kg Bater a de 48 V 750 Ah 2646 lb 1200 kg 0107 E F 2 Qw W Las bater as contienen un cido t xico y corrosivo Por ese motivo se debe usar ropa p...

Page 228: ...orcionadas por los fabricantes de la bater a y de la estaci n de carga son de obligado cumplimiento F 3 0107 E 3 Carga de la bater a Ponga la bater a al descubierto Qw W Durante el proceso de carga y...

Page 229: ...ben estar bien cerradas Qw W La bater a deber ser extra da por completo siempre y nicamente 1 4 3 2 0107 E F 4 4 Desmontaje y montaje de la bater a Ponga la bater a al descubierto Qw W Para evitar que...

Page 230: ...superior de la placa A continuaci n cierre el tap n de cierre En caso necesario recargue la bater a F 5 0107 E 5 Comprobaci n del estado de la bater a el nivel de cido y la densidad del cido Son de ap...

Page 231: ...os NOTA La indicaci n cambia entre la hora y el tiempo de funcionamiento restante 49 50 62 56 48 61 0107 E F 6 6 Indicador de descarga de la bater a dispositivo de control de descarga de la bater a co...

Page 232: ...de elevaci n Horas de servicio Altura de elevaci n m x Altura de elevaci n Altura de elevaci n m x F 7 0107 E Contador de horas de servicio pulsando brevemente la tecla Shift 56 se cambia a unos camp...

Page 233: ...a formato R 00 00 OK 0 CE 8 TUV 7 PQRS 9 WXYZ 5 JKL 4 GHI 6 MNO 2 ABC 1 3 DEF 0009 h 08 45 11 12 13 0107 E F 8 6 2 Ordenador de a bordo o Indicador de descarga de bater a el estado de carga de la bate...

Page 234: ...a llena o semidescargada NOTA La indicaci n se apaga cuando ha terminado la recuperaci n de energ a F 9 0107 E Contador de horas de servicio las horas de servicio aparecen indicadas junto a la hora aj...

Page 235: ...0107 E F 10 0107 E F 10...

Page 236: ...elevado si la horquilla est bloqueada y bien sujeta mediante una cadena lo suficientemente estable G 1 0708 E G Mantenimiento de la carretilla 1 Seguridad durante el servicio y protecci n del medio a...

Page 237: ...nes Mediante la aplicaci n externa de la grasa lubricante no se consigue una lubricaci n suficiente 0708 E G 2 NOTA Sobre los puntos de elevaci n consulte el cap tulo D Limpieza no est permitido limpi...

Page 238: ...seguridad los sistemas de elevaci n los topes de los ejes de rotaci n y los componentes del chasis G 3 0708 E Mangueras hidr ulicas despu s de un periodo de utilizaci n de seis a os las mangueras deb...

Page 239: ...protecci n y seguridad los mecanismos de elevaci n y descenso y las barras transversales del chasis 0708 E G 4 Las carretillas o los mecanismos especiales que hayan sido dise ados y autorizados para e...

Page 240: ...er a poner en servicio hasta que se haya reparado debidamente despu s de haberse detectado un fallo G 5 0708 E Comprobaci n y reparaci n de las horquillas empleadas en las carretillas las horquillas e...

Page 241: ...rueba por horquilla debe corresponderse con la capacidad nominal de carga se alada en la carretilla 0708 E G 6 6 Desgaste Hoja de la horquilla y parte posterior de la misma la hoja de la horquilla y l...

Page 242: ...debe comprobar las tuercas de las ruedas o los pernos de las ruedas y en caso necesario apretarlos G 7 0708 E 3 Mantenimiento e inspecci n Un servicio de mantenimiento a fondo y especializado es una...

Page 243: ...e desgaste t 7 7 Compruebe si los componentes electr nicos se encuentran bien asentados y limpios t 0708 E G 8 4 Lista de comprobaci n para el mantenimiento del modelo Intervalos de mantenimiento Est...

Page 244: ...2 Una vez concluido el mantenimiento efect e ante el encargado una demostraci n con el veh culo k t G 9 0708 E Intervalos de mantenimiento Est ndar t W A B C Almac n frigor fico k Motores el ctricos 8...

Page 245: ...aceite hidr ulico a Tap n de desag e del aceite de la transmisi n Empleo en almacenes frigor ficos 0708 E G 10 5 Esquema de lubricaci n A G E F E F B B C 1 3 9 l 195 10 Nm 2 1 Proporci n de la mezcla...

Page 246: ...batanado a 25 C Categor a NLG1 Temperatura de uso C E Litio 185 265 295 2 35 120 F 310 340 1 52 100 G 11 0708 E 5 1 Materiales de servicio Manejo de los materiales de servicio Los materiales de servic...

Page 247: ...es a alta presi n por chorro de vapor agentes limpiadores en fr o ni agentes limpiadores qu micos 1 0708 E G 12 6 Descripci n de los trabajos de mantenimiento y reparaci n Qw W S lo se podr n efectuar...

Page 248: ...la tubuladura de relleno 2 sobre las caracter sticas del aceite hidr ulico v ase el apartado 5 2 3 G 13 0708 E 6 3 Inspecci n de las cadenas de elevaci n Desgaste inadmisible y da os externos De conf...

Page 249: ...e seguridad en la espiga de gu a y presi nela por la parte superior Bloquee el tornillo hexagonal 4 0708 E G 14 6 5 C mo abrir la tapa del tablero de instrumentos Abra la puerta del compartimento del...

Page 250: ...0 A 24 3F13 Circuito de control de 48 V 30 A 5 6 7 8 9 10 11 12 13 14 15 16 17 18 19 20 21 22 24 23 G 15 0708 E 6 7 Comprobaci n de los fusibles el ctricos Qw W Los fusibles el ctricos s lo pueden ser...

Page 251: ...c e todos los contactos el ctricos que queden al descubierto con un aerosol para contactos adecuado 0708 E G 16 6 8 Nueva puesta en servicio del veh culo tras los trabajos de limpieza o de mantenimien...

Page 252: ...s veces Qw W Inmediatamente despu s de la puesta en servicio lleve a cabo varias pruebas de frenado G 17 0708 E 7 2 Medidas necesarias durante la paralizaci n Cada 2 meses Cargue la bater a v ase el a...

Page 253: ...aretilla una placa En dicha placa se indican el mes y el a o en que se tiene que repetir el control 0708 E G 18 8 Controles de seguridad a efectuar en intervalos regulares y tras acontecimien tos extr...

Page 254: ...posici n 0 Ponga el cerrojo de interruptor en la posici n I Fusible averiado Compruebe los fusibles G 19 0708 E 9 Puesta definitiva fuera de servicio retirada del equipo NOTA La puesta definitiva fuer...

Page 255: ...0708 E G 20 0708 E G 20...

Page 256: ...ntersecci n entre el equipo b sico el m stil de elevaci n y el veh culo podr ser puesto en servicio H 1 0606 E H Transporte y primera puesta en servicio 1 Transporte En funci n de la altura total del...

Page 257: ...partado Desmontaje y montaje de la bater a en el cap tulo F acerca del desmontaje de la bater a 1 2 0606 E H 2 2 Carga mediante gr a 2 1 Puntos de gr a IMPORTANTE Utilice nicamente dispositivos de ele...

Page 258: ...los ojetes situados en el travesa o superior del m stil y el tejadillo protector del conductor 3 4 H 3 0606 E 3 Protecci n del veh culo durante el transporte Qw W Durante el transporte sobre un cami...

Page 259: ...or de PARADA DE EMERGENCIA y el cerrojo de interruptor El veh culo est ahora listo para el servicio 0606 E H 4 4 Dispositivo de seguridad para el transporte del freno de estacionamiento Qw W Cuando se...

Page 260: ...tiles de elevaci n y los veh culos base que cuenten respectivamente con los mismos n meros de serie H 5 0606 E Desplazamiento del veh culo sin bater a Retire el enchufe de la bater a Separe el enchufe...

Page 261: ...de la primera puesta en servicio es posible que el freno emita unos ruidos ligeros de deslizamiento 0606 E H 6 6 Puesta en servicio IMPORTANTE Conduzca el veh culo nicamente con la corriente de la bat...

Reviews: